►
From YouTube: Ribbon Bookmark Craft with Charminster Library
Description
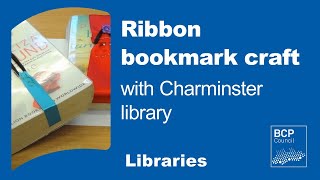
In this video Gina from Charminster library shows us a fun ribbon bookmark craft.
A
Today's
craft
is
making
a
ribbon
bookmark
and
it's
a
really
simple
craft.
It's
a
lovely
one
that
you
can
personalize
in
lots
of
different
ways,
and
it
just
involves
say
three:
three
items:
the
button,
the
ribbon
and
a
hair
band,
and
then
so
you
just
wrap
it
around
the
pages
and
it'll
expand,
as
obviously
you
go
through
further
into
the
book,
and
so
that's
one
that
was
made
by
member
staff,
which
we've
used
this
project
with
our
teenage
craft
group
and
that's
a
little
added
the
other
day.
A
So
we've
just
got
initials
on
these
ones,
and
I'm
going
to
show
you
how
simple
it
is
to
to
make
one.
So
all
you'll
need
is
ribbon.
I'd
recommend
sort
of
two
to
four
centimeter
width
ribbon.
Ideally
two-sided,
satin
is
probably
best.
This
actually
is
one
side.
It
was
left
over
from
a
project,
but
it's
actually
quite
quite
thin
feeling.
So
if
you've
got
decent
quality
ribbon,
I
love
ribbon.
A
So
I've
always
got
it
in
lots
of
different
colors
that's
best,
and
today
I'm
actually
going
to
show
you
on
a
really
wide
piece
of
ribbon,
because
you
can
use
wide
ribbon
as
well.
If
you
really
want
to
there's
no
no
problem
with
that,
just
because
I
thought
it
would
show
up
a
bit
better
on
here
and
then
hair
bands,
just
the
cheap
hair
bands,
you
can
get
really
cheap.
A
A
This
one's
got
a
nice
little
flower
shape,
but
any
buttons
that
you've
got
that
you
think
might
be
useful,
she's
just
going
to
loop
that
around
and
then
some
thread
so
say
sewing
thread
or
if
you
want
to
you
can
use
embroidery
thread.
Whichever
is
easiest
so
that-
and
it's
really
that
simple.
So
what
you
need
to
do
to
begin
with
is
measure
an
average
hardback
book,
and
then
you
need
to
take
off
about
2.5
centimeters
and
cut
the
ribbon
that
length.
A
You
have
the
thread
in
the
same
color
as
your
ribbon,
ideally
when
you're
folding
over,
but
you
fold
over
you
fold
over
twice
just
to
make
sure
the
ends
are
really
neat
inside
and
then
just
just
sew
along
doesn't
matter
what
stitch
you
use
just
to
make
the
the
end
of
it
neater.
Then
this
is
the
end
that
we're
going
to
sew
the
button
on.
So
don't
have
it
right
towards
the
end.
You
want
to
have
it
a
little
bit
further
in
so
that
it's
got
bit.
A
Looks
it's
going
to
have
to
take
the
pressure
of
being
pulled
so
make
sure
it's
not
exactly
on
the
end,
and
this
is
where
you
need
to
make
sure
that
you
do
actually
sew
this
quite
quite
securely,
so
make
sure
that
is
really
nice
and
tight
all
right.
So
you've
got
the
button
sewed
on
there,
nice
and
securely.
So
then
we
work
at
the
other
end
now,
so
it's
very
messy
here
and
what
we're
going
to
do
is
make
sure
that
the
hair
band
is
actually
captured
underneath
it
okay.
A
So
you
just
fold
that
over
I
usually
fold
over
twice
because
it
just
makes
it
a
little
bit
neater
firmer
to
hold
so
just
capture
that
inside
there
and
then
again,
you're
just
going
to
sew
that
one
all
the
way
through
again
make
sure
it's
nice
and
secure.
Because
again,
this
is
going
to
take
some
of
the
pulls
it's
going
to
get
stretched.
A
So
this
is
a
stretch
bit
here,
and
so
you
just
take
take
your
book
and
you'd
thread
this
through,
obviously,
whatever
page
you've
got
to
with
reading,
and-
and
so
this
is
probably
designable
for
hardback
book,
but
you
get
the
idea
that
it
would
just
stretch
there
and
you've
got
lots
of
room
there
as
well,
as
you
worked
your
way
through
the
book
for
it
to
expand
so
pull
there.
So
this
is
also
an
ideal
space
either
one
end
or
the
other
to
actually
personalize
it.
A
If
you
want
to
so,
for
instance,
on
julie's
one
here,
she's
actually
just
done
like
very
simple
chain
stitch
with
her
initials,
so
you
can
always
draw
that
on
first
and
do
that
these
are
make
ideal
gifts.
Obviously
mother's
day
is
coming
up
in
march.
That
might
be
something
you
might
like
to
make
your
mum
and
personalise
with
her
initials
or
it
could
be
a
flower.
Maybe
she
loves
it
being
in
the
garden.
You
could
actually
very
simply
just
draw
a
flower
and
then
chain
stitch
around
that
one.
A
You
might
have
some
stickers
or
something
you
could
stick
on
there
if
you
want
to
make
sure
they're
stuck
well
and
truly,
but
you
could
do
that
the
other
option
to
personalize,
of
course,
the
buttons.
So
again,
if
I
was
making
one
of
these
for
my
dad,
he
was
very
proud
of
his
naval
career.
So
I
would
have
chosen
maybe
something
with
an
anchor
or
one
of
his
naval
buttons
that
he
had
left
over
from
service
and
I
would
probably
have
used
one
of
those.
A
So
you
can
personalize
it
with
colours
the
buttons
or
say
adding
some
embroidery
on,
depending
on
your
skill
level
and
suited
for
the
person
that
you
hope
to
gift
it
to,
and
it's
a
lovely
little
gift
there
and
really
shows
that
you've
been
thinking
of
them
and
ideal
for
someone
who
loves
their
books.
So
a
ribbon
bookmark.