►
Description
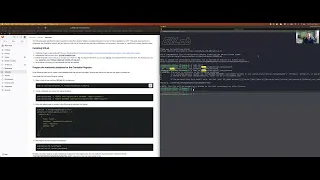
This is an experimental feature, it is not ready to be used in production environments. Follow this guide at your own risk, including
potential data loss from the container registry
The following guide specifies the steps required to enable the Container Registry metadata database for a new
Omnibus installation on GCP. This guide assumes this is a completely new installation without data and there is a high
risk of losing data and working configurations in the process.
Stay tuned for a guide that includes migration steps.
Epic: https://gitlab.com/groups/gitlab-org/-/epics/5521
Issue: https://gitlab.com/gitlab-org/container-registry/-/issues/1065
Snippet: https://gitlab.com/-/snippets/2572204
A
So,
as
you
may
be
aware
of,
we
recently
released
this
metadata
database
on
gitlab.com
that
allows
you
to
run
online
algorithms
collection,
so
we've
been
working
more
recently
on
releasing
this
for
self-managed
installations
and
yeah.
This
is
epic
that
you
can
follow
along
and
more
specifically,
today
I'm
going
to
be
talking
about
this
POC
that
I've
been
working
on
and
trying
to
enable
the
database
for
a
new
installation,
basically
and
today,
I'm,
going
to
focus
on
the
Omniverse
side
of
things.
A
So
I
have
created
a
snippet
that
I'll
link
to
this
issue
at
the
bottom,
and
here
I'll
set
up
all
most
of
the
steps
that
I
had
to
follow
and
I'm
gonna
be
following
now,
and
so
hopefully,
they'll
work
on
the
first
try
so
cool,
let's
get
started
so
first,
some
personal.
This
is
an
experimental
feature.
This
is
in
the
new
installation.
So
please,
if
you
follow
this,
it's
at
your
own
risk.
We
recommend
this
on
new
installations
because
there's
possible
data
loss.
This
is
not
test.
A
No,
it's
not
completely
tested
for
self-managed
installations.
It's
not
managed
yet
so
yeah
just
be
careful.
With
with
this
cool,
so
before
getting
started,
you
can
either
have
a
domain
name
or
an
IP
address
for
this
I
forgot
to
mention
I'm
gonna,
be
following
the
gcp
installation
method,
so
yeah
I'm,
basically
just
following
this
guide
that
we
have
here
on
Google
Cloud,
I'm
gonna
skip
a
few
steps
here.
A
For
example,
I
already
created
a
VM
in
in
Google
Cloud,
so
I'm
gonna
go
into
step
two
or
basically
this
pile
installing
gitlab
I'm,
already
connected
to
my
instance,
so
I'm
already
here
and
let's
go
into
the
this
next
step
is
following
this
guide.
I
already
ran
this
update
and
this
installing
some
of
the
dependencies.
So
we
should
be
good
to
go
here
so
now,
I'm
up
to
this
step,
where
we
want
to
add
the
gitlab
package.
So
let's
do
that.
A
Cool
in
here
now
we're
gonna,
install
gitlab
right
and
we're
gonna
be
running
this
one
line
command
before
we
do
that.
I
recommend
either
getting
a
domain
name
like
specified
here
or
getting
the
IP
address
of
the
instance
where
you're
running
for
me,
I'm
just
going
to
be
using
the
IP
address
for
now.
That's
because
it's
easy
to
test
I'm
gonna
copy,
this
IP
and
then
I'm
gonna
run
a
command
this
one
and
then
I'm,
Gonna
Change.
A
Let's
do
that,
it's
not
the
one.
Let's
put
the
IP
address
now
a
little
bit
I
I've
added
to
this
to
this
snippet.
Here
it's
you
can
use
the
nip
IO
service.
It's
basically
a
simple
DNS
service
that
whatever
IP
address
you
set
here,
is
going
to
resolve
to
that
IP
address
so
I'm
gonna
do
this
gitlab
Dot
IP
address
and
then
dot
name,
IO
and
I'm
gonna
just
use
the
the
package
manager
to
install
gitlab
in
here.
A
One
thing
I
need
to
mention
here
is
I'm
using
https
here
this
will
generate
some
self-signed
certificates
or
if
we
have
a
let's
encrypt
available,
it
should
generate
this.
The
certificates
for
us
as
well.
So
that's
pretty
good,
because
when
we
do
this,
some
dependencies
or
some
services
like
the
registry
will
be
enabled
by
default.
So
yeah,
it's
just
a
little
bit
easier.
This
way,
I
may
pause
the
recording
here
and
wait
for
this
to
come
back
all
right.
A
A
All
right,
so
we
are
now
in
inside
the
gitlab
instance.
Let's,
let's
just
do
this
real
quick,
they
say
well,
I'll,
sign
ups,
just
because
it
makes
it
easier
following
the
practice
cool.
So
now
that
we
have
this,
we
can
probably
skip
this
hit
this
one
simple,
git
live
instance
that
is
running
and
we
are
gonna,
create
I'm
gonna,
get
ahead
of
myself.
I'm
gonna
create
a
sample
test
test
project.
A
So,
let's,
let's
call
it
registry,
let's
just
says
private,
create
a
project
and
we're
gonna
see
the
container
registry
is
enabled
so
cool
before
we
start
pulling
and
pushing
things
from
the
registry
Let's.
Do?
Let's
not
do
that.
Yet,
let's
follow
this
part
here
cool,
so
we're
we're
gonna.
Do
this
preparing
steps
so,
first
of
before
we
start
with,
let's
just
make
sure
we
have
a
backup
of
the
GitHub
registry.
A
Sorry
gitlab
configuration,
although,
to
be
honest,
the
rest
of
the
configuration
only
has
the
external
URL,
because
it's
a
default
one
but
anyways.
We
should
still
air
on
the
side
of
caution
here.
Okay,
this
didn't
work
yeah,
we
got
a
copy
of
the
file
cool.
So
what
are
we
gonna?
Do
we're
gonna,
first,
create
a
database
user
and
then
create
a
new
logical
database
inside
the
postgres
instance
that
okay,
Labs
gitlab
comes
with.
A
So
here
Omnibus
provides
this
gitlab
psql
tool
that
allows
you
to
connect
to
the
database
as
the
root
or
as
the
owner
of
the
of
the
installation.
So
this
allows
you
to
create
users
and
databases.
So
if
I
run
this,
this
created
a
user
with
a
password
and
as
you
can
see,
it's
created
row
and
then
I'm
gonna,
say:
Okay
registry
create
database.
A
A
After
doing
this,
we
need
to
make
sure
that
we
allow
local
connections
using
username
and
password.
This
is
because
the
default
that
the
default
configuration
for
the
for
the
postgres
configuration
that
comes
out
of
omnibus
only
allows
local
connections
via
sockets,
but
we
need
to
allow
it
doesn't
use
password.
It
uses
a
peer
connection,
authentication
it's
a
little
bit
out
of
scope.
A
So
for
now
what
we
want
to
do
is
we
want
to
allow
local
connections
to
a
certain
database
from
a
certain
user
using
md5,
which
means
using
a
password
so
I'm
going
to
copy
this,
and
then
I'm
gonna
put
that
basically
put
that
into
the
gitla
Barbie
I'm
gonna
put
it
at
the
end
of
the
file
cool.
So
we
can
verify
this.
If
we
go
and
say
config.
A
So
we
are
here
and
it's
all
at
the
bottom,
which
is
cool
now
that
we're
here
we
need
to
reconfigure
gitlab,
so
we're
gonna
do
this
and
after
reconfiguring
we
need
to
make
sure
the
path
we
restart
postgres
as
well,
so
that
the
settings
are
applied.
So
they
should
take
just
a
minute,
because
we
only
change
the
postgres
config.
A
Cool
postgres,
it's
running,
so
we
can
verify
the
possibilities
ready
by
failing
the
logs
I.
Don't
know.
Yeah
database
is
ready
to
accept
connections
so
now
we're
just
going
to
verify
that
the
the
entry
is
properly
set
in
the
in
this
file,
the
PG
hva
config.
So
if
I
do
this,
this
should
give
me
the
few
lines
Yep.
This
basically
says
the
type
of
user.
The
type
of
connection
is
local
to
these
database
for
this
user
and
we're
skipping
the
CIA
address
for
this
method,
because
it
doesn't
need
it
and
it's
all
there
awesome.
A
So
we
are
ready
to
Connect
Now.
What
what
do
we
need
to
do?
Next?
We
need
to
configure
the
registry
to
set
the
database
connection
settings
so
first,
we
are
gonna,
have
to
stop
the
registry
and
we're
gonna
say:
okay
to
those
develop
control
status,
you
can
see
everything
is
running
except
the
registry
is
now
down,
which
is
good.
Also,
let's
make
a
backup
of
the
config
just
because,
okay
and
now
we're
gonna
do
something
similar,
we're
gonna,
append
the
com,
the
new
config,
the
database
config
to
the
registry
config.
A
In
this
case,
you
can
see
here.
This
is
documented
in
the
registry
Ripple,
but
for
now
you
can
see
the
settings
we
need
is.
We
are
setting
the
database
enabling
it
reducing
the
host,
which
is
the
unique
socket
address,
we're
using
the
registry
user
which
we
created
above
it
should
be
here
with
the
password
which
is
just
registered,
password
very
safe
and
then
we're
using
the
same
database
and
for
the
sake
of
testing
we're
disabling
SSL
connections.
A
A
A
A
The
registry
still
down
that's
good
so
before
we
start
the
registry,
let's
make
sure
that
the
connection
settings
are
working,
so
the
registry
binary
already
comes
with
the
database
sub
command
that
it
needs
to
talk
to
the
database.
So
in
this
case
we're
gonna
check
if
the
migration,
if
the
schema
migrations
have
been
applied
or
not
and
just
see
what
the
status
is,
so
basically
we
call
this
cool.
A
So,
as
you
can
see
here,
we
have
a
list
of
migrations,
none
of
them
has
been
applied,
which
is
what
we
wanted
and
but
that's
good,
because
it
means
the
registry
can
actually
talk
to
the
configure
database
awesome.
So
now
we
we
are
here
we
are
at
the
step.
Let's
run
the
database
schema
migrations,
so
we're
using
the
same
command,
we're
just
changing
the
Status
to
an
up
which
means
run.
The
migrations
schema
migrations
in
the
up
direction
or
all
of
them
up.
This
allows
us
you
to
run
the
migrations
down.
A
A
A
This
just
takes
a
few
seconds
now
that
it's
up
awesome.
Let's
check
the
database.
Sorry,
the
registry
locks,
let's
just
make
sure
that
this
is
running
I'm,
just
prepping
for
the
metadata.
Let's
add
a
few
lines
before
awesome,
so
yeah
we
see
the
shutdown
and
before
we
stop,
and
then
this
is
a
new
starting
of
the
registry.
A
So,
as
you
can
see,
we
have
a
message,
a
warning
here
saying
the
metadata
database
is
experimental
based
on
user
in
production,
yet
feel
free
to
experiment
with
this
code.
So
the
registry
is
up
up
and
running,
and
it's
using
the
database-
and
this
is
this-
is
great
now
on
this
tab
that
I
have
here.
I
didn't
put
this
on
the
on
the
guide,
but
what
I'm
we're
gonna
do
is
just
connect
to
the
postgres
Council
to
to
check
that
the
schema
is
simply
that
the
database
is
MP
so
registry.
A
I'm
just
using
the
same
command
to
connect
to
this
database
if
I
do
backwards,
backslash
D.
That
should
give
me
all
the
tables
which
were
created
by
the
schema
migrations.
So
if
I
go
and
say
it's
a
leg
or
from
the
positories,
it
should
be
empty.
This
is
good.
This
is
what
we
want
so
now
that
we're
here
we
should
be
able
to
push
an
image
to
the
to
the
ratio.
So
in
order
to
do
so,
let's
go
to
the
gitlab
instance.
A
We're
gonna
create
first,
create
a
test
project
in
the
instance.
I've
already
done
that
this
is
the
instance
that
I'm
working
on-
and
this
IP
address
here
and
I
just
created
a
project
on
the
root
which
is
a
admin
user,
and
it's
called
registry
and
I
have
that
the
next
step
is
actually
creating
an
access
token.
A
So
we
need
to
create
a
personal
access
code,
token
with
the
API
read
registry
and
write
registry
scopes.
So,
let's
do
this:
let's
go
to
preferences
access
tokens,
let's
just
call
it
registry
path
with
API,
read
and
write
repository,
feel
free
to
you
know,
remove
expiration
dates
that
you
need
to
once
that
we
have
here
so
I
have
a
token
I'm
gonna
go
into
a
new
tab
and
I'm
gonna
just
export
this
token.
A
Yeah
awesome
I
have
a
token
now
that
we
have
a
token,
let's
create
a
container
repository
in
the
instance,
sorry
not
create
a
this
is
rewarding.
Let's
go
to
the
let's
go
to
the
project
that
we
just
created,
which
is
verifying
that
the
registry
is
there
I
sort
of
did
that
before
container
registry
here,
on
the
left
hand,
side
deploy
container
registry.
These
are
the
details
for
my
instance,
which
is
it's
all
good.
A
A
A
Hopefully
this
will
come
back
with
a
login
succeeded,
that's
good!
If
we
go
back
to
the
logs,
we
should
be
seeing
here
some
some
logs
authorized
requests,
which
means
beware
login
successfully,
so
it's
all
looking
promising.
So
far
now
we're
gonna
pull.
We
need
to
get
a
Docker
image.
We
can
build
one.
We
can
pull
and
tag
for
now.
I'm,
just
gonna
pull
an
Alpine
image
from
Docker
Docker
hall.
Probably
the
easiest
thing
to
test.
A
A
Pocket
tag
latest
registry,
if
I
don't
sell
if
I
just
set
like
this,
it's
just
gonna
do
the
infamous
red
root
image.
Now,
if
name
it
now,
we
use
the
name
of
the
repository
if
I'm
remember
correctly,
so
if
I
go
I'm,
just
gonna
do
this
latest
and
I'm
gonna
push
should
be
ready
to
push
okay
push
this
great.
A
As
you
can
see,
the
push
was
very
fast
and
if
you
were
telling
the
locks,
you
can
still
see
that
we're
doing
some
pushing
and
it's
all
all
created
201
somewhere
there,
which
means
it'll
work
cool.
So
if
I
refresh
this
page
on
the
left
one
and
the
left
side,
I
should
see
the
image
now
yay.
So
it's
here,
if
I
go
into
it,
I
can
see
that
it's
just
one
tag.
I
can
do
things
like
tag
another
tag
and
then
I'm
gonna
push
another
tag.
A
This
was
very
quick.
This
is
because
the
registry
note
that
the
layer
already
exists.
I
didn't
change
anything
with
the
image,
so
we
basically
just
mount
on
whatever
existed
there.
If
I
refresh
here,
I
can
see
both
tags,
which
is
great
cool.
So
now
that
we
have
this,
if
we
go
into
this
into
the
database,
this
is
all
part
of
the
of
the
scripts
over
here
by
the
way
verifying
the
database.
A
And
yes,
as
you
can
see,
the
path
is
basically
the
name.
The
project
path
and
the
name
of
the
image
is
registry,
and
you
know
if,
if
I
do
some
joints
and
here
and
there
I
should
be
able
to
get
all
the
data
related
all
the
metadata
related
to
this
image,
but
because
this
this
is
empty
right
now,
if
I
do
select
from
text,
I
should
see
both
the
latest
to
the
repository.
Let's
take
a
note
of
this
is
repository
ID
number
one
top
level,
namespace
ID
number
one.
A
So
if
I
go
and
select
alt
text,
this
should
be
two
one
is
latest
and
one
is
another
tag
and,
as
you
can
see
here,
top
level
namespace
ID
is
one
repository.
Id
is
one
so
they're
all
match
the
same.
The
same
ID
and
yeah-
so
that's
pretty
much
it
now
that
we
have
this.
For
you
know,
for
the
sake
of
completeness,
we
should
verify
that
that
we
can
pull.
So,
let's
see
is
one
of
the
tags
that
we
just
created
locally,
not
from
the
relationship
but
locally.
A
A
A
We
also
have
online
coverage
collection
running
here
somewhere
and
if
you
look
at
the
logs,
we
see
registry
BC
worker,
it's
removing
blobs.
So
all
these
little
features
are
enabled
and
yeah.
This
is
like
I
mentioned
before.
This
is
just
a
proof
of
concept.
It's
working
yeah.
This
is
very
manual.
There
are
still
so
many
risks,
so
yeah
just
be
mindful
of
that,
but
yeah
all
in
all,
this
is
working.