►
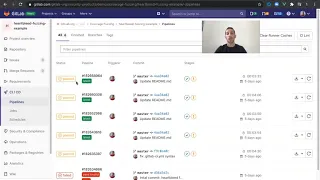
From YouTube: Finding Heartbleed bug with libFuzzer and integrating it to GitLab coverage guided fuzzing feature.
Description
Fuzzing documentation: https://docs.gitlab.com/ee/user/application_security/coverage_fuzzing/#coverage-guided-fuzz-testing-ultimate
Fuzz testing direction page: https://about.gitlab.com/direction/secure/fuzz-testing/fuzz-testing/
A
So,
let's
dive
in
first,
let's
take
a
look
at
the
fast
target
itself.
Actually,
it's
a
fast
test,
but
let's
call
it
fast
target
from
now
on
fuzzer.cc,
so
to
implement
a
leapfaster
target,
you
need
to
implement
a
function
called
llvm,
father,
test1
input,
and
this
function
will
be
called
essentially
indefinitely
by
the
leaf
fuzzer
engine.
It
will
be
called
with
two
parameters:
the
first
one
is
data
and
the
second
is
size.
A
So
in
the
function
itself,
you
need
to
call
the
code
that
you
want
to
test
and
or
the
function
that
you
want
to
test
with
the
data
that
is
passed
to
you
by
the
leave
fuzzer
engine.
So
in
this
case
we
are
calling
essentially
ssl
due
handshake
and
we
also
have
a
bunch
of
a
bit
daunting
setup
code,
but
don't
worry
about
it
because
it's
really
not
the
point
in
this
tutorial.
A
The
point
is
that
for
an
open,
ssl
developer,
it
will
look
pretty
familiar
and
obviously,
if
you're
a
developer
yourself,
you're
writing
unit
tests
for
your
own
code,
and
you
also
should
write
fasttest,
if
applicable,
of
course,
because
you're
as
the
developer
you're
the
most
familiar
with
your
code,
the
structure
of
your
code,
the
architecture
and
you
know
best
what
functions
and
what
components
you
want
to
fast
test
and
what's
really
worth
writing
fastest.
For
so
now,
let's
go
back
and
see
how
we
integrate
this
fast
target
with
our
gitlab
ci.
A
So
the
first
thing
we
want
to
do
here
we
want
to
include
a
built-in
template
in
git
club.
The
template
is
coverage
fuzzing.gitlabci.com
and
one
more
thing.
Everything
that
I'm
saying
now
is
available
in
the
coverage:
guided
fast
testing,
documentation
of
gitlab
under
application
security
and
for
the
leap
further
documentation
it's
available
in
the
lyft
other
official
documentation,
which
is
part
of
llvm
part
of
ceiling.
A
So
after
we
include
the
built-in
template
of
coverage
fuzzing,
we
need
to
create
a
target
for
each
fast
target
that
we
have,
so
we
need
to
create
a
fast
step.
So
in
this
case
we
create
heart
bleed
target
and
we
need
to
extend
this
step
from
fast
base,
which
is
now
available
because
we
included
the
coverage
fuzzing
earlier
and
now
there
are
some
regular
steps
which
we
do
in
ccpp
program,
so
we
install
ceiling
we
install
make,
and
then
we
need
to
compile
the
open,
ssl
library.
A
The
interesting
part
here
is
the
f
sanitize
flag,
where
we
pass
address
and
father
no
link,
so
address
means
that
we
want
to
use
the
adverse
sanitizer
and
the
sanitizer
will
help
us
identify
memory,
corruption
bugs
the
father.
No
link
is
really
just
that
we
want
to
link
it
with
our
first
target
in
the
next
step.
So
here
we
compile
our
handshake
fuzzer
and
we
pass
the
send
sanitizer
address.
But
this
time
we
pass
also
fuzzer,
which
means
now
leapfaster
will
know
that
the
fast
target
code
is
located
in
this
file.
A
Again,
this
part
is
really
documented
in
lip,
fuzzer
documentation
and
the
daunting
flags
of
open
ssl.
Don't
worry
about
it
now
because
obviously
you're
familiar
with
the
build
system
and
the
make
system
of
your
code.
So
the
important
step
here
is
the
last
step
where
we
call
git
webcaf
files
run,
and
then
we
pass
the
binary
the
fuzzer
binary.
A
So
here
you
can
pass
any
additional
leave.
Father
flags
and
the
gitlab
kaffa's
cli
will
just
pass
through
those
flags.
You
can
find
more
information
about
the
git.
Look,
how
fuzzy
environment
variable
in
flags
in
the
gitlab
documentation,
but
what
this
cli
does
is
it
takes
care
of
analyzing
parsing
the
stack
trace,
parsing
the
crashes,
doing
deduplication
of
crashes
by
stack
analysis,
doing
core
boost
management
that
I'll
talk
about
in
a
second,
and
this
is
also
available
because
we
extended
from
fuzz
base.
A
A
And
here
we
can
see
two
stages.
One
stage
is
the
test
stage
where
we
usually
run
our
unit
tests
and
the
other
stage
is
the
file
stage
which
contains
our
heart
bleed
target.
We
may
have
additional
targets.
In
this
example,
we
have
one
fast
target:
the
default.
The
default
configuration
is
to
have
two
stages,
chess
stage
and
the
first
stage,
but
it's
really
up
to
you
and
you
might
want
to
have
the
fast
target
running
as
part
of
your
test
stage.
A
So
now,
let's
go
to
the
heart
bleed
target.
Here
we
can
see
leaf
other
standard
output
and
we
can
see
that
it
detected
the
crash
pretty
quickly
and
if
we
go
here,
we
can
see
that
the
under
sanitizer
detected
a
heap
buffer,
overflow,
read
and
mem
copy
function,
which
was
called
by
a
function.
That
is
called
tls1
process
heartbeat,
and
this
is
one
why
we
also
call
it
heartbeat
because
apparently,
in
addition
to
just
doing
heartbeat
behavior,
it
also
bleeds
some
bytes.
A
Unfortunately,
so
here
we
have
the
stack
trace
and
if
we
go
now
to
the
security
and
compliance
dashboard,
we
will
see
that
this
bug
is
analyzed
and
parsed
and
we
have
the
hip
buffer
overflow
read
bug
here.
Now,
let's
go
to
the
details
screen,
we
can
see
the
crash
address.
We
can
see
that
the
engine
the
underlying
engine
has
live
fuzzer
and
we
can
also
go
to
something
called
cwe,
which
is
common
weakness
enumeration.
A
So,
while
you
develop
your
code,
if
you
find
a
bug,
it's
not
a
vulnerability
yet
because
it
doesn't
have
a
cv,
but
it
is
a
weakness
in
your
code,
and
so
we
link
it
to
the
correct
weakness
to
the
correct
type
of
bug.
So
you
can
read
about
this
type
of
bug.
You
can
see
more
examples
and
it
might
help
you
understand
the
bug
better.