►
Description
SC20 Deep Learning at Scale Tutorial
https://github.com/NERSC/sc20-dl-tutorial/
A
Hi
everyone
and
welcome
to
the
tutorial.
My
name
is
josh
romero,
a
devtech
from
nvidia,
and
I
will
be
copyrighting.
This
talk
with
my
colleague,
thorsten
kurth.
In
this
talk,
we
will
cover
some
techniques
to
optimize
the
performance
of
your
deep
learning
codes
on
nvidia
gpus.
As
the
demo
material
is
in
pytorch.
The
talk
will
use
pytorch
code
examples,
but
the
concepts
and
best
practices
we
will
cover
are
general
across
the
frameworks
to
begin
here
is
a
brief
outline
of
the
talk
to
start.
A
A
Finally,
in
the
last
section
of
the
talk,
I
will
cover
methods
to
improve
compute
utilization,
with
a
focus
on
accelerating
training
using
mixed
precision
and
enabling
tensor
cores
using
a
profiler
is
an
essential
step
in
optimizing.
Any
code
and
deep
learning
is
no
different.
Ensight
systems
is
a
profiling
tool
developed
by
nvidia.
For
this
exact
purpose.
Insight
systems
is
a
tracing
tool
that
can
generate
a
visual
timeline
of
your
code,
giving
you
an
easy
to
digest
high
level
overview
of
your
workload.
A
Loading
the
profile
from
a
simple
pi
torch
training
script
in
the
insight
systems.
Gui
looks
like
the
image
to
the
right.
There
are
a
number
of
rows
here,
split
into
a
section
where
cpu
work
on
the
top
and
gpu
work
on
the
bottom.
In
the
cpu
section,
you'll
see
rows
for
all
active
cpu
threads
and
within
each
you
will
find
entries
for
cuda
api
calls
like
cuda
malik,
free
cuda
device,
synchronize
and
kernel
launches,
as
well
as
operating
system
calls
for
simplicity.
This
profile
image
doesn't
include
operating
system
calls,
but
those
are
enabled
by
default.
A
A
While
the
raw
profile
provides
loads
of
useful
information,
it
can
be
difficult
to
decipher
what
this
information
is
without
adding
additional
context
to
add
additional
context.
We
can
add:
nvtx
ranges
to
annotate
the
timeline
in
pytorch.
There
are
convenient
functions
available
to
push
and
pop
named
ranges
and
also
a
context
manager,
autograd.profiler.emit
nvdx,
which
will
automatically
add
nvtx
ranges
to
annotate
model
layers
and
vtx
ranges
can
be
used
to
annotate
large
general
code
sections
like
steps
and
epics,
but
can
also
be
used
in
a
targeted
fashion
to
identify
sources
of
saws
and
idle
gpu
time.
A
Here
is
an
example
of
a
simple
trending
loop
in
pi
torch
over
some
number
of
epochs,
and
here
is
that
loop
with
nvtx
ranges
added
to
annotate
the
epic
boundaries,
the
training
step
boundaries
and
the
exposed
time
for
the
data
loader
to
return
a
training
sample.
I
say
expose
time
here
to
emphasize
that
typically,
the
data
loader
will
prefetch
data
in
an
ideal
circumstance
by
the
time
next
is
called
on
the
data
loader,
the
sample
is
fully
pre-fetched
and
the
time
it
takes
should
be
negligible.
A
A
Here's
what
the
profile
looks
like
with
nvtx
rangers
added
this
section,
labeled
nvtx
in
the
profile
with
the
gray
boxes,
shows
all
the
annotated
ranges
captured
in
the
profile
with
a
label
to
identify
them
compared
to
the
unannotated
profile.
Adding
nvtx
ranges
provides
a
lot
more
context
and
enables
you
to
better
focus
your
optimization
efforts.
A
B
After
this
short
profiling
introduction
and
obtaining
your
first
profile,
you
might
ask
yourself
what
will
be
the
the
parts
to
focus
on
first
and
in
my
experience
in
many
cases,
this
is
actually
the
data
loading.
So
how
do
you
load
the
data
from
disk
or
from
memory
into
the
gpu
in
the
fastest
and
most
efficient
way?
B
So,
on
the
right
hand,
side,
we
have
an
nvtx,
annotated
profile,
and
you
see
all
this-
this
blue
stuff,
which
are
basically
cuda
kernel,
calls
and
those
are
nice
and
there's
not
much.
You
can
do
about
those.
What
you
can
also
see
here
is
that
between
the
backward
pass
and
the
start
of
the
next
forward
pass,
there
is
a
gap
and
the
nvtx
markers
show
you
some
turquoise
or
green
regions,
and
these
are
actually
memory
copies
host
to
device
memory
copies
and
the
only
reason
for
copying.
B
So
the
good
news
is,
though,
that
most
frameworks
come
with
efficient
tools
for
mitigating
this
problem,
so
basically
helping
you
to
feed
your
data
to
the
gpu
in
a
very
fast
and
efficient
way,
and
most
of
them
allow
you
to
work
with
arbitrary
python
code.
For
example,
you
can
use
your
preferred
file
format
like
h5pi,
netcdf
or
pillow
for
images.
What
have
you,
however?
There
are
still
some
caveats
and
pitfalls.
B
So,
let's,
let's
see
this
example,
this
comes
from
cosmology,
so
we
have
this
huge
volume
from
a
cosmological
simulation
and
we
cannot
feed
it
to
the
network.
We're
planning
to
train
on
it
in
full.
However,
physics
helps
you
here
because
of
translation
and
rotational
invariance
of
space.
You
can
basically
crop
out
a
sub-volume,
rotate
it
and
feed
it
to
the
gpu,
and
that
is
what
we
want
to
do
here,
so
crop
it
out,
feed
it
to
the
gpu,
rotate
it
and
then
feed
it
to
the
neural
network.
B
B
The
most
important
part
of
this
is
the
get
item
function
in
that
you
can
use
any
python
function
to
to
open
the
file
load
data
from
it
process
it,
for
example,
with
numpy.
The
only
important
thing
is
that
you
emit
it
or
return
it
later
as
a
torch
tensor.
So
in
this
case
we
we
return
two
torch
tensors,
because
this
is
from
an
image
segmentation
problem
where
you
have
a
target
and
an
input.
B
So
once
you
have
this
class,
you
create
an
instance
of
it
and
wrap
it
into
a
data
loader
object
and
that
we
see
here
on
the
lower
left
and
this
data
loader
object
gets
some
performance,
relevant
parameters,
so
first
there's
the
batch
size.
This
is
basically
to
tell
the
data
loader
how
many
samples
are
in
a
batch
and
it
will
batch
it
for
you.
B
B
The
work
in
it
function
allows
you
to
specify
a
specific
worker
in
that
function.
For
example,
setting
in
the
seed
per
worker
and
the
pin
memory
option
is
very
important.
So
this
pins
the
host
memory
for
fast
hostile
device
transfers.
I
think
this
you
should
always
enable
if
your
data
data
set
emits
cpu-based
tensors.
B
B
B
B
Mpi
doesn't
really
like
that.
So
mpi
doesn't
like
when
you
fork
processes.
Some
api
implementations
are
more
resilient
to
it,
but
some
others
will
barf
and
maybe
crash
and
and
display
a
long
segment
message
on
your
screen
related
to
the
data
loader
and
you
might
think
what
the
hell
is
going
on.
So,
if
you're
using
mpi
with
your
code,
you
might
need
to
work
around
this
and
there
are
fortunately
some
some
tricks
you
can
play.
So
for
that.
I
have
prepared
this
link.
So
it's
a
long.
It's
it's
a
long
article.
B
B
So
how
does
a
good
implementation
of
this
hf5
data
set
for
multi-multiple
workers
look
like
and
that
we
have
here
it's
a
bit
more
involved,
but
not
much
more
involved.
So,
first
of
all,
we
need
the
length
of
the
of
the
data
set,
so
we
need
to
load
the
file
at
least
once
and
check
out
how
long
it
is,
and
that
is
what
this
is
doing
and
I'm
using
the
context
manager
here
in
this
case
the
good
thing
about
this
context
manager
is
that
it
will
clean
up
after
himself.
B
B
When
you
instantiate
the
class
and
on
the
first
invocation
of
get
item,
I
actually
open
the
file.
I
want
to
read
from
extract
the
data
set
and
set
this
initialize
to
true
so
that
in
the
next
invocation
of
get
item
it
will.
It
will
skip
this
step
and
this
allows
you
to
open
the
file
per
worker
once
per
worker,
and
and
by
that
you
basically
mitigate
the
limitations.
B
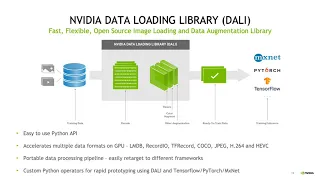
A
B
It
has
an
easy
to
use
python
api
and
can
talk
to
any
framework
in
the
back
end.
Basically
mxnet
pytorch
tensorflow.
What
have
you
and
the
good
thing
is?
It
can
run
on
the
gpu
and
on
the
cpu
or
in
both.
So
you
can
put
part
of
the
pipeline,
the
cpu
part
on
the
gpu
and
will
do
everything
as
concurrent
as
possible
for
you,
and
you
can
also
use
custom
python
operators,
so
you
can
hook
it
up
to
any
like
input
data
format
you
might
want
to
use.
B
For
example,
this
is
a
very
simple
and
short
pipeline
reading
images
from
from
an
image
store
in
jpeg
format,
decoding
them
and
then
rotating
them.
Okay-
and
this
is
usually
the
best
example
for
for
so
this
will
give
you
the
best
performance
in
dali,
since
this
is
a
natively
images,
for
example,
are
natively
supported
by
dali
and
allow
you
to
to
implement
very
efficient
file
readers
for
that.
So
you
do
not
need
to
create
a
python
wrapper
around
some
other
reader
class,
as
I
will
show
you
in
the
next
few
slides.
B
So
what
does
it
do
so
here
in
the
first
line?
It
grabs
the
encoded
images
from
from
the
from
the
file,
so
it
loads
the
file
and
the
labels
in
an
encode
in
an
encoded
way.
Then
it
throws
the
decoder
at
it
and
decodes
the
image
into
a
for
example,
array
type
you
can
use
later
in
pi
torch
and
before
we
emit
it.
B
We
do
a
random
rotation,
for
example,
for
data
augmentation,
and
then
we
emit
it
as
a
dali
tensor
object,
so
that
first
of
all
is
not
very
useful
for
python
or
for
pytorch
or
tensorflow
or
any
other
framework,
but
dali
supports
iterator
wrappers,
which
are
like
tailored
to
each
individual
framework.
So
if
you
then
want
to
use
this
pipeline
and
hook
it
into
your
your
favorite
framework,
for
example
pytorch,
you
can
implement
a
specific
class
and
and
pass
this.
This
pipeline
object
to
that
class
and
it
will
basically
create
a
data.
B
A
B
B
You
have
to
define
some
metadata
info
for
dali
to
use,
because
this
is
not
a
native
dali
object.
It
needs
to
know
how
how
big
your
data
set
is,
for
example,
and
where
to
start
so
that
you
can
do
it
with
this
function.
Here
I
implemented
the
random
crop
function
as
a
class
member,
so
not
in
line
with
the
next
iterator.
B
You
can
do
it
as
you
like,
but
essentially
it
still
uses
numpy
syntax
to
extract
a
random
crop
out
of
this
bigger
array-
and
this
is
the
most
important
part
it's
the
iterator
next,
which
is
very
similar
to
the
get
item
for
the
data
set
loader.
It's
just
that
here.
It's
called
next
and
essentially,
if
you
take
the
old
data
set,
you've
wrote
before
you
can
almost
one-to-one
translate
it
to
this
construct
and
you
will
need
to
create
a
graph.
So
dali
works
with
graphs.
B
B
B
B
But
of
course
there
are
also
pitfalls
here,
namely
about
threat
safety
again
and
zero
copy,
because
this
external
source
of
data
generator
you
implemented
on
your
own
dali
cannot
make
any
assumptions
about
threat,
safety
and
buffer
persistence
right.
It
doesn't
know
if
the
buffers
was
still
around
long
enough,
so
that
dali
can
just
do
in
place
operations
on
them,
and
that
can
be
a
significant
performance
overhead.
So,
for
example,
this
one
this
profile
on
the
right
hand,
side
shows
shows
a
pipeline
accelerated
with
daliao.
B
For
the
for
the
example
I
showed
and
what
you
can
see,
the
rotation
itself
nicely
overlaps
with
the
forward
pass
and
part
of
the
backward
pass
of
the
network,
so
that's
great,
but
still
between
the
backward
and
the
next
forward
pass.
There
is
this
gap,
and
actually
you
see
two
things:
an
nvtx
annotated
region
and
a
gap,
though
this
nvtx
annotated
region
comes
from
inside
my
external
source
operator.
B
I
implemented
itself
because
that
that
has
some
overhead
and
that
will
be
called
in
the
main
thread,
because
dali
doesn't
know
that
this
thing
is
fret,
safe
right
and
then
the
other
white
gap
you
see.
This
is
an
internal
dali
copy.
Dali
function
being
called
to
copy
your
data,
this
external
source
would
be
provided
into
an
internal
buffer.
B
Fortunately,
now
the
more
recent
dali
versions,
they
have
a
method
or
like
a
parameter,
you
can
specify
named
zero
copy,
which
basically
tells
dali
to
not
make
a
copy
of
the
buffer,
but
you,
on
the
other
end
of
the
end
user
side,
have
to
make
sure
that
this
buffer
stays
around
for
long
enough.
So,
for
example,
you
can
in
your
class
initial
initialization,
you
can
create
an
empty
numpy
array.
B
You
read
your
data
or
copy
your
data
into
and
just
make
sure
that
this
array
is
always
there
and
doesn't
go
out
of
scope
and
gets
destroyed,
and
as
long
as
you
can
guarantee
this,
you
can
specify
the
zero
copy
option
and
you
will
get
rid
of
this
white
gap
for
the
other
gap.
There's
still
some
some
issue
here,
like
dali,
doesn't
cannot
spawn
threats
to
do
prefetching.
B
In
this
case,
what
you
could
do
is
use
python
python,
concurrent
futures
to
and
double
buffering
to
implement
some
some
pre-fetching
in
your
external
source
implementation
on
your
own.
It's
pretty
simple!
To
do
that.
I
don't
want
to
show
this
here,
but
in
general
this
is
very
straightforward
to
do,
and
by
doing
so,
you
can
remove
this
this
gap
almost
completely.
B
Let
me
summarize
the
optimization
part
of
this
talk.
I
introduced
two
frameworks
to
you:
the
pytorch
data
loader
data
set,
which
is
a
very
efficient
way
of
feeding
data
to
your
neural
network,
and
it
is
basically
integrated
in
python.
You
don't
need
any
additional
software
for
it,
and
this
is
very
flexible
because
it
can
basically
read
what
whatever
python
can
read.
B
It
works
best
when
you
have
a
natively
supported
format
like
most
image
formats,
audio
or
video,
but
you
can
also
use
non-natively
supported
file
formats
through
this
external
source
operator,
which
is
especially
for
scientific
applications.
I
think
one
of
the
most
important
parts
of
this
of
this
framework
so
that
it
has
some
performance
caveats.
I
talked
about
that
you
can
work
around
most
of
them.
B
There's
one
important
thing
I
have
mentioned
before
is
that
dali
does
not
do
in
place
operations
most
of
the
time.
So
that
means
that
if
you
have
a
long
pipeline
on
the
gpu,
it
might
consume
a
lot
of
additional
gpu
memory
on
top
of
what
your
net
neural
network
already
consumes,
especially
if
you
have
a
long,
prefetch
queue,
you
can
just
define
this
in
dali.
A
Now
that
we've
covered
the
data
pipeline,
let's
talk
about
how
you
can
improve
your
compute
utilization.
One
of
the
best
ways
to
improve
your
compute
performance
on
nvidia
gpus
is
to
try
out
mixed
precision.
Training
mixed
precision,
training
combines
typical
single
precision
compute
with
lower
precision,
fp16
compute,
where
applicable.
A
A
A
A
Fortunately,
much
of
this
handling
for
mixed
precision
has
been
automated
via
the
automatic,
fixed
precision
or
amp
feature.
Nvidia
has
contributed
to
the
major
frameworks.
Amp
makes
applying
mix,
precision
easy
by
automating
the
conversion
of
existing
single
precision,
training,
graphs
to
mix
precision
converting
only
safe
operations
to
fp16.
A
A
Adding
amp
to
an
existing
training
script
is
very
straightforward
and
requires
just
a
few
lines
of
additional
code
on
the
right
is
an
example
of
adding
amp
to
a
pytorch
training
script
with
added
lines
for
amp
highlighted
in
green
to
break
it
down.
The
feature
is
split
into
two
components:
grad
scaler
manages
the
automatic
loss
scaling
dynamically,
adjusting
a
loss
scale
during
training
to
keep
gradients
within
the
range
of
fp16
and
skipping
weight
updates
when
necessary.
A
The
autocast
contact
manager
applied
to
the
model
takes
care
of
converting
safe
layers
to
lower
precision.
With
these
lines
added.
Your
script
is
now
set
up
to
run
in
mixed
precision
and
take
advantage
of
tensor
cores,
enabling
amp
alone
can
result
in
large
training
speedups.
Even
if
you
see
a
speedup,
though
there
can
still
be
room
on
the
table
for
improvement,
don't
forget
ann
bell's
law,
since
amp
only
speeds
up
operations
on
the
gpu.
A
Your
final
speed
up
will
be
limited
by
remaining
work,
not
impacted
by
amp,
like
your
data
input
pipeline
or
remaining
work
on
the
cpu.
The
speed
up
achieved
for
gpu
work
will
depend
on
the
relative
proportion
of
compute
bound
to
memory
bound
operations
in
your
workload
as
a
first
step.
Reprofile
your
training
script
and
re-evaluate
bottlenecks.
A
A
Besides
this,
there
are
ways
to
make
your
network
more
tensor,
core,
friendly,
specifically
favor,
multiples
of
eight
for
sizing,
linear
layers
and
convolutions,
while
kudian
and
8
and
kublas,
and
the
kuda
11
toolkit
can
now
use
tensor
cores
on
problem
sizes.
Outside
these
size
constraints,
they
are
still
more
efficient
if
you
follow
these
rules,
finally
avoid
small
gems
with
dimensions
less
than
128,
as
these
are
memory
bound.
A
To
conclude,
this
section
here
are
some
miscellaneous
pie
torch
tuning
tips.
The
first
step
is
to
enable
cootie
and
auto
tuning.
This
allows
qdn
to
benchmark
and
use
the
fastest
implementations
it
has
available
for
your
workload.
The
next
two
tips
are
useful
for
reducing
the
impact
of
memory
bound
operations.
A
A
While
we
couldn't
cover
all
the
details
of
these
topics
in
this
short
talk,
here's
a
collection
of
some
additional
resources
that
we
encourage
you
to
check
out
for
more
information
on
profiling.
I
o
optimization
and
mixed
precision
training
thanks
a
lot
for
listening.
Please
let
us
know
if
you
have
any
questions.
Let's
move
on
to
the
next
part
of
the
tutorial.