►
From YouTube: 3D Printer Controller Panel Explanation
Description
What you see here at Open Source Ecology is an ambitious program based on a volunteer effort. To help us reach the goals - please consider joining as an OSE Developer in 2017-
http://opensourceecology.org/wiki/OSE_Developers
Take a minute to subscribe to our email newsletter (updates, workshops, etc): http://bit.ly/1LtcM44
A
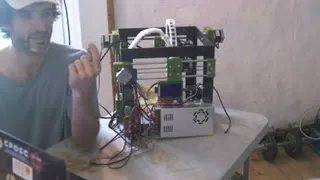
Welcome
back
everybody
so
right
now
we
will
cover
the
electrical
control
panel,
essentially
all
the
controls,
elements
that
go
on
top
of
the
mechanical
system
to
make
this
thing
work
as
a
3d
printer.
So
what
are
those
things
that
we
need
to
do
there
1?
We
need
to
control
the
motion
direction
of
motion.
We
need
to
heat
certain
things
like
the
bed
and
the
extruder
3.
We
need
to
extrude
filament
and
we
need
to
do
things
like
correct
for
the
bed
leveling
at
the
same
time,
and
what
else
do
we
need
anything
else?
A
Those
are
the
things.
So
how
do
we
do
that
in
the
most
simple
way,
so
the
control
panel
is
a
modular
build.
So
the
whole
panel
here
contains
all
the
elements
that
that
now
connect
your
wires
through
the
rest
of
the
system,
and
the
panel
is
a
piece
of
plexiglass
where
we
just
use
zip
ties
and
mount
all
the
all
the
different
components,
simply
through
poles
that
are
drilled
in
a
panel
as
an
easy
way
to
do
it,
like
you
know,
mounting
with
zip
ties,
actually
is
a
pretty
good
idea.
A
It's
not
not
bad
they're,
three
cents
per
zip
type.
If
you
mess
up,
you
can
do
it
again
and
it
allows
you
to
do
a
modular
part
that
can
also
be
like
if
we
have
a
if
we
have
a
build,
it's
a
module
that
can
be
built
independently
and
then
assembled
into
place.
So,
let's
begin
first
of
all,
the
plexiglass
suit
in
the
build
Minh
official
build
materials
contains
12
by
12
piece
of
plexiglass.
Here
we
have
love
about
a
6
by
12,
so
we
cut
those
in
half.
A
A
Really
so
lubrication
is
one
way,
but
what
we
do
is
we
take.
It
pick
an
or
piece
of
board
so
you're
drilling
through
a
backing
of
a
wood
board,
so
the
pressure
on
the
bottom
of
the
other
side
of
the
Plexiglas
word
would
otherwise
break
through
like
when
the
drill
bit
catches
as
it
starts
to
go
out,
it
can
actually
tear
the
Plexiglas
and
you
want
that
to
be
prevented
by
punching
the
Plexiglas
against
the
backing.
A
So
when
the
drill
bit
goes
through,
it
goes
through
the
Plexiglas
and
then
through
the
wood
without
damaging
any
of
the
Plexiglas,
which
means
that
if
you
do
not
get
a
hole
in
here,
if
you
mess
something
up
or
you've
got
to
remove
something,
you
can
it's
harder
to
drill
it
here,
because
you
need
to
put
something
on
the
back.
You
cannot
drill
just
straight
through
you're
running
into
a
risk
of
a
breakage.
It
may
or
may
not
happen,
but
it
probably
will
check
something
in
the
worst
case.
A
A
A
What
are
all
those
things
RepRap
refers
to
the
project
this
came
from,
so
RepRap
is
the
official
open-source
3d
printed
project
started
about
2010
or
so,
and
those
are
the
guys
that
have
actually
changed
the
entire
shape
of
the
entire
3d
printing
world,
because
most
3d
printers
today
are
based
on
the
RepRap
project.
The
largest
3d
printer
company
in
the
world.
Right
now
that
produces
8000
3d
printers
per
month
is
Prusa.
The
Prusa
printers
from
the
Czech
Republic
is
benek
our
guest
here
he's
from
the
Czech
Republic.
A
It's
30
minutes
from
his
house,
so
you
can
probably
see
it,
but
that
project
is
it's
pretty
much
fully
open
source
came
out
of
the
RepRap
project,
just
like
lulzbot
3d
printers
they're
one
of
the
big
contenders
MakerBot,
which
started
open-source
and
turned
proprietary.
They
are
all
objects
of
the
3d
printer
RepRap
world.
A
huge
community
they've
got
a
wiki
they've
got
a
annual
conference
called
the
Midwest
RepRap
festival.
A
They
also
have
an
Easter
eastcoast
RepRap
Festival,
now
the
first
one
last
year,
but
it's
a
live
vibrant
community
that
develops
the
hardware
and
software
the
software
is
marlon.
It's
called
marlin,
it's
one
of
the
most
most
printers
run
marlin.
We
run
marlin,
that's
the
firmware!
The
stuff
you
upload
to
the
Arduino.
To
make
this
thing
run,
so
that's
RepRap
or
do
we
know,
is
the
board.
You
cannot
see
it
underneath
there's
an
actual
sandwich
of
all
the
pins
on
the
top
board.
They
go
into
the
sockets
on
the
board
below
which
is
the
Arduino.
A
It's
a
particular
person
of
Arduino
there's
many
kinds
of
Arduino
in
different
forms.
This
is
called
the
Arduino
mega.
Arenal
mega
is
the
one
that
has
a
lot
of
those
output
pins,
so
it
can
handle
more
things
than
other.
You
can
get
a
tiny
little
Arduino
mega,
that's
just
a
little
minimalist
thing,
but
all
of
them
have
a
microprocessor
that
does
the
controls.
A
Pololu
Pololu
is
refers
to
the
stepper
drivers
on
the
rep,
the
ramps
board.
You
see
five
of
these
little
chips
that
plug
in
and
they
are
the
devices
that
send
the
correct
sequence
of
electricity
to
the
stepper
motors
stepper
motors
are
not
just
a
regular
motor
with
two
leads
that
just
goes
on
and
off
it
actually
indexes
on
an
inside.
It's
got
200
steps
per
revolution.
What
it
means
it's.
It's
got
a
bunch
of
magnets
like
coils
around
arranged
in
a
circle
and
depending
on
how
you
electrify
those
coils,
you
can
get
just
one
step.
A
A
That's
the
Pololu
and
shield
refers
to
the
fact
that
the
ramps
shield
is
like
a
shield
that
slaps
into
plugs
into
the
base
Arduino
board,
so
we'll
go
through
that
the
power
supply
standard,
$20
off
the
shelf
power
supply
Arduino
and
the
ramps
board,
there's
very
common
off-the-shelf
parts
and
you've
got
an
LCD
screen.
So
that
gives
you
feedback
like
temperatures.
You
can
actually
do
controls
like
how
fast
you're
going
in
real
time
we'll
turn
it
on
you'll
see
more
about
how
that
works.
A
It's
very
useful
because,
for
example,
if
you
plug
in
the
sensors
there's
two
temperature
sensors
in
the
system
we'll
go
through
the
wiring
later,
but
you
need
two
of
them.
One
is
to
control
the
temperature
of
the
nozzle,
your
extruding
for
PLA
polylactic
acid,
the
material
that
these
are
printed
from,
we're
extruding
that
at
210
degrees
Celsius.
You
need
to
keep
that
specific
value
on
constantly
so
the
the
thermistor,
the
thermal
sensor,
the
text
that
gives
the
feedback
to
the
computer
brain
here
and
it
controls
in
turns
it
just
turns
it.
A
Flips
it
on
and
off
to
get
the
right
temperature
you'll
see
that
the
light
will
just
blink
so
on
off
on
off
on
off
and
duty
cycle
of
that,
meaning
how
how
long
it's
on
how
long
it's
off
will
determine
the
temperature
of
the
sensor
of
the
of
the
extruder.
If
it's
fully
on
it
can
go
up
to
the
extruders
that
we
have
they're
rated
for
up
to
300
degrees
Celsius,
which
means
you
can
print.
A
We
do
have
a
high
performance
of
hot
end,
which
can
print
in
any
material
wrong,
PLA
ABS
due
to
high
temperature
ones
such
as
poly
carbonate,
rubber
rubbers,
not
a
high
temperature
but
poly
carbonates
nylon
and
printed
nylon.
You
can
think
about.
If
you
have
a
dual
head,
you
can
think
about
nylon
embedded
rubber
tires.
How
about
that
it'll
be
very
interesting
job
spec.
Thank
you.
A
Celsius,
that's
really
hot:
it's
not
like
212
Fahrenheit,
which
is
a
hundred
Celsius.
This
is
pretty
hot
and
also
the
guys
from
the
Michigan
Tech
they've
done
some
prototypes
worth
actually
using
one
head
to
extrude
thin
wire.
Well,
no
they're,
not
they're,
not
doing
that
they're.
What
they're
doing
is
they're
actually
wrapping
wire
around
the
form
and
they're
printing
over
that.
So
you
get
metal,
metal,
wire,
embedded
in
plastic,
they
print
around
it.
So
you
can
get
composite
salvage,
but
think
about
this.
What
if
you
had
a
very,
very
thin
wire
from
McMaster
car?
A
You
can
get
down
to
very
tiny
like
a
fraction
of
a
millimeter,
maybe
a
tenth
of
a
millimeter,
great
tiny
wire.
What
if
you
had
a
hot
wire
head
in
addition
to
the
extruder
head,
I,
believe
you
can
do
metal,
embedded,
3d,
printing
right
out
of
the
extruder
heavy
you
have
to
get
it.
You
have
to
figure
it
out.
The
wire
would
have
to
be
thin
enough
that
it
acted
when
it
goes
in
there.
It
doesn't
mess
up
the
whole
print,
because
obviously
metal
is
much
tougher.
Much
stiffer
than
plastic
so
will
tend
to
like.
A
If
it's
still
not
fully
fully
solidified
plastic
it'll
just
rip,
it
rip
the
plastic.
So
if
you
get
the
right
combination
of
the
exact
timing
and
the
distance
away
from
like
say
right
after
the
print
you're,
embedding
it
right
as
it's
starting
to
solidify
you
can
probably
give
that
to
work.
I,
don't
know!
If
anybody
that's
done
it,
but
I
can
definitely
foresee
the
possibility
of
metal
embedded
3d
printing.
So
we
got
composites
straight
out
of
a
3d
printer
like
this.
C
B
A
I
think
that's
actually
very
exciting
potential.
You
can
also,
of
course,
put
like
the
metal,
the
guys
from
Michigan
Tech
they've
they've
done
a
lot
of
this
kind
of
work.
You
can
put
a
MIG
wire
welder
head
on
this,
so
you're
actually
depositing
in
metal.
Of
course,
this
is
sparking
all
over,
so
you'd
have
to
have
the
protection
or
a
different
physical
setup.
So
all
that
can
happen.
Major
TIG
welding
can
can
happen
on
a
machine
like
this
as
well.
A
So
that's
the
temperature
sensors
there's
another
temperature
sensor
in
a
bed
you're
keeping
the
bed
around,
maybe
like
between
forty
and
a
hundred
or
under
20
Celsius.
The
way
this
bed
is
designed,
it's
got
a
PDI
surface,
which
is
a
high-performance
plastic
that
allows
the
print
to
stick
to.
It
went
hot
when
it
cools
off
it's
very
easy
to
pop
off,
but
you
need
control
on
the
temperature
to
keep
that
bed
of
it
at
a
constant
rate.
Constant
sitting.
Next
is
your.
A
We
have
one
element
here:
called
MOSFET
field
effect,
it's
a
transistor,
it's
a
device
that
turns
the
bed
on
and
off
what
we've
seen
with
the
ramps
boards,
because
the
bed,
especially
if
you
scale
it
up
like
to
a
1
meter
square
surface,
that
takes
a
bit
of
car.
Currently
it
takes
about
16
amps
at
12,
volts,
it's
about
200,
watts
or
so,
but
the
little
controller
board
has
these
transistors
on
it.
But
because
the
leads
are
so
tiny
they're
they
tend
to
burn
out.
A
These
kinds
of
boards
are
not
really
designed
to
handle
so
much
power,
so
one
way
to
get
around
that
is
to
send
that
on
signal
to
a
stronger
power
handling
element.
So
that's
what
transistors
are
transistors
have
been
developed
in
the
50s
they're,
a
critical
part
of
our
current
infrastructure,
very
tiny,
transistors
they're,
just
on-off
switches
for
electricity
they're.
What's
inside
our
computers
and
the
whole
modern
industry
sticks
since
the
50s.
A
This
is
a
big
one.
It's
just
on-off
the
logic
there
is
binary.
A
computer
has
much
many
of
these
very
tiny
that
create
logic.
Logic
is
just
that
how
a
sequence
of
electricity
is
turned
on
and
off,
but
the
logic
there
is
just
on-off
for
the
heat
bed,
so
you're
sending
a
little
signal
and
that
signal
is
amplified
to
turn
on
these
big
wires
that
come
straight
from
the
power
supply,
and
that
goes
to
the
feedback.
A
So
it's
think
of
it
as
a
light
switch
for
high
power
whenever
you're
dealing
with
switching
a
lot
of
current.
Whenever
you
make
that
contact
the
deal,
is
you
get
a
little
spark
if
you
were
just
to
connect
wires?
That
only
could
you
can
only
do
that
a
few
times
before
the
spark
just
wears
out
the
wires?
That's
called.
A
What
do
you
call
that
there's
actually
machining
process
where
EDM
electric
discharge
machining,
that's
you're,
doing
one
time:
electric
discharge
machining.
Whenever
you
turn
a
switch
on
what
happens
there,
the
spark
that
happens,
the
ablates,
the
metal
and
before
before
long
you,
you
will
break
the
switch.
It
won't
work
anymore.
That's
why
you
use
different
a
device
like
a
field
effect
transistor,
a
transistor,
so
call
it
a
transit
as
a
general
term.
This
is
a
transistor
that
takes
a
small
current
and
then
it
switches
a
large
current.
It's
a
very
powerful
concept.
A
That's
what
all
the
semiconductor
devices
are
about.
Their
various
combinations
of
semiconductors
that
can
switch
current
and
for
high-performance
ones
means
you
switch
it
like
instant,
meaning
like
a
nanosecond
or
microsecond,
and
you
can
switch
lots
of
current
so,
for
example,
for
an
induction
furnace.
You
have
things
like
that:
they're
gonna
be
bigger,
they
might
be
switching
like
a
hundred
amps
or
a
thousand
amps,
but
the
semiconductor
technology
is
what
allows
you
to
do
that
and
since
the
transistor
was
invented,
you
have
switched-mode
power
supplies.
A
What
is
called
switch
mode
power
supplies
so
the
way
these
things
work
is
you
take
120
AC
from
the
wall,
but
we're
using
12
AC
it
converts
up
to
12
AC,
so
12
DC
direct
current
the
way
it
does.
It
actually
uses
transistors
in
there
to
switch
things
switch
things
around
so,
instead
of
using
transformers,
you
can
use
fast
switching
to
accomplish
the
same
thing.
A
So
that's
that's
the
concept
and
then
nothing
a
one-sentence
of
of,
what's
known
as
a
switch
mode
power
supply,
which
means
that
you
can
make
these
things
tiny,
like
you
can
have
a
welder
like
I'm
to
like
Miller
Matic
200
welders
that
have
a
big
transformer
inside
and
they're.
Pretty
big
or
with
modern
technology
can
use
transistors
do
that
and
that
same
well.
There
would
be
tying.
You
could
probably
fit
a
small
box
like
that
will
be
like
10
pounds,
but
that's
modern
technology
which
uses
switching
now.
Switching
has
losses
so
the
high
performance
deals.
A
Are
I
think
it
depends,
depends
because
there's
also
high-performance
transformers
as
well,
but
the
power
electronics
based
on
transistors
are
in
the
90s
95
98,
maybe
up
to
99
percent
efficient.
So,
yes,
that
would
definitely
be
more
than
a
transformer
and
that
we
were
talking
that
the
welder,
the
transformer
welders
just
take
away
more
power
on
the
generator,
whereas
inverter
well,
there
doesn't
load
down
the
generator
as
much
so
you
can
see
that
that
means
the
transfer.
Transformer
is
wasting
more
power,
but
there's
current
technology
also.
A
C
A
A
So
you
use
this
high-performance
plastic
so
that
things
come
up
very
easily
at
the
cost
of
electricity
and
I
and
I.
Think
it's
worth
it
in
production,
because
if
you
talk
about
the
operating
costs
of
this,
if
it's
200
watts
every
5
hours
using
about
a
kilowatt
hour,
so
every
five
hours,
it's
costing
you
10
cents
to
run
this.
So
it's
not
bad,
but
if
you
have
a
whole
farm
of
these,
let
me
know
what
costs
that
up,
but
still
the
value
of
production
that
you're
getting
out
of
that
is
huge.
A
So
in
production
you
want
to
use
a
high-performance
thing
like
this.
Does
the
tape,
if
you
have
to
reapply
the
tape
as
you
ripped
it,
because
you
know
the
part
wouldn't
come
off,
you
can
only
do
it
so
many
times
and
that
becomes
for
production.
It's
not
it's
not
practical.
So
you
want
to
use
a
high
performance
surface
for
for
printing
on
people
used
to
use
glass
or
straight
on
an
aluminum
glass
would
break.
Sometimes
glass
doesn't
work
as
well.
A
This
is
the
highest
tech
way
to
do
it
right
now,
with
some
other
things,
other
people
have
Teflon
I'm,
not
sure
how
things
might
stick
the
Teflon.
This
peplum
is
very
nonstick.
So
depends
this
one
I
know
I,
don't
know
too
much
about
the
chemistry's
of
these
things,
but
we
know
this.
One
works,
that's
industry
standard
for
wolves
bot
uses
it
the
Russa
most
popular
printer
uses
it.
So
the
cutting
edge
stuff
does
use
the
this
kind
of
plastic.
So
we
are
trying
to
do
that.
Hey
I
lost
my
internet.
A
C
A
So
that's
the
field
Deal
effect,
that's
a
transistor
power
here
in
the
element,
if
I
miss
anything,
the
the
LCD
screen
catches
through
these
big
two
wires
on
to
the
bottom
of
the
board.
But
the
problem
statement
right
now
is
to
attach
one
two,
three,
four:
hey:
it's
just
four
components:
we
can
do
that
pretty
quickly,
so,
let's
not
get
lost
the
power
supply
gets
four
four
zip
ties
so
one
another
one
on
the
edges,
then
zip
tie
there
so
for
a
zip
tie
for
this
you're.
A
Actually
we're
actually
going
through
this
we're
two
going
like
inside
one
of
these
cracks
and
winding
through
on
the
other
side,
but
two
holes
two
holes,
two
holes,
whereas
on
the
edge
we
need
only
one
Hall
for
this.
This
transistor
we've
got
one
zip
tie
pair
and
one
zip
tie
in
another
corner.
We're
did
for
the
screen.
We
got
one
here
and
one
there.
All
these
have
those
holes
already
there.
So
the
Arduino
we're
using
I
think
three
and
their
word
we
know
in
itself
has
holes
all
these
things
have
mounting
hole.
A
So
it's
convenient
to
use,
zip
ties
and
stuff.
Otherwise
you
might
like
to
screw
it
on
with
a
little
screw
or
something
the
zip
ties
are
fast
and
efficient.
So
it's
good
and
then
you
have
form
for
more
mounting
points
of
the
Plexiglas
to
the
actual
frame.
So
here
on
the
edge,
you
can
have
one
hole
going
through
the
frame
and
we
already
drilled
those
holes.
The
hard
work
is
done.
This
is
going
to
be
easier
here.
A
We've
got
one
hole,
it
should
be
one
hole
on
all
four
corners
of
the
Plexiglas
and
we
do
have
different
sized
machines.
So
this
is
13
inches
here
and
we
have
14
and
16,
because
it's
a
12
inch
thing
you're,
gonna
kind
of
be
dangling
in
the
air
like
on
the
corner
for
the
large
machines,
because
you're
gonna
have
about
14
inches
of
space.
The
board
itself
is
12,
so
the
zip
ties
can
catch
that
no
problem.
When
you
have
the
smaller
frame,
the
the
Plexiglas
will
sit
on
a
metal.
It
doesn't
matter.
A
If
you
have
pre
hanging.
That
means
it'll
be
more
shock
absorb
when
the
printer
is
moving
really
fast,
so
both
ways
work.
The
only
other
element
is
that
the
LCD,
you
can
run
it
from
an
SD
card,
so
you
don't
need
to
be
connected
to
a
computer.
One
of
the
ways
to
run.
It
is
straight.
You
put
your
files,
g-code
files
on
this
plug
it
in
and
you
can
run
hit
print
from
the
controller,
so
you'll
need
a
to
be
tethered
or
you
can
run
through
a
USB
cord
into
the
Arduino.
A
But
then,
if
your
computer
goes
out,
the
print
goes
out
too.
So
so
there's
more
failure.
I
would
say
there
it's
more
robust
to
have
the
card
in
here,
so
you're
eliminating
one
extra
element
of
disruption,
it's
about
it
and,
besides,
after
we're
done
with
that,
there's
a
bunch
of
wires
and
the
wiring
has
essentially
got
power
to
through
the
keypad
you
get
power
to
the
controller.
A
The
wiring
to
the
steppers
is
a
plug
that
goes
into
each
of
the
the
stepper
drivers.
There's
two
thermistor
connector
connectors,
there's
two
end
stops.
We
haven't
talked
about
the
head
stops.
Yet
these
are
these
things.
There
are
limit
switches
once
the
doctor.
Ultimately,
I
thought
that's
pretty
simple
to
do
well,
catch
those
magnets,
because
what
you
can
do
on
these
these
are
actually
self
holding,
because
you
can
put
a
magnet
on
one
side
in
the
other.
They
can
put
glue
on
one
side
and
then
take
off
the
magnet
from
the
other
side
cuz.
A
It
will
hold
through
the
plastic,
so
this
is
easier
to
make
the
plugs
they
plug
in
so
plug
and
play.
So
after
we
do
the
other
components
on
we
do
the
wiring.
But
let's,
let's
get
to
that
later,
it's
relatively
straightforward,
like
if
everyone
follows
that
makes
the
same
connection
one
after
another.
It's
it
can
go
relatively
benign
Lee,
but
the
next
task
is
to
mount
mount.
The
fork
just
for
components
and
it's
in
a
location
is
not
that
critical.
A
As
long
as
you
fit
everything,
only
one
consideration
is
actually
this
and
we'll
look
at
the
machine
downer.
We
won't
take
this
because
the
other
one
has
the
updated
version.
It's
actually
here
so
that
this
one
single
wire,
we
didn't
have
to
extend
it
right
now.
I
extended
this
wire
through
an
extender
to
reach
two
needs
to
go
right
here.
If
we
mounted
here,
you
don't
need
an
extender
off
the
wire
that
already
comes
with
a
with
a
switch
so
we'll
move
that
cause
the
only
difference
down
there
is
the
LCD
is
more
here.
A
A
No,
okay,
okay!
We
well
done
so
right.
Now,
all
of
us
help
whoever's
not
finished.
Put
together.
Everything
that's
down
there
I
think
there's
like
a
couple
machines
that
may
not
be
complete
to
the
level
of
z
axis
x
and
y
worried
about
the
bed
later.
Let's
do
the
electronics
right
now
and
maybe
get
some.
A
It's
a
limit
switch
that
detects
so
you'll
see
that
when
the
axis
moves
all
the
way
to
it,
it'll
trip
it,
it
flicks
it.
It's
adopts
the
accident
when
there's
one
on
each
axis,
there's
gonna
be
one
on
the
x
click
and
what's
on
the
Z,
is
there
non-stop
on
the
Z
know
you
got
a
sensor
and
that
sensor
plugs
into
the
same
same
kind
of
a
plug,
but
it's
a
sensor.
It's
not
a
mechanical
switch.
It's
an
electrical
inductive
sensor.
It
senses
the
presence
of
metal.
A
This
is
eight
millimeter
distance
sensing.
This
extruder
we
modified
from
their
stock
four
millimeter
distance
sensing,
which
would
have
to
be
closer
to
the
bed
because
we
want
to
go
large.
We
wanted
to
keep
that
distance
bigger,
so
we
never
hit
the
prints
like
a
steak.
The
way
you
can
hit
the
prints
in
theory,
you
never
would,
but
if
things
come
off
the
bed
like
if
something
warps
you're
talking
about
thermal
effects,
if
you
don't
get
the
first
layer
connected
to
the
book
to
the
bed,
the
print
might
pop
off.
B
A
A
A
Not
a
different
circuit
design
because
there's
a
version
of
us
of
this
Pololu
driver,
it's
not
called
the
palo
lots
of
different
one.
It's
the
state
of
art
that
came
out
like
a
couple
of
years
ago,
but
it
does
read
the
resistance
and
when
it
hits
it
it
trips
by
itself
without
these
sensors
without
these
limit
switches,
but
you
have
to
tune
it
because
the
resistance
has
to
be
like
you
don't
want
like
when
you
have
a
rough
spot
in
axis,
you
don't
want
it
to
stop
there,
so
you
got
a
definitely
calibrate
it.
A
But
that's
in
fact
the
Prusa
3d
printer
does
do
that
and
that's
like
the
latest
thing
in
a
business.
The
interesting
thing
about
it
is
one
you
don't
need.
You
don't
need.
The
end
stops
because
you
you're,
mechanically,
detecting,
hey
I,
went
against
the
limit
like
physical
limit
and
just
stops
it
immediately.
A
The
other
thing
about
it
is
that
the
one
it's
not
related
to
that
to
that
stepper
driver,
but
they
also
the
so
the
proofs
of
3d
printers
right
now
have
the
part
where,
if
you
turn
off
the
power,
it
actually
stores
the
locations
in
the
controller
and
it
can
resume.
Even
if
you
interrupt
power,
which
is
like
wow,
that's
pretty
pretty
advanced
we're
not
there
at
that
point.
That
requires
different
electronics.
There.