►
From YouTube: Summer X Day 5 Class
Description
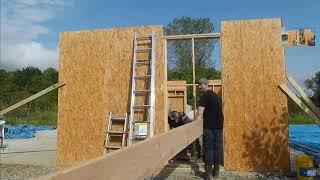
Review of wall build of Day 5. 3.5 minutes install time per wall module - combined effort with 2 teams.
-----------------
What you see here at Open Source Ecology is an ambitious open source project for the common good. Join our development team:
http://opensourceecology.org/wiki/OSE_Developers
We run One Day Extreme Build workshops in many locations. Please put yourself on our map if you'd like us to host a workshop near you:
https://microfactory.opensourceecology.org/request-a-workshop/
Take a minute to subscribe to our email newsletter (updates, workshops, etc): http://bit.ly/1LtcM44
A
A
This
one
five
minutes,
so
this
takes
us
through
the
day
what
we
saw
yesterday.
There
was
not
a
house
up
to
the
first
floor
trusses
yesterday.
Now
there
is
here's.
The
process
actually
gets
quite
nice
at
the
end,
but
yeah
some
impressions
from
yesterday.
I
think
it
was
pretty
cool
like
it
went
up
pretty
fast.
A
The
pad
is
all
over
the
place.
It's
not
even
so.
We
had
those
issues,
and
one
big
learning
I
would
say
is
that
we
definitely
want
to
pay
attention
to
that
like
this
is
kind
of
like
our
multi-purpose
pad,
like
our
learning
pad
our
launch
pad,
because
this
is
this
was
done
all
by
us
part
of
the
workshop
novices.
A
It
was
pretty
good,
but
not
actually
not
good
enough
to
to
get
little
gaps
like
it's,
probably
like
one
inch
gaps
somewhere
here
and
there,
where
the
tops
were
a
little
uneven
in
places
so,
and
we
did
fight
that
we
did
spend
a
little
bit
of
time.
Oh,
like
we
had
to
drop
one
of
these
modules
down
to
align
things.
One
point
also
that
I
saw
as
a
mistake
was
actually
that
one
of
the
rim
joists
wasn't
was.
We
ended
up
32
minus
one
inch
on
one
side.
A
A
D
A
F
G
F
E
A
E
A
A
But
beyond
that,
so
it's
in
that
far
corner.
That's
that
corner
has
got
a
gap
and
I
was
like
what's
going
on,
because
the
osb
has
to
go
all
the
way
to
the
edge,
and
I
thought
oh
what's
going
to
happen
there,
because
it's
going
to
be
like
hanging
over
one,
but
no
everything
else
otherwise
is
32
by
16,
so
we'll
just
it
was
just
this
one
little
piece
that
was
not
reaching
then,
but
no
problem.
Yeah
beyond
that,
yeah
man,
it
was
going.
A
A
A
H
A
One
thing
we
found
out
was
a
major
issue.
Is
that
the
sill
plate,
because
it's
treated
lumber
it
happens
to
be
between
like
definitely
like
at
least
a
quarter
over
the
nominal
5.5
inch
dimension,
which
destroyed
our
plan
with
the
tabs,
which
we
had
to
a
lot
of
them.
We
had
to
take
off
or
modify
so,
but
not
a
real
number.
It
is
a
real
data
point
it's
real
data,
but
it
means
we
can.
A
We
can
do
much
better
actually
because
it
was
under
some
extenuating
conditions
where
no
it
we
did
not
have
that
smooth
workflow.
We
had
to
fight
things,
so
this
is
actually
really
good
and
if
you
were
to
actually
take
a
look
at
I'll
play,
the
other
one
from
the
other
angle,
which
is
which
wasn't
actually.
A
We
said
like
oh
yeah,
we're
gonna
do
in
five
minutes,
so
I
mean
that's
pretty
good,
like
close
close
to
five
minutes.
Definitely
under
15
minutes,
which
was
like
the
best
case
scenario
in
the
first
house
like
15
minutes
was
the
shortest.
So
I
mean
we're
we're
doing
well,
it's
good
there's.
Definitely
a
vision
of
wow.
This
coming
right
up.
You
know,
you're
doing
a
build
for
somebody
else
and
we're
doing
well.
A
H
H
A
A
B
A
Yeah,
definitely
so
all
the
joists
after
they
come
up
hurricane
time
between
the
joists
then
and
the
top
plate
there,
like
you
know
after
you
have
a
joist
wherever
you
have
it
say
you
got
it,
you
got
them
right.
There,
hurricane
tie
between
each
one
and
the
rest
of
the
house,
so
top
plate
the
two
top
plates
there.
That's
that's
that.
So
we
have
those
okay.
C
E
E
E
I
E
I
E
I
L
D
L
I
L
I
I
A
A
A
A
B
A
A
B
A
A
A
That's
the
second
story
on
the
platform
on
a
on
a
joist
before
that
we
need
to
make
that
stem
wall
which
is
effectively
nine,
basically
a
nine
two,
nine
foot
modules
that
sit
under
the
opening
the
stairway
opening
right
right.
That's
not
structural
right
now
we
can't
really
be
walking
up
there
or
a
bunch
of
people
can
be
up
there.
D
A
Out
so
yeah
easy
to
slice
whatever
it
is.
So
as
far
as
the
windows
we
need
to
put
on
the
osb
and
cut
out
exactly
the
profile
for
a
36,
the
rough
opening
there
is
36.,
so
the
full
detail.
It's
actually
we
have
the
full
detail.
So
if
you
go
back
to
the
dock,
the
working
dock
from
before,
how
do
you
find
it
too
many
links?
So
I
would
go
to
sh3,
build
instructions.
A
A
That's
there
we
go
right
here.
It's
even
got
the
part,
all
the
cut
list.
Right
now
we
have
just
the
aperture,
which
is
just
just
the
vertical.
We
don't
have
these
interiors
like
all
this.
All
this
interior
stuff
is
not
there,
but
we
can
follow
this
exactly
all
the
dimensions
are
there.
So
if
you
pull
that
up,
it's
exactly
what
we
have
to
do
after
that.
Once
again,
the
plywood
is
still
staggered
to
make
it
fit
just
like
normal
and
then
cut
out
exactly
the
aperture
of
the
window.
A
Once
we
have
that
the
house
wrap
can
go
on
it
right.
So
that's
the
that's
the
windows,
the
crack.
Oh,
we
need
to.
What
do
you
do
for
the
cracks?
The
adjustment
points
they're
they're
about
the
size
of
a
two
by
two
by
possibly
even
a
two
by
might
fit
in
there.
If
you
ram
it
in
probably
what
we
want
to
do
is
cut
strips,
which
are
half
inch.
Plywood.
Definitely
two
will
fit.
Maybe
three
we
can
possibly
cut
like
one
that's
out
of
quarter.
You
probably
have
some
of
that
lying
around.
A
So
actually
we
have
this
big
pile.
What
I
would
actually
ask
is,
since
scaffolding
is
also
an
issue
for
today,
let's
take
a
look
at
our
wood
supply
in
the
very
back,
so
maybe
we
can
take
the
whole
team
do
like
maybe
10
minutes
of
putting
that
stuff
under
the
the
protected
area
and
taking
some
stuff
for
scaffolding.
A
So
we
can
take
the
car
back
there
loaded
up
on
the
back
of
the
car,
but
there's
material
like
quarter
inch
material
quarter
ply,
there's
half
ply,
but
that's
very
simple,
5.5
long
strips
fit
like
two
or
three
structurally
wise,
it's
effectively
like
well,
we've
got
walls
on
top
on
either
side
structurally,
it's
important
that
we
just
bond
that,
together
to
the
other,
to
what's
around
it,
but
that's
that's
a
pretty
easy.
That's,
but
that's
that
would
be
a
team
there's
two
of
those.
A
What
we
ended
up
doing
is
fitting
or
yeah
building
the
two
other
adjustment
modules
in
place,
so
those
are
already
done,
which
which
is
another
way
to
do
it?
I
would
probably
prefer
that
we
have
them
to
install.
Maybe
I
don't
know
I
I
guess
in
terms
of
time,
how
do
people
think?
I
think
that
we
framed
them
up
like
very
quickly.
A
Just
like
almost
like
just
for
you,
it's
almost
like,
we
didn't
need
to
do
them
now.
It
would
be
a
little
harder
on
the
second
floor
because
you're
at
height
there,
you
can't
get
it
from
one
side.
You
just
got
to
work
from
one
side,
so
it's
kind
of
you're
on
a
ladder
there.
It's
maybe
a
little
more
dangerous,
so
probably
would
definitely
do
it.
For
the
second
floor,
on
the
first
floor
it
turns
out
it
was
quite
easy
to
do
them
right
in
place.
It
was
very
quick,
okay,
double
door.
A
We
have
so
we
have
everything,
as
is
here.
Only
thing
missing
is
the
plywood.
So
all
you
need
to
do
is
do
this,
so
that's
already
laid
out
long.
Eight
footer,
two
short
strips
like
that
dimensions
are
given.
We
can
follow
that.
That's
our
finish
for
now
before
the
door
ready
for
house
wrap,
so
we
can
wrap
around
that.
A
A
A
A
M
D
M
B
A
A
Second
floor,
so
we
once
again
want
the
rail
to
align
the
walls
perfectly
other
comment
about
the
top
plate.
I
like
it
how
we
can
put
it
against
the
osb
and
then
we
just
punched
it
down
it
all
just
aligned.
That
was
good.
You
want
to
repeat
that
we're
going
to
have
the
same
idea
where
the
second
story
module,
is
pretty
much
mirror
of
everything
except
for
different
window
sizes,
but
once
again
we
pre-frame
no,
no,
the
windows
we
actually
have
to
put
in
now.
A
We
don't
want
to
work
that
at
height,
so
but
all
the
other
modules
are
pretty
much
analogous
to
the
former
ones,
except
there
is
no
double
door.
Those
are
just
okay.
Let's
look
at
the
house
picture
just
go
to
seed
home
2,
just
one,
that's
how
it
looks.
That's
what
we're
building
so,
instead
of
the
double
door,
we
got
two
more
windows.
A
So
that's
the
corner.
That's
one!
Two
three
four
five
is
regular
windows
adjustment
corner
like
before,
so
we
pretty
much
mirror
the
kind
of
pattern
we
did
with
the
first
floor
modules,
except
now.
Instead,
instead
of
using
two
by
two
by
six,
nine
foot,
pre-cut
we're
using
two
by
six
eight
foot
pre-cut
and
why
not
nine?
Well,
nine
gets
really
tall
up
there
and
it's
you
don't
really
need
that.
A
You're
at
height
I
mean
once
you're
standing
at
the
top
of
the
roof.
It
feels
pretty
high.
It
doesn't
really
look
like
it
from
here,
but
this
is
actually
quite
tall.
You'll
see
it
like
once
you're
on
the
first
floor,
it's
quite
a
height
even
from
the
first
floor,
so
so
plate
team
after
the
cell
plate,
you
can
get
into
the
actual
second
story,
walls,
so
walls,
walls
and
windows
and
all
that.
I
I
A
B
A
A
Why
do
we
need
scaffolding
at
the
point
where
we
put
the
modules
up?
We
can
do
that
all
from
inside
actually
from
on
top
of
the
first
floor.
But
what
happens
to
the
siding?
At
the
end
of
the
day
and
a
house
wrap
the
house
wrap
an
actual
siding
remain
unaddressed,
so
we'd
want
to
do
scaffolding
now.
What
I
would
propose
for
scaffolding
is.
A
Out
this
cunning
plan
right
here,
so
we've
got
the
top
view
and
first
of
all,
the
question
is
what
height
would
be
the
most
appropriate
for
scaffolding?
What
do
we
have
to
do?
We
have
to
do
house
wrap
and
the
exterior
siding,
which
we
did
not
touch
it.
It's
this
3
8,
it's
actually
5
16
cement
board.
It's
got
it's
pretty
much
lifetime
exterior
material
that
comes
in
four
by
eights.
So
that
means
the
first
floor
is
ending.
We
got
eight
foot
and
then
from
then
we
have
to
go
up,
so
it
would
make
sense.
A
Probably
to
put
the
scaffolding.
You
know,
like
seven
eight
feet
we
have
to
screw
to
the
top
of
that.
We
could
also
go
over
from
the
roof,
but
you
know
so
so
the
house
is
front
of
the
house
first
floor.
You've
got
your
second
story
platform
second
floor.
You
got
your
roof
platform
and
another
insulation
box.
A
So,
actually,
it's
going
to
be
quite
challenging
to
get
the
second
layer
of
that's
20
foot
mark,
so
the
scaffolding
I
would
propose
would
be
here
I'll,
be
level
the
scaffolding,
because
16
only
gets
you
halfway
up
the
second
story.
Walls,
man,
so
we
still
have
to
address
that
that
that
actually
gets
16
foot
mark
is
the
top
top
of
the
exterior
siding
there.
What
do
we
do
there?
A
Man,
I
think
we're
going
to
have
to
go
from
here
to
stuff
or
just
do
ladders
on
the
scaffolding,
because
this
this
is
kind
of
tough.
You
can
get
the
very,
very
top
like
the
last
very
top
row
if
you
like
reach
over
that
hanging
off
the
roof,
but
you
can
get
this.
This
is
our
kind
of
like
danger
zone.
Here
we
don't
have
without
scaffolding.
I
don't
see
how
we
can
do
that.
So
for
the
scaffolding,
what's
the
concept
okay
top
view,
so
this
is
front
top
view.
A
C
A
I
A
Yeah
but
after
we
put
them
on
what
do
we
do,
then
we
do
actually
have
interior
modules
that
are
sitting
in
a
pile
that
which
are
actually
already
eight
feet.
We
could
do
that,
there's
a
pile
of
pre-framed
2x4
modules,
so
how
many
would
we
need
to
actually
span
it
all
around?
I
mean
we
can
work
one
side
at
a
time
and
then
move
everything
over
yeah
these
you
can
carry
right
over
yeah
just
put
the
boards
on
it,
so
at
the
minimum.
We,
though
we
would
need
like
four
of
them.
B
A
A
The
boards
here,
like
the
2x12
spanning
10,
feet
that
that's
pretty
good.
We
got
a
bunch
of
those
boards
in
the
wood
storage.
We
can
use
that
so
any
other
ideas
on
that,
or
does
that
sound
decent?
And
then
how
do
you
get
to
the
eight
foot
mark
ladder
on
the
sides?
So
we're
going
up
there
and
we'll
see
from
there.
A
B
A
B
B
A
E
D
A
A
Cardboard
door
double
door,
that's
all
like
cutting
the
plywood
stuff
and
maybe
finishing
up.
If
there's
framing
missing
on
that.
According
to
the
the
document,
stair
support
subfloor,
I
don't
know,
I
think
subfloor
still
play
this
is
likely.
We
can
possibly
start
some.
No,
I
mean
this.
This
could
actually
go
quite
quickly.
We
can
definitely
do
a
lot
of
this.
Like
we'll
yeah,
we
can
do
a
lot
of
the
second
story.
Walls
already
yeah.
L
I
D
A
A
I
I
E
F
E
F
M
Ladders
and
you
know
you're
right
yeah,
maybe
I
misunderstood
your
idea,
but
move
the
scaffolding
up
to
the
bottom
of
the
boards
is
at
the
10-foot
mark.
If
that's
not
too
tall,
and
then
you
can
do
the
whole
first
floor
wrap
you
can
secure
the
top
of
the
wrap.
Take
your
scaffolding
off
and
now
you
can
just
use
ladders
to
secure
the
bottom
of
the
second
layer
of
wrap,
because
now
it'll
be
over.
E
A
Only
after
this
step
are
we
at
the
scaffolding,
the
first
siding
on
the
first
floor,
all
the
windows.
All
of
that
I
can
conceptualize
the
being
on
the
ground
and
wrapping
the
first
layer
doing
this
this
and
siding,
and
then
scaffolding.
So
we
do
this
on
ladders
and
stuff
this
this
here
would
be
scaffolding
here.
D
D
I
A
D
A
D
I
A
C
A
B
A
J
M
A
A
We'll
do
that
in
practice.
Maybe
it's
it's
a
little
complicated
but
but
yeah
this
complication
here
with
the
utility
channel,
like
we
always
had
that
piece
of
bottom
blocking
in
there
which
we're
avoiding
now,
that's
because
the
interior
siding
right
now
we're
going
to
put
battens
to
mount
it.
So
we
didn't
need
that
bottom
bottom
piece
of
blocking
like
right
there.
A
We
didn't
need
that
that
wood
there,
but
anyway,
that's
that's
the
that's,
basically
support
walls
for
so
that
these
joists,
which
are
bearing
all
the
weight
okay.
So
if
you
look
at
the
load
paths
here,
where
is
all
the
weight
of
this
yeah
all
the
weight
right
now?
As
you
see
this
this
one
stud
here
and
the
end
one
here.
A
That
this
one
and
that
one
are
bearing
all
this
weight
here.
So
if
this
these
screws
here
they're
going
to
be
the
first
to
go,
you
need
support
underneath
that,
to
the
tune
of
like
I
mean
the
rating
is
like
20
pounds
per
square
foot.
So
over
that
you
know
10
by
12
120
square
feet,
you're
holding
like
2
400
pounds
on
these
screws
here
and
screws
at
the
end
there
that's
not
going
to
do
it,
so
you
need
a
no.
A
D
A
I
A
Really
hard,
so
this
is
a
way
that
a
novice
can
do
stairs
with
high
quality
and
the
supports
there
are
just
one
on
one
side
and
one
on
the
other,
there's
nothing
in
the
middle,
which
means
that
also
like
we're
getting
out
the
squeaks
out
of
this
stair
set,
because
in
a
standard
set
with
three
stringers.
If
you
have
the
outside
inside
outside
inside
and
mid,
three
points
are
very
hard
to
get
perfectly
level.
A
Yeah
there
is
no
like
softening
anywhere
we're
not
using
carpet
or
anything
like
that,
so
we're
gonna
actually
put
a
little
sill
gasket,
underneath
that
so
one
for
squeaks
and
two
for
noise
reduction,
because
we're
trying
to
pay
attention
to
the
noise
like
right
now,
the
cdc
home
one
weak
point
is
an
open
space.
You
do
have
a
lot
of
noise.
Transferring
throughout
the
house.
K
D
A
A
G
B
A
A
A
Two
modules:
that's
it!
Okay,
we'll
do
the
stairs
in
the
other
house.
So
this
is
we
look
forward
to
that.
I
want
to
see
these
stairs
okay
yeah
in
this
house,
we're
going
to
quit
it
at
the
frame,
the
main
bulk
structure,
we'll
do
all
the
finish
like,
including
the
stairs
and
everything
in
the
other
house
yeah,
so
back
to
I'm
seeing
that
yeah.
So
that's
that
allows
us
to
walk
on
a
on
a
second
story.
There's
this
so
play.
L
C
A
A
There
is
an
answer
for
that.
Actually,
because
in
our
current
pad
we
made
this
big
structure.
If
you
make
just
the
16
by
32,
you
can
you
can
level
it
pretty?
Well,
okay,
novices
can
level
it
very
well,
and
then
you
have
the
very
clear
frame
boundary.
That's
the
very
precise
height
pretty
easily
to
a
quarter
inch
like
eighth
inch,
so
it
is
actually
doable
as
long
as
you
do
the
forms
right,
then
you
do
the
scree
board,
but
in
here
we're
like
in
the
middle.
D
A
A
I
D
I
A
That
anything
settles
like
no,
I
think,
by
the
way
to
the
house:
it's
not
right.
Now
we
don't
have
like
enough
weight
in
the
house
for
that
to
be
an
issue,
because
you've
got
that
whole
second
story
platform.
That's
pretty
stiff,
like
you
won't
it
might.
You
know
just
come
down
a
little
bit
here
and
there,
but
I
don't
think
it
will.
You
probably
won't
notice
and.
A
And
we're
taking
it
down,
okay,
right
right,
so
one
of
the
things
here
we're
quite
tolerant
on
all
these
kinds
of
mistakes,
because
we're
learning
and
it's
an
it's
an
education
thing
that
we're
recycling
every
quarter
and
doing
that-
which
I
think
is
a
good
idea.
I
mean
professionally
yeah.
We
would
not
do
it
this
way.
We
would
pay
more
attention.
We'd
start
with
the
proper
foundation
and
stuff
like
that,
so
yeah.
This
is
focusing
on
learning.
A
Yeah
yeah,
it
doesn't
have
to
be
up
there
and
it
actually
takes
a
lot
of
stress
off
us
because
right
now
like
to
fix
that
we'd
spend
a
bunch
of
time
and,
like
all
these
other
details
like,
for
example,
the
jagged
like
top
plate
there
I
mean
we
probably
want
to
fix
that
it
would
kill
all
our
time
and
all
that
so
we're
kind
of
a
little
more
relaxed.
So
we
can
have
more
fun
and
still
get
the
house
up
safely
very
safely.
G
D
A
C
A
I
A
A
It's
quick
double
door.
Putting
in
what's
the
steps
on
the
double
door,
you
got
to
cut
the
plywood
effectively
now
on
the
doors
those
have
to
be
cut.
As
far
as
the
sill
plate,
sill
plate
gets
cut
out
where
it
is
right
now
so
yeah
we
got
to
cut
it
out,
because
the
floor
actually
sits
on
a
sill
not
on
a
sill
plate.
A
I
A
A
M
A
A
I
A
A
A
Yeah
we'll
do
it
on
the
stairs,
not
not
important,
because
we're
not
going
to
use
it
to
live
in
there.
So
there's
also
plywood
clips
that
go
in
between
the
on
the
subfloor
yeah,
like
we
use
these
metal
clips
that
go
between
that's
for
the
plywood,
not
bending
over
time,
like
not
getting
off
this
kind
of
a
thing.
A
A
E
I
B
A
A
B
I
A
A
I
D
I
I
A
I
A
I
A
A
H
G
B
A
A
Aperture
starts
exactly
on
the
mid
stud
which
mid
studs
are
24
on
center.
If
you're
going
all
the
way
to
the
edge
of
that,
is
there
like
a
three-quarter
inch
yeah?
There
is
because
the
middle
of
it
is
four
feet,
but
if
you're
going
all
the
way
to
the
edge,
that's
where
that
three-quarter
inch
comes
from
yeah.
Okay.
What
about
the
other
side?
I
guess
that's
is
that
controversy?
Is
it
72
or
72,
and
three-quarter
you're
going
once
again
two
feet
on
center
middle
of
that
would
be
on
center.
A
A
G
I
A
C
A
D
L
A
I
C
A
A
The
end,
if
we
had
the
actual
stairs
back
there,
it
would
matter
actually,
because
we
have-
we
have
a
precise
finish
on
that
for
this
purpose,
without
we'll
do
it
properly
in
the
other
house
which
or
that
should
be
48.75
on
the
other
house.
Already,
we've
done
that
already
so
yeah,
it's
flush,
it's
a
little
detail,
because
that,
on
top
of
this
we've
got
thin
thin
flooring
and
you
want
to
have
those
details
pretty
accurate
there
yeah.