►
From YouTube: Large Printer, CNC Torch, and Plastic Shredder
Description
-----------------
What you see here at Open Source Ecology is an ambitious open source project for the common good. Join our development team:
http://opensourceecology.org/wiki/OSE_Developers
We run One Day Extreme Build workshops in many locations. Please put yourself on our map if you'd like us to host a workshop near you:
https://microfactory.opensourceecology.org/request-a-workshop/
Take a minute to subscribe to our email newsletter (updates, workshops, etc): http://bit.ly/1LtcM44
A
On
a
large
printer,
we're
moving
quite
quite
a
way
toward
the
with
the
belts.
That
was
a
big
issue.
I
mean
those
belts
just
stretching
like
crazy.
We
learned
that
you
really
need
the
steel
belted
belts
in
order
for
larger
axes
to
work
like
more
than
three
feet,
because
they
just
stretch
so
much
so
if
they
don't
have
the
steel
belting
in
them,
they're
just
too
stretchy
and
then
when
you
go,
it
has
huge
backlash.
That's
what
it
means.
A
Even
if
the
belt
is
pretty
tight,
we
couldn't
get
it
tight
enough
to
make
it
not
have
backlash
upon
reversing
direction.
We.
What
we
would
do
is
we
would
move
one
millimeter
back
and
there
would
be
no
motion
back,
so
it
was
at
least
like
one
millimeter
backlash
and
everything
else
and
that
that
was
solved
readily.
A
A
I
would
definitely
clean
it
up
because
we
gotta
in
order
to
get
the
top
performance
of
it.
We
could
do
that
and
there's
definitely
something
we
could
do
like
do
a
12
by
12
one
inch
that
weighs
40
pounds.
We
can
do
one
of
those
put.
Hang
it
by
weld
little
rings
on
the
side,
hang
it,
but
we
also
want
to
have
the
wires
go
straight
down.
So
there
is
no
no
angles
and
that's
easy
to
do.
We
can
do
I
thought
about
that.
A
A
A
You
know,
because
there's
four
motors
you
want
to
make
sure
that
every
print
you're
getting
that
all
equalized
so
go
down
bottom
out
on
a
structure.
That's
even
that
could
be
even
like
the
table.
We
have
that
little
metal
table
like
if
you
just
bottom
it
out,
and
you
set
that
really
even
then
you
know
you're
bottomed
out.
So
what
you
do
is
you
keep
moving
down
and
even
like?
A
A
What
we
do
is
we
go
all
the
way
to
the
max
until
we
hit
the
end
where
the
end
is
at
a
equal
position
and
we
let
it
click
belt
skip
a
couple
of
times.
So
we
know
it's
at
that
place
and
then
we
move
it
back
and
we
know
it's
actually
been
aligned
to
to
the
same
place
so
that
the
same
kind
of
concept
you
want
to
use
for
the
z
here
and
actually
for
the
the
y's
too,
and
we
have
we
want
to
do
that
within
the
the
firmware
too.
A
A
C
C
A
A
A
X
is
a
single
axis,
so
we
don't
need
to
do
that.
Okay,
we
just
have
a
one
one
end:
stop
there
there's
no
paralleling
issues
there.
The
the
issue
comes
in
when
you
have
parallel
axes
that
you
know
they
have
to
be
moving
equally,
so
even
things
like,
maybe
the
belt
is
tensioned
like
a
little
more
on
one
axis
than
the
other,
and
it
goes
off
a
little
bit.
A
Well,
maybe
that
builds
up
over
time,
so
it's
safe
to
just
bottom
it
out
or
max
it
out
on
the
y,
and
then
you
know
you're
at
the
a
good
place,
and
we
already
did
that.
So
that's
something
that
would
go
into
the
start
g
code,
so
in
a
startup
startup
sequence
before
you
start
probing,
you
might
want
to
do
this
to
make
it
happen.
Okay,
so
that's
just
about
the
mechanics
we're
close
to
that
like
once
we
get
this
done
now.
A
The
other
thing
is,
we
have
to
change
actually
the
firmware,
because
right
now
we're
set
up
for
like
whatever
like
200
by
200
bed.
Well
150
and
the
firmware
does
not
it
messes
up
the
motion.
You
have
to
tell
it
in
firmware
that
you've
got
a
meter
bed,
because
when
it
does
homing
it
homes,
no
more
than
150
millimeters,
so
it
just
stops
there.
It
never
gets
to
the
end.
Stop
it
thinks
it's
on
a
small
bed,
so
it
thinks
it
should
stop,
because
it
probably
hit
the
end
stop
already.
A
We
got
to
just
change
the
z
dimension.
How
do
you
do
that?
Whoever
wants
to
do
that,
but
this
is
within
nothing
what
to
do
with
cure.
This
is
arduino
environment
where
you
would
open
up
your
your
code.
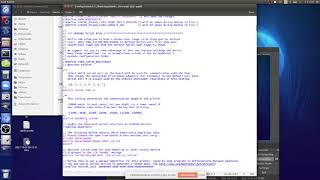
This
is
called
configuration
h
within.
So
if
you
download
marlin
okay,
let's
take
a
look
at,
say:
d3d
universal,
2,
download,
marlin,
open
it
up
with
an
arduino
environment.
A
A
A
A
C
C
A
A
B
A
Okay,
well
something's
weird
here,
but
configuration
h
is
the
file
that
you
want.
So
you
want
you'd
want
to
open
it
up
in
text
editor,
and
it
has
the
settings
here.
There's
a
there's
documentation
if
you
start
to
build
a
new
printer
and
you
want
to
do
all
the
kinds
of
different
settings
there's,
it
should
be.
It's
well
documented
on
a
wiki
somewhere
like
configuration
h,
how
do
you,
what
are
all
the
parameters
that
are
relevant?
But
what
we
want
right
now
is
the
bed
size,
3d
printer
software.
A
A
A
A
So
here
you
gotta
change
this
to
a
thousand,
and
I
think
that's
it
at
this
point,
because
otherwise
we
paid
attention
to
like
the
end
stop
is
that
the
x
min
the
y
end
stop
is
at
y
max.
So
actually
the
configuration
that
we
have
in
front
of
the
on
the
printer
is
if
we
look
west
meaning
towards
like
look
west
from
the
east
side,
that's
like
x,
y,
so
where's,
the
end.
Stop
going
to
be
x.
Min
is
going
to
be
on
this
side.
A
A
A
A
Yeah,
but
you
can
move
backwards
after
you
go
up,
but
not
to
the
negatives
thing.
Is
there
the
first
thing
you
got
to
do
when
you're
testing
is
do
the
home,
auto
home,
and
that
way
you
can
once
after
that,
it'll
allow
you
to
move
the
entire
bed
everywhere.
But
pending
has
changed
here.
So
you
actually
get
the
full
range
of
motion,
so
we
should
take
a
rough
measurement
in
centimeters.
A
The
end
stops.
I
wanted
to
put
them
at
the
location
where,
if
you're
triggered
at
at
the
home
position,
you'd
be
at
those
at
the
corners,
so
the
x
minimum.
So
it's
right
on
the
edge
on
the
x
and
it's
right
on
the
edge
of
the
y
at
the
at
the
back,
so
that
when
you
print
you
know
you're
right
at
the
bed,
you
don't
have
to
like
give
it
extra
steps
which
would
happen
and
start
g-code.
It's
like
you
would
say,
move
over
until
you
reach
the
bed
effectively.
A
You
know
where
the
bed
is
compared
to
your
end,
stops,
but
end
stops
right
now
are
right
at
the
bed
right
at
the
corners
of
the
bed,
so
we're
good.
So
that's
that's
all.
We
need
to
know
on
that
now
pending
that
we're
ready
to
roll
like,
but
I
would
so
definitely
the
the
weights
we'll
clean
that
up.
I
can
work
on
that
I'll.
Take
the
slabs
and
cut
them
on
an
ironworker
and
weld
little
tabs
on
them
and
do
that.
A
A
A
I
think
we
can
just
go
with
that,
because
I
mean
especially
if
the
belt
pinch
holds
them,
maybe
just
at
a
little
distance
it
might
work
just
right.
The
other
thing
I
was
thinking.
If
that
does
not
work,
we
can
think
about
actually
modifying
those
pulleys.
As
in
there's,
you
could
slide
that.
I
think
you
can
slide
that
tab.
That's
on
top.
We
have
to
look
at
it.
The
worst
case
is
you
cut
it
cut
it
in
half
and
then
put
a
second
one
on.
A
C
C
A
A
A
B
A
A
B
A
A
Oh
yes,
yes,
a
good
good
point
so
for
bed
leveling,
we
have
a
pro
being
at
a
little
section.
Yes,
okay,
let's
actually
go
back
into
take
a
look
at
that
real
quick
because
that
you're
right
and
what
do
we
want
to
do
now?
We
probably
want
to
do
like
nine
point,
like
poke
it
every
foot,
because
now
we
got
a
huge
surface
that
we
need
to
correct
for.
A
A
A
Well,
let's
call
it
make
an
easy
number
like
a
hundred
so
10
centimeters
in
and
then
here
we
would
go
all
the
way
to
900
and
then
we'd
go
again
to
100
for
the
front
and
900
at
the
backs,
because
we
got
a
meter
bed
so
something
like
that
and
then
it
would
select
three
points
between
those
limits.
So
that's
that's
what
we
got
to
do
there.
C
A
A
A
Okay,
that
solves
that
on
a
shredder,
actually
hey
those,
we
got
two
motors
ready
to
go,
so
I
would
say
brad.
If
maybe
you
could
pick
that
up,
but
actually
jeff
needs
help
on
taping.
So
do
that
after
you're
done
with
that
yeah,
let's
go
out
there
and
pick
them
up
because
then
we
can
start
setting
up
a
table
and
doing
all
the
shredder
yeah.
A
Even
so,
this
is
actually
going
to
get
heavy
like.
So
that's
another
consideration
there
yeah
so
shredder.
We
can
go
on
that
on
the
film
and
let's
set
up
the
table
to
to
work
on
a
filament
maker.
We
should
get
those
parts
out,
so
we
can
actually
start
playing
with
them
and
actually
getting
it
all
together.
But
yeah
the
belts
and
weights
are
the
two
critical
things
just
to
make
sure
like.
Okay,
we
can
get
this
thing
rolling.
We
can
actually
now
go
all
the
way
up
and
down.
A
A
So
the
idea
was
so:
let's
go
into
the
dock
so
so
torch
table.
This
is
useful
to
document,
because
it's
a
cool
way
to
hang
stuff,
but
let's
duplicate
slide
here
so
so
axis
mounting
on
tubular
frame
because
the
holes
we
have
one
inch
holes
but
there's
two
beings.
So
like
it's
kind
of
inconvenient,
you
have
to
use
like
a
one
inch
bolt,
but
I
mean
how
do
you
mount
our
little
axis
with
a
one
inch
bolt
or
something
also
so
axis
mounting?
A
So
you're,
looking
from
the
end,
how
do
you
mount
it?
So
the
frame
is
going
to
be
the
tube
that
you're
mounting
to
is
going
to
be
a
vertical
tube
right,
because
it's
that
big
vertical
tube
we
have
so
this
is
your
4x4
tube
with
the
holes
in
it.
But
we
just
said:
okay,
let's
just
take
a
piece
of
angle
and
make
a
bracket
like
this,
so
just
go.
A
B
A
A
A
A
A
A
B
A
Well,
not
really,
because
you
got
two
points
and
they
just
got
to
be
at
the
same
height
yeah
if,
if
they
kind
of
are
too
wide
put
a
little
shim
in
there
to
press
it
against,
like
you
know
that
little
space
there,
if
it's
not
accurate,
just
a
little
shimmy,
so
I
mean
either
way.
But
I
think
this
is
much
easier.
It's
this.
We
already
got
the
little
pieces
cut
and.
B
B
A
A
A
A
A
A
A
A
Yeah
any
questions
on
the
workhead,
so
so
priorities
get
that
motion
on
a
large
printer,
we're
so
close,
and
I
would
look
forward
to
a
nice
big,
impressive
structure
printed
in
vase
mode,
where
it
goes
like
spirals
up
and
along
so
it'll,
be
a
pretty
quick
print.
In
fact,
we
could
just
like
go
make
it
go
fast.
Man
like
like
this
thing
can
go
fast,
so
we'll
see
how
fast
it
can
go
without
losing
quality.
A
C
Just
maybe
one
point
to
consider
if
we
at
the
beginning
want
to
still
constrain.
You
know
the
dimensions
a
bit
more,
because
if
you're
debugging,
you
know
it
just
takes
a
long
time.
Let's
say
you're
bottoming
without
it
takes
quite
a
while
to
go
all
the
way
down
moving
up
again,
then
it
goes
all
the
way.
The
axis
to
home.
A
At
that
point,
we
would
want
to
go
into
marlin
and
get
those
speeds
there.
There's
like
there's
homing
speeds.
All
those
I
believe
are
in
configuration
h.
So
if
you
parse
that
see,
if
you
can
up
one
of
those
values,
I
know
that
was
an
issue
like
once
we
got
into
those
12
and
18
inch
beds
where
actually
yeah.
I
speeded
up
the
homing
part.
A
A
C
B
A
Yes,
well,
you
got
it.
You
got
to
stop
at
close
to
the
tip.
You've
got
like
two
or
three
millimeters
that,
like
probably
like
two
millimeters
at
the
tip,
you
got
to
stop
before
you
bust
through
the
hole.
No
actually
there's
two
things
you
can
do.
One
is
to
remount
the
whole
neck
to
a
larger
diameter,
filament
size.
So,
for
example,
what
I
did
was
I
had
like
1.75
nozzles
and
I
reamed
it
out
with
a
three
millimeter
bit
to
make
it
into
a
three
millimeter
nozzle.
A
Now,
as
far
as
the
tip
the
tip,
you
only
have
to
go
the
actual
aperture
it
narrows
down
like
it
has
the
filament
tube
and
then
it
narrows
down
to
the
nozzle.
So
there
you
just
got
to
puncture
a
couple
of
millimeters.
That's
easy,
but
yeah,
let's
do
like
the
limit
is
going
to
be
the
heating,
how
much
we
can
heat.
So
if
you
press
the
1.2
pretty
hard,
you
probably
get
to
the
limit
of
how
fast
you
can
heat
so
going
to
a
larger
nozzle,
actually
does
not
help.