►
Description
Let's discover how to adapt an easy, popular and beloved Arduino project to Rust! The obstacle avoiding robot is perfect to discover no-std Rust and make a cute robot to play with.
More at https://rustfest.global/session/21-build-your-own-(rust-y)-robot/
B
Hello,
I'm
isata
mega
just
your
regular
computer
science
student
and
I
live
in
sweden.
I
discovered
draws
this
summer
and
immediately
fell
in
love
with
it
like
a
lot
of
you
in
the
audience,
I'm
pretty
sure.
So,
let's
just
start,
this
presentation
will
be
about
making
a
robot
in
rust
and
working
with
no
std,
it's
a
fun
project
to
try
for
yourself
or
with
children.
It's
also
very
easy.
The
most
intimidating
part
is
just
to
get
started
and
order
stuff
from
the
internet.
B
I
used
to
create
a
viral
in
that
project
and
I
got
a
lot
of
help
from
reichs.
Who
is
the
creator
of
this
grade,
so
it
has
great
documentation,
a
lot
of
templates,
how
to
start
your
own
project
and,
of
course,
how
to
configure
your
cargo,
your
cargo
file
and
basic
templates,
but
it
also
has
many
examples
for
every
arduino
board.
B
B
The
component
first
with
time
you
will
notice
that
all
components
are
standard
and
pretty
much
the
same,
but
the
easiest
way
to
get
started
is
just
to
buy
a
kit.
Many
are
available
on
banggood,
ebay
or
amazon.
So,
if
you
just
google,
smart
car,
arduino
or
electronic
smart
car,
you
should
see
a
bunch
of
suppliers
from
which
you
can
choose
the
cheapest
start
at
around
10
or
15
euros.
B
B
There
is
usually
schematics
that
follow.
You
must
be
very
careful
to
follow
them
and
to
plug
things
as
they
look
like
as
they
look
on
the
image,
but
the
most
important
is
to
make
sure
that
the
circuit
is
grounded.
That
means
that
all
ground
cables
are
connected,
that
the
circuit
has
a
common
ground.
B
If
not
bad
things
will
happen,
but
things
also
called
undefined
behavior.
So
if
you
are
here
and
nothing
is
working-
and
you
are
getting
frustrated
just
check,
if
everything
has
a
common
ground-
I
don't
know
is
ideal
to
begin
this
kind
of
project.
They
are
relatively
affordable
and
there
are
tons
of
tutorials
on
robot
making
with
arduino.
B
What
is
great,
with
the
brand
is
the
ecosystem,
all
the
libraries
and
the
ide,
but
we
can't
use
that
in
frost
and
that's
where
average
has
you
covered.
Arduino
is
using
a
8-bit
microcontroller
called
avir
from
the
avir
family.
I
meant
the
one
on
the
uno
and
the
nano
is
at
the
mega
328p,
you
can
access
it
with
gpio,
which
has
the
general
purpose:
input,
output,
pins,
those
little
holes
and
over
protocols.
B
B
B
I
will
of
course,
show
you
what
I
mean
with
an
animation
at
the
end
of
this
slide,
so
the
servo
motor
is
a
simple
rotating
motor,
but
we
do
not
need
it
to
go
all
the
way
to
obtain
the
rotation,
so
we
can
think
of
it
as
a
light
dimmer,
we
will
use
something
called
pulse
width,
modulation
if
you're
having
some
nice
romantic
dinner
with
your
partner,
you
need
to
control
the
light
right,
and
this
is
what
we
are
going
to
do.
We
are
going
to
control
the
duty
cycle.
Duty
cycles.
B
Are
nothing
mystical,
it's
the
fraction
of
time
where
the
signal
is
active.
In
other
words,
we
are
going
to
tell
the
microcontroller.
How
do
we
want?
How
long
do
we
want
the
signal
to
be
active
now?
Pre-Scaling
all
microcontrollers
have
an
internal
clock
and
the
internal
clock
of
the
atamega
328p
is
16
megahertz.
B
B
B
B
So
let's
go
and
look
at
some
code,
so
this
is
the
code
for
the
servomotor,
so
first
the
magic
numbers
that
we
calculated
together
so
to
center
it
we
divide
the
time
that
we
found
in
the
data
sheet
with
the
prescaled
period
times
the
size
of
the
register,
and
then
we
declare
a
mutable
timer,
a
mutable
pin
you
note
that
the
timer
is
pre-scaled
with
a
factor
of
1024
and
then
the
mutable
pin
is
d3
and
then
we
enable
it.
So
how
do
we
know
how
to
do
that?
B
We
can
go
into
documentation,
and
you
can
see
here
that
I
just
followed
the
documentation.
Please
note
that
eric's
is
using
timer,
0
and
pin
d5
and
it's
very
important
to
choose
them
right
because
they
are
hardwired.
Actually.
So
this
is
my
big
er
number
three,
so
timer
two
that
I'm
using
is
hardwire
to
pd3.
B
So
if
we
go
back
to
the
code,
so
here
you
see
that
I
just
have
a
mutable
delay
to
make
the
rotation
not
too
fast,
then
we
just
set
the
duty
to
24
sorry
to
2156,
so
we
set
it
right.
That's
why
we
use
constants.
So
we
set
it
right.
We
wait
a
bit.
We
set
it,
we
center
it
again
and
then
we
wait
a
bit
400
milliseconds,
and
then
we
put
it
to
the
left
and
I'm
going
to
show
how
it
looked.
B
B
B
B
B
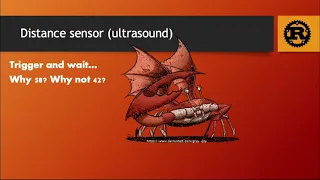
This
is
the
code
for
the
sensor,
so
we
are
using
timer
1,
which
is
16
bit
and
we
are
pre-scaling
it
with
a
factor
of
64.
Here
we
declare
a
mutable
trigger
that
I
connected
to
pin
d12
and
configured
into
output.
All
pins
are
output
by
default.
Oh
sorry,
input
by
default.
That's
why
you
need
to
configure
it
into
an
output,
and
then
you
need
to
to
declare
an
echo
I
that
I
connected
to
pnt11.
B
B
B
Then
we
have
to
manage
an
eventual
error
with
the
hardware,
so
if
we
have
waited
for
more
than
50
000
ticks,
it
means
that
we
have
waited
for
more
than
200
milliseconds.
So
this
is
probably
an
error,
so
we
need
to
use
to
exit
the
loop
since
rust
is
is
allowing
us
to
name
loops.
We
just
write
continue
to
where
we
continue
to
the
outer
loop.
B
If
not,
if
we
have
detected
something,
we
just
write
zero
to
the
timer
register,
and
then
we
monitor
how
long
the
echo
is
high
means
that
we
don't
do
anything.
While
the
echo
is
high,
then
we
get
the
number
of
ticks
in
the
timer
register,
divided
by
the
magic
number
58
and
multiply
it
by
4,
because
the
unit
is
4
milliseconds,
and
then
we
wait
a
hundred
milliseconds
between
two
sound
waves,
so
100
milliseconds
is
corresponding
to
25006
and
at
last
we
print
on
the
screen.
How
far
we
are
from
the.
B
B
B
B
B
B
B
To
get
the
cargo
dome
configuration,
you
can
again
go
to
average
documentation
here,
and
everything
is
explained
in
point
five.
This
is
what
you
need
for
your
cargo
file,
so
we
can
go
back
to
the
code,
so
we
are
going
to
because
we
are
in
no
std.
We
are
going
to
need
to
import
a
panic
handler
so
panic
health
here
and
those
two
are
the
crates
that
I'm
importing
from
average
to
make
it
work.
B
B
B
B
Downgraded
means
that
they
can
be
put
in
a
mutable
array
that
we
can
send
to
other
modules
to
make
to
modify
them,
but
main
is
still
wheels
is
still
the
owner
of
those
wheels
and
then
the
infinite
loop
that
is
going
to
control
a
robot.
It's
still
called
outer
loop
and
it
starts
with
the
servo
unit
that
is
rotated
to
the
front,
and
then
the
wheels
are
going
to
move
forward.
B
We're
reading
the
value
with
the
sensor
continuously.
But
if
the
value
is
smaller
than
the
minimal
distance
that
we
decided,
then
we
are
going
to
stop
the
wheels
I'm
going
to
show
a
bit
later
how
to
stop
the
wheels
and
then
check
the
distance
at
the
right.
We
are
going
to
use
the
to
turn
the
servo
to
the
right.
Get
the
value
here,
wait
between
two
action
and
then
do
the
same
for
the
left,
and
the
rest
is
just
a
if
else
sandwich.
B
If
the
value
on
the
left
is
bigger
than
the
value
on
the
right
and
if
it's
an
acceptable
distance.
Like
if
there
is
not
another
obstacle
here,
then
we
are
going
to
turn
the
wheels
left
and
then
continue
to
the
outer
loop.
That
is
go
forward
else.
If
the
value
on
the
right
is
better,
then
we're
going
to
turn
right
and
then
continue
to
the
outer
loop
else,
we're
just
going
to
go
backwards
and
turn
right,
so
I'm
going
to
show
the
motor.
I
think
this
is
the
only
thing
that
I
didn't
show.
B
B
B
B
And
to
turn
right,
you
need
to
stop
the
wheels.
That
is
exactly
the
I
mean
to
to
stop
the
wheels
you
just
need
to
set
all
the
pins
low
right.
I
just
re
removed
it
from
the
presentation
for
a
clarity
and
to
turn
right.
You
have
to
set
the
the
left
forward,
wheel,
high
and
the
right
forward
will
low
for
an
amount
of
time.
So
if
you
move
the
left
wheel,
the
robot
is
going
to
turn
to
the
right.
B
You
need
to
know
where
to
find
help.
Actually,
if
there
is
one
thing
you
must
get
from,
this
top
is
where
to
find
help.
The
ros
community
is
very
welcoming
and
one
of
their
core
values
is
to
provide
a
safe,
friendly
and
welcoming
environment.
This
is
a
community
in
which
I
felt
safe
and
comfortable
from
day
one.
You
can
ask
any
question
on
the
community
forum,
then
the
rust
embedded
working
group
is
also
living
by
those
values.
Overall,
people
have
been
providing
me
with
technical
consultancy,
as
well
as
psychological
support.
B
B
C
C
C
D
D
D
D
D
So
in
the
chat
you
actually
mentioned
that
you
were
kind
of
cringing,
because
there
were
some
things
you
would
have
liked
to
correct.
Do
you
want
to
do
so
now?
Just
so
we
have
it.
You
know,
like
you
notice
these
things,
you
don't
need
any
angry.
There's
not
going
to
be
any
angry
youtube
comments,
but
you
know
our
community
is
great,
but
yeah.
C
B
D
B
You
know
at
some
point
I
say
something
about
this:
the
sound
and
then
I
I
jump
from
340
to
334
thousand
and
it's
because
you
know
it
was
really
weird.
It's
because
I
was
looking
in
meters
and
then
in
centimeters,
and
I
forgot
to
do
that
to
explain
it
and
then
oh,
I
don't
even
know
what
to
say,
and
then
I
I
saw
that
in
my
comments.
B
D
I
mean
if
it's
fair
at
all,
I
think
it
was
very
clear,
like
I
know
we're
we're
multicultural
and
everything,
so
everyone
might
not
be
might
might
not
be
on
the
same
technological
or
or
english
speaking
level,
but
I
actually
thought
the
two
things
you
mentioned
were
fairly
clear.
So
you
know,
but
thank
you
for
clearing
that
up
too.
B
Yeah,
maybe
I
should
not
speak
about
all
the
errors,
but
you
know
speak
about
the
community
because,
instead
of
thinking
about
the
bad
things,
the
the
good
things.
That's
true
that
when
I
joined
the
ross
community,
it
was
just
the
only
time
that
I
used
my
my
own
name
and
my
own
picture
on
the
internet,
and
I
never
do
that
because
you
know
you're
always
afraid
of
me
comments
and
abuse
and
but
yeah
like
from
day
one.
It
never
happened.
B
D
That's
amazing,
you
know,
I
know
people
who've
been
in
the
industry
for
years
and
years
and
they're
too
scared
to
make
prs
to
put
their
stuff
out
there.
So
that's
really
cool,
it's
so
great
that
you
actually
went
for
it
and
that
you
felt
safe
and
comfortable
to
do
so.
I
hope
you
know
that's
why
I
love
your
mentoring
work
as
well.
You
mentioning
that
and
you're
sharing
so
much
with
us,
because
you're
encouraging
other
people
to
feel
safe
to
go
for
it
to
also
try
it
and
that's
amazing.
So
thank
you
so
much.
D
D
B
Yeah,
okay,
so
what
I
really
wanted
to
convey
with
this
talk
was
it's
it's
not
that
hard
you
have
to
have.
You
have
to
have
help
and
if
you
have
the
right
help,
it's
not
it's
not
that
difficult
and
the
most
difficult
is
really.
How
do
I
start
with
it,
and
this
is
what
I
wanted
to
show
in
my
talk.
How
do
you
get
started
and
then
I
mean
I'm
pretty
sure
all
of
you,
you
have
you
have
your
own
idea.
You
have
your
own
you're
on
your
own
objective,
you
you
have.
B
Crazy
stuff
that
you
want
to
implement,
I
was
talking
robots,
so
I
don't
know
every
time
I
speak
to
people.
Everybody
comes
up
with
with
great
things,
so
I
just
wanted
to
show
how
yeah
the
components
that
I'm
using?
How
can
you?
How
do
they
work,
so
you
can
put
them
to
use?
I
don't
know,
maybe
you
want
to
have
a
fridge
that
comments
if
you
open
it
at
night,
so
yeah.
This
is
something
you
can
do
with
with
this
stuff,
but
when.
D
D
B
B
B
D
D
Oh,
that's
just
part
of
being
the
community
and,
and
part
of
you
know
getting
to
partake
in
this.
So
I
think
I
wanted
to
jump
onto
more
technical
questions,
but
I
think
we
actually
have
to
go
to
the
next
talk,
but
I
mean
you
got
to
show
us
the
next
project.
So
that's
super
cool.
Thank
you.
So
much
for.