►
Description
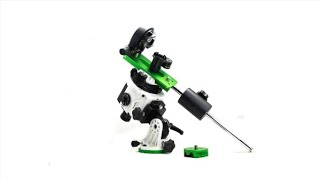
Our fellow member Steve Sells tells us about his Sky Watcher Star Adventurer & how he navigates the night skies. We follow Steve's presentation with some general discussion.
B
A
B
A
C
C
C
C
C
The
picture
here
was
taken
about
60
frames
with
a
16
millimeter
lens.
I
have
a
nikon
d5600
with
a
crop
factor
1.5,
so
that
gives
a
full
frame
equivalent
of
24.
You
divide
that
into
500.
You
get
20
seconds,
but
I
picked
10
seconds.
I
like
rounder
stars
from
longer
exposures
or
longer
focal
lengths,
you're
going
to
need
tracking
to
compensate
for
the
rotation
of
the
earth.
C
C
C
I
think
that's
that's
enough.
For
the
moment
the
ball
head.
Adapter,
you
see
here
does
come
with
this
star
adventure.
The
ball
head
doesn't
for
me.
I
just
unscrewed
the
ball
head
from
my
tripod
and
used
that
and
then
I
had
a
tripod
with
nothing
on
it.
So
that's
where
I
screwed
on
the
equatorial
wedge,
essentially
putting
this
the
star
adventure
in
between
the
tripod
and
my
ball
head.
C
C
C
Here's
the
the
full
configuration
you
buy,
the
pro
version,
you
see,
we've
added
a
full
length,
dovetail
and
a
declination
bracket
and
a
counterweight,
and
you
could
put
a
ball
head
on
it,
but
I
I
don't
recommend
it
unless
you're
just
using
it
as
a
tripod,
in
which
case
you
can
put
the
put
the
counterweight
down,
and
essentially
your
ball
head,
sits
on
the
top
of
the
rig
and
that's
pretty
good
for
some
kinds
of
landscape.
Astrophotography.
C
About
the
blue
masking
tape,
that's
for
holding
the
the
zoom
setting,
which
in
this
case
is
200
millimeters
on
a
70
to
300,
millimeter
lens
this
camera
and
the
lens
I
bought
for
for
nature
photography.
But
it's
been
getting
a
lot
more
use.
Since
I
took
up
astrophotography
here's
an
an
early
example
taken
with
that
configuration.
C
C
C
I
don't
use
this
calculator
there's
a
an
app
available
for
your
phone
called
skywatcher
sam
app
sam
stands
for
star
star
adventurer
mini
it's
a
slightly
different
model,
but
you
it
shows
you
exactly
what
you
should
see
in
the
when
you
look
in
the
in
the
eyepiece.
It
shows
you
a
clock
face
with
a
dot
for
the
position
of
polaris,
and
so
you
just
match
match
up
what
you
see
in
the
in
the
telescope
with
what
you
see
on
the
app
and
I
never
did
use
this.
C
C
C
C
C
One
of
the
problems
I
had
when
I
oh
I
wanted
to
mention
about
mark
streibeck.
He
has
a
blog
called
diaries
of
of
a
rookie
and
the
blog's
tagline
is
astrophotography
combined
some
of
my
major
passions
in
life,
mathematics,
astronomy,
computers
and
buying
gadgets
that
really
helped
to
put
into
perspective.
For
me
what
the
hobby
is
about,
it's
about
whatever
you
want
it
to
be
about.
A
C
C
C
So
what
it
means
is
you
can
turn
the
disc
relative
to
the
hub
with
your
hand,
which
you
see
I'm
doing
here,
and
you
set
that
to
you.
Essentially,
you
have
to
calibrate
it
every
time
you
set
up
your
rig
and
there
are
other
uses
for
it
too,
but
you
don't
need
to
you.
Don't
need
to
have
a
computer
to
take
advantage
of
this
I'll
talk
about
computers
later.
C
C
Seder
is
a
fairly
bright
star,
so
it
shouldn't
be
that
hard
to
find
at
a
dark
site,
but
at
the
site
the
sky
didn't
seem
to
look.
Look
much
like
the
star
chart.
I
expected
it
to
the
stars.
Look
a
lot
different
on
a
chart
than
they
do
in
the
actual
sky,
they're
tinier
for
one
thing
and
it's
harder
to
tell
one
magnitude
from
another
anyway,
I
I
did
the
best
I
could.
I
thought
I
had
it.
The
next
day
I
started
processing
the
sub
frames.
C
So
a
major,
a
major
mistake.
I
was
brand
new
to
this.
If
I
had
had
this
declination
circle,
I
would
have
nailed
the
declination.
You
pointed
at
a
known
star,
look
up
the
declination
set
this
circle
to
match
the
the
declination
of
the
star.
That's
in
the
middle
of
your
your
camera's
field
of
view,
and
then
you.
C
C
C
I
finally
just
gave
up
on
the
original
wedge
in
despair.
I
thought
it
was
too
flimsy
and
it
had
a
very
hard
time
holding
the
altitude,
the
ins
instead
of
a
proper
lock
on
the
on
the
latitude.
It
had
a
and
a
clutch
and
it
seemed
like
you
could
never
get
it
tight
enough
to
keep
it
from
gradually
sliding
down,
and
this
thing
had
had
recently
come
out.
It
is
weighs
about
three
times
as
much
as
the
one
that
comes
with
it
and
it's
about
three
times
as
expensive
too
but
boy.
C
C
C
It
also
has
three
usb
3.0
ports,
it
has
ethernet
audio
input
and
output,
and
it
has
it
has
arduino
capabilities
which
I
haven't
used,
but
it
is
kind
of
a
maker's
computer
and
it
also
came
with
a
small
ac
power
supply
and,
of
course,
windows.
10
pro
the
whole
thing,
including
the
windows
10
pro
and
the
shipping
was
228
dollars.
That's
cheap
for
such
a
lot
of
power
in
the
blue
bag
hanging
from
the
bottom
of
the
tripods
center
pole
is
is
a
power
bank,
and
this
was
just
a
great
choice.
C
C
C
C
Here's
a
here's
my
display,
it's
also
my
mouse
and
keyboard
and
the
the
software
is.
The
computer
runs
the
type
vnc
server
which
is
free
and
the
tablet
runs
the
real
vnc
viewer
app
and
then
the
tablet
connects
to
the
router
via
wi-fi.
I
just
got
the
router
about
a
month
ago
I
had
had
a
lot
of
trouble
with
wi-fi
direct
on
the
computer.
C
C
C
C
C
C
The
first
thing
it
does
is
it
takes
a
picture
and
it
plate
solves
it,
and
from
that
it
knows
where
the
where
the,
where
you
are
relative
to
the
to
the
actual
north
pole,
and
it
takes
another
picture
after
you,
after
asking
you
to
rotate
them
out.
I
I've
skipped
one
screen
on
the
previous
screen.
It
says
that
down
here
towards
the
bottom
in
bright,
yellow
it
says
next,
you
click
that
it
takes
you
to
another
screen.
C
It
says
turn
your
mount
by
about
90
degrees,
60
to
90
degrees,
doesn't
have
to
be
accurate
and
there
it
takes
another
picture
and
by
comparing
the
two
pictures
it
can
calculate
where
you
are
pointing
so
now
it
knows
where
the
north
pole
is.
It
knows
where
you're
pointing
and
it
gives
you
your
error,
and
it
tells
you
which
way
you
need
to
move
the
mount
here.
You
see
it's
telling
me
to
move
the
amount.
C
C
C
C
There
were
other
things
that
the
computer
could
do
for
me,
which
I
hadn't
realized
yet
but
you'll
you'll
see.
Most
of
you
know
what
the
phd
phd
to
guiding
is,
but
essentially
it's
set
up
here
to
take
a
picture
every
three
seconds
and
it's
tracking
a
star
that
it
has
selected
and
it's
checking
to
see.
Have
you
moved
away
from
that
star
and,
if
you're
in
it,
since
the
since
the
rig
has
only
one
motor,
it
can
only
make
corrections
in
right
ascension,
but
those
are
the
important
ones
to
get
your
declination.
C
C
C
C
C
It's
six
and
a
half
degrees
by
10
degrees
through
the
rectangle
around
this
on
the
star
chart,
and
then
I
moved
I
can
move
the
star
chart
underneath
the
rectangle
with
the
mouse
until
I
get
it
composed
the
way
I
want
it,
and
then
I
usually
what
I
do
next
is.
I
pick
out
a
star:
that's
real,
close
to
the
midpoint
that
there's
a
little
tiny
red
plus
in
the
middle
of
that
rectangle,
and
I
pick
out
a
star
there.
C
C
C
So
you
can
see,
I
was
pretty
darn
close,
I'm
off
by
about
26
minutes
in
right,
ascension,
I
you
can
see.
I
have
calculated
that
by
hand,
so
I
take
that
then
to
the
next
step,
which
is
to
make
a
correction
whoops
one
of
the
things
that
you
can
do
with
apt,
which
is
a
program
that
runs
it's
kind
of
the
central
program
that
I
use
and
it
coordinates
with
a
number
of
other
programs,
namely
the
phd2
and
stellarium,
and
all
skype
plate
solver,
and
it
coordinates,
and
it
also
runs
the
camera.
C
So
what
I
did
was,
I
I
clicked
on
show
and
it
passed
the
past.
The
celestial
coordinates
from
the
plate,
solving
and
the
orientation
and
so
forth
to
stellarium,
and
I
bring
up
stellarium
and
there's
a
rectangle,
that's
where
I'm
actually
pointed
when
I
took
the
picture
and
you
can
see
the
star.
The
bright
star
I
picked
out
by
eye
turns
out
to
be
denim
and
it
doesn't
matter
whether
you're
close
or
not,
if
you're
off
by
30
degrees.
This
is
not
a
problem
in
this.
This
technique
that
I've
worked
out.
C
C
C
C
C
Our
angle
is
not
something
that
we
that
I
hear
much
in
our
meetings.
I
guess
that's
from
an
earlier
era.
That's
when
I
was
in
college
and
had
a
little
exposure
to
astronomy.
I
knew
what
our
angle
was
because
that's
how
you
set
your
telescope
right,
ascension
and
our
angle
are
very
closely
related,
but
you
can
see
that
circle
there
is
is
calibrated
in
minutes
and
you
see
the
the
minor
marks
on
the
circle
are
every
10
minutes
and
that
that
circle
doesn't
move.
C
C
So
I
took
the
middle
of
the
lower
the
lower
circle,
which
is
halfway
between
11
and
12..
That's
new
year's
eve,
and
I
use
that
as
an
index
pointer.
It
doesn't
matter
what
you
use
as
long
as
you
use
the
same
always
use
the
same
one.
It
is
halfway
between
11
and
12.,
so
this
is
currently
set
to
our
angle.
Zero.
C
C
C
C
C
This
lower
circle
moves
with
the
eyepiece
and
with
the
with
the
amount
with
the
mount
all
right,
I
guess
they
call
it
sorry,
I
don't
know
what
the
I
I
remember
in
the
manual
they
have
a
name
for
that.
I
think
they
anyway,
it's
you
rotate.
You
rotate
them
out
about
the
right
ascension
axis
until
the
hour
angle
reads:
26
minutes.
C
C
C
C
C
C
Just
an
explanation
of
the
method:
here:
we've
just
used
two
of
them
for
large
amounts
of
adjustment
to
the
right.
Ascension
loosen
the
clutch,
rotate
them
out
by
the
desired
amount.
As
you
watch
the
hour
angle,
circle
small
amounts.
We
didn't
use
this
technique,
you
hold
down
one
of
the
arrow
buttons.
C
Once
I
have
labeled,
east
and
west,
you
see
in
the
top
picture
it's
on
the
side
of
the
mount
and
that
moves
at
12
times
the
sidereal
rate,
which
is
gives
you
one
minute
of
right,
ascension
in
five
seconds
or
12
minutes
of
right
ascension
in
one
minute,
just
hold
it
down
for
the
number
of
seconds
you
need
and
then
take
another
picture
and
plate
solve
it
for
even
smaller
amounts.
Now
we
use
this
one
to
increase
the
right
ascension
by
n
seconds.
You
turn
off
the
tracker
and
then
turn
it
back
on.
C
C
C
C
C
C
D
D
A
C
C
I'm
using
apt
there
were,
I
heard
several
people
discussed
their
rigs
in
this
in
presentations
to
this
meeting
earlier.
Bruce
was
one
high
murray
discussed
it.
I
think
they
were
using
different
programs,
but
when
I
looked
into
it,
the
only
one
that
supported
the
nikon
d5600
was
apt
and,
as
I
looked
into
it
further
apt
is
not
only
cheap
at
about
20
dollars.
C
E
C
E
F
C
The
shortest
one
of
the
pictures
I
showed
the
shortest
one
was
five
seconds
that
was
the
picture
of
the
comet.
In
the
beginning
I
took
61
five
second
exposures,
the
longest
was
probably
two
or
three
minutes.
That's
what
I
usually
shoot
two
or
three
minutes.
I
think
I
may
be
bringing
that
down
a
little
bit.
I
I
think,
there's
really
no
reason
to
go
for
long
exposures
with
that
camera.
C
F
C
C
F
C
And
when
I
first
got
started
with
phd2,
I
was
dithering
between
every
exposure.
Well
for
short
exposures
that
doesn't
make
any
sense.
If
you
were
shooting
10
minute
exposures,
you
would
only
dither
once
every
10
minutes
so
the
last
time
I
used
it.
I
was
dithering,
every
other
picture
and
you
could
probably
go
to
a
more
efficient
number.
That
is,
if
you
did
do,
every
every
every
four
pictures
you
you
would
be
getting
more
sub
frames
per
hour.
G
B
G
A
high
iso
to
get
to
collect
as
much
signal
noise
ratio
as
you
can,
but
once
you
start
introducing
this
star
tracker
to
allow
you
to
stack
more
photos
with
longer
exposures
and
allow
you
to
have
the
lower
iso,
how
do
you
start
thinking
about
aperture?
At
that
point,
like
a
lot
of
my
lenses,
I
feel
tend
to
perform
at
a
higher
aperture
number
closer
to
like
f8,
compared
to
what
I
would
normally
read
is
is
normal
for
astrophotography.
G
C
C
C
Sometimes
I
have
taken
landscape
astrophotos
with
a
35,
millimeter
or
50
miller,
millimeter,
f,
1.8
and
sometimes
on
a
landscape
photo
just
open
it
wide
up,
coma's
not
going
to
be
noticed,
and
I
have
some
a
couple
of
pretty
cheap
nikon
lenses.
They're,
you
know
plastic,
you
know
like
150
a
piece
and
you
don't
want
to
look
too
close
at
at
the
stars,
but
but
if
it's
a
landscape
photo
nobody's,
gonna
notice,
just
open
it
up.
G
C
C
E
Yeah
some
of
the
the
conventional
wisdom-
I
guess,
on
these
lenses
and
first
of
all,
you
know,
prime
lenses
versus
zoom
will
perform
better
and
secondly,
yeah.
If
you
just
stop
down
just
a
little
bit,
you
usually
can
can
increase
the
quality
of
the
of
the
stars,
but
yeah
everything
is
plays
off
against
another
knob
to
turn
like
staying
up
all
night.
So.
E
C
Cool
well,
it's
it's
a
lot
of
it's
a
lot
of
fun
for
those
of
us
who
like
challenges,
I
have
an
engineering
background.
I
like
to
solve
problems.
I
like
to
figure
out
how
to
make
an
improvement-
and
you
have
a
lot
of
opportunities-
is
in
this
and
some
of
the
people
here
tonight
at
this
meeting.
Love
to
do
that
kind
of
thing
too.
C
C
C
A
A
F
F
I
just
want
to
check
one
of
the
things
when
I
started.
Looking
into
this,
I
saw
the
price
of
the
guided
mounts
and
decided
as
a
first
step
to
build
my
own
barn
door,
and
that
is
an
interesting
way
to
achieve
a
certain
degree,
a
very
limited
degree,
but
a
certain
degree
of
tracking
out
of
this
and
it's
relatively
easy
and
straightforward
to
do.
I've
now
graduated
to
a
full
nature
mortgage
on
the
house
and
selling
two
children
to
buy
a
telescope,
but
that's
another
story
entirely.
B
A
B
B
So
this
is
more
of
a
visual
light
representation
of
it,
and
you
can
see
that
the
most
of
the
stars
that
are
small,
hopefully
the
farther
away
tend
to
be
written
by
the
interstellar
dust-
is
my
interpretation
of
what
it
is.
So
this
is
again.
This
is
m
78
again
with
a
white
balance
with
this
with
the
foreground
stars,
it
looks
quite
a
bit
different
than
a
lot
of
pictures
you
see
done
of
it,
but
it
kind
of
looks
how
it
would
look
visually
if
I
had
a
100
inch
telescope.
B
B
So
I
just
don't
have
my
wedge
prism
in
the
optical
system.
Yet
this
is
a
interesting
one.
I
haven't
seen
too
many
pictures
of
this,
but
this
is
a
dwarf
galaxy
about
three
million
light
years
away
and
it
has
an
interesting
name
which
is
abbreviated
in
wlm
dwarf,
and
evidently
there
are
some
interesting
star
formation
going
on
in
in
the
in
the
middle
of
all
this
somewhere.
B
B
I
found
out
that
with
the
rig
that
I
have
and
the
complication
of
getting
my
equipment
to
talk
to
each
other,
that
I
could
get
away
with
dithering,
every
fifth
shot,
because
I'm
chewing
over
for
a
hundred
of
them
or
actually
I'm
shooting
more
like
160
shots
at
a
at
a
time
and
by
the
time
I
throw
out
the
ones
that
got
bitter
because
qhy
cameras
always
recording
it.
I
have
not
figured
out
a
way
with
my
equipment
to
have
it
do
a
proper
different.
Well,
it's
a
stop.
B
B
B
B
I
don't
have
that
much
patience
for
dealing
with
interface
issues
with
software
programs
that
weren't
necessarily
written
for
each
other
so
goes
at
a
kind
of
a
carryover
from
when
I
was
working.
That's
how
I
say
as
an
engineer
so
like
I
say
I
just
run
backyard
eos
with
my
cannon
with
a
lens
cap
on
hiding
someplace
and
it's
just
arbitrary
scissors
about
maybe
every
four
and
a
half
minutes.
B
B
B
So
obviously
that's
no
good,
so
I'm
to
throw
that
out
then
there's
a
settle
down
time,
which
may
mean
that
one
might
get
thrown
out
or
maybe
two
might
get
thrown
out
because
of
the
desert.
And
of
course,
when
I'm
going
through
in
a
blink,
maybe
there's
some
little
bit
of
bad
weather
that
comes
over
and
the
and
the
fsh
whatever
will
blow
to
star
up
for
one
reason
another
or
s
or
something
like
that.
B
So
I'll,
throw
that
out
when
I
get
into
the
subframe
selector
in
pix
insight,
I'm
going
to
pretty
well
lock
off
the
top
third
of
all
my
star
shots
that
have
the
half
width
frame
setting
on
them.
So
I'll
just
arbitrarily.
Do
that?
Because
you
see
the
raza
native
resolution
to
a
star
image
is
about
four
arc
seconds.
That's
if
everything
works.
Great
perfect!
That's
like
perfect,
perfect,
perfect!
Well,
the
world
isn't
perfect.
B
B
Well,
if
you
do
that,
you're
going
to
end
up
taking
700
exposures
to
get
the
theoretical
maximum
out
of
it,
which
is
a
bit
of
a
problem.
The
process,
to
say
the
least,
so
I
tried
two
minutes
exposure,
but
I
was
getting
too
many
bloated
starts.
So
that's
why
I'm
kind
of
of
settling
down
at
about
a
minute
seems
to
work
reasonably.
B
Okay
with
the
rig
that
being
said,
you
know
it
would
be
nice
to
have
a
much
slower
optical
system,
which
I
have
designs
on
doing
one
of
these
days,
I
would
I
would
like
to.
I:
have
a
12-inch
f4
mirror
that
I'd
like
to
convert
into
the
astrograph,
but
I
don't
know
what
I'm
going
to
get
around
to
doing
that.
A
E
E
For
me,
it's
going
to
be
behind
the
roof
of
my
house
unless
I
motivate
to
set
up
another
rig
out
on
the
sidewalk,
so
I'm
sort
of
hoping
somebody
takes
some
nice
pictures.
I
think
maybe
the
goal
would.
If,
if
it
was
me,
the
goal
would
be
to
get
the
two
planets
and
some
of
their
moons.
I
haven't
looked
at
it
in
stellarium
to
see.
E
C
And
in
the
last
couple
of
weeks
it's
it
changes
completely.
Every
few
days
this
apparently
the
weather
is
very
hard
to
forecast
right
now
and
I
would
encourage
everyone
who
wants
to
see
or
photograph
those
planets
close
together
get
out
every
night.
You
can
don't
wait,
it
could
be
completely
clouded
over
on
the
21st
get
out
and
start
shooting.
Now,
according
to
the
forecast
I
looked
at,
I
think
thursday
night.
We
might
have
a
shot,
but
I
sure
wouldn't
put
money
on
it.
You
know
to
tomorrow.
C
The
forecast
could
be
completely
different,
so
it's
just
be
ready
to
set
up
figure
out
figure
out
a
place
where
you
can
go
where
you
have
the
view
it'll
be.
I
think
now
it's
around
20
degrees
altitude,
it's
still
fairly
high
above
the
horizon,
but
you
do
are
going
to
need
a
clear
view
to
the
southwest.
E
It's
pretty
easy
to
get
confused
as
to
which
day
you're,
looking
at,
depending
on
whether
you're
centering
on
midnight
or
centering
on
the
current
hour
and
I've
been
confused
more
than
once,
where
I
thought
the
next
day
was
going
to
do
something
and
then
it
suddenly
seemed
to
change,
and
it
was
actually
just
because
you
know
I
was.
I
was
displaying
the
grass
from
the
from
the
current
hour
or
something
or
whichever
it
was,
but
I
it
somehow
it's
just
not
as
intuitive
as
it
as
it
should
be.
C
C
E
A
But
all
right,
everybody
anything
else,
no
all
right!
Well,
thanks
for
coming,
and
I
hope
to
see
you
again
next
month.
Unfortunately,
it
looks
like
we're
not
going
to
be
getting
together
anytime
soon,
because
of
it.
So
we'll
see
you
back
online,
hopefully
next
next
month,
all
right
take
care
all
right
thanks
thanks.