►
From YouTube: SJAA Imaging SIG meeting 8 15 17
Description
San Jose Astronomical Association Imaging Special Interest Group Meeting August 15, 2017 at Houge Park San Jose. Glenn's latest rig, share first images, compare and contrast to smaller/DSLR rigs, and demo Photoshop processing techniques
A
B
B
So
let's
go
forward
here.
So
if
you
read
the
Facebook
post
here
so
back
in
2014,
I
think
I
started
this
hobby,
maybe
March
of
2014
and
with
that
scope
on
a
really
cheesy
tripod
before
the
the
Cirrus
mount
serious
mount
there,
that
I
got
in
a
in
a
catalog
because
of
being
at
work
for
my
15
year
anniversary
at
work.
You
know
they
give
you
catalog
and
I.
B
B
Don't
know
if
this
is
really
only
you
know
like
three
or
four
months
later,
but
you
know
you
can
tell
I've
already
hung
a
ton
of
junk
off
of
it,
and
you
know
it
looks
like
I'm
Auto
guiding
and
I've
got
a
DSLR
on
there
and
and
whatnot.
So
so
this
was
a
Facebook
post
and
you
know
it
says:
well,
the
good
news
is
a
pretty
cool.
Looking
nebula,
the
Eagle
Nebula
should
be
stunning
with
more
exposure
time.
The
bad
news
is
I
can't
take
longer
than
30-second
exposures,
and
so
these
are.
B
These
are
high
ISO
shot.
So
it's
probably
a
you
know
low
on
it
is
low
on
the
horizon,
so
extra
challenging
and
I'm
sure
I
had
any
number
of
problems
and
you
can
tell
all
the
junk
that's
hanging
off
there.
All
kind
of
angles
and
stuff,
so
that
was
an
early
and
so
if
we
step
forward,
oh
and
there's
a
mistake
in
this
slide,
so
we
know
that
this
is
not
really
taken
with
that
Matt
calves
because
there
are
diffraction
spikes
on
the
bright,
the
one
bright
star
there.
B
So
it
can't
be
the
Matt
calves
because
it
doesn't
have
any
diffraction
spikes.
So
this
probably
the
next
scope
I
bought,
was
a
1/8
inch,
carbon
fiber
RC.
So
it's
probably
early
results
from
from
that
and
I
have
a
picture
of
that
rig
coming
up
here
but
jumped
forward
to
today.
So
this
was
the
very
first
results
that
I
got
of
that
Eagle
Nebula
with
my
new
rig
and
there
it
is
on
the
on
the
right
there.
B
So
it's
a
it's
a
12-inch,
TPO,
truss,
RC
and
I've
got
an
astrophysics
focal
reducer,
so
that
brings
it
down
to
F.
5.6
and
I've
got
like
a
lot
of
people
now
these
new
CMOS
cameras.
So
this
is
a
ZW,
o
monochrome
cooled
and
they
sell
it
in
a
kit
with
a
filter.
Wheel
and
I
got
the
largest
filters
that
they
had
to
offer
and
seven
so
RGB,
l,
RGB
and
the
three
narrow
band
filters
all
in
a
in
a
package
there
I
already
had
the
mount,
but
that
that's
a
ryan,
HDX
110.
B
B
B
So
what
are
the
specs
of
this
rig?
So
you
know
it's
way
more
aperture
than
then
I
had
before
right.
So
it's
you
know.
The
the
area
of
the
mirrors
is
the
radius
squared
times
pi
right,
so
it
makes
a
big
difference
as
you
go
up
in
in
aperture,
so
it's
304
millimeters
in
aperture.
Instead
of
you
know
that
first
scope
I
showed
you
was.
It
was
a
90
millimeter.
So
it
seems
to
me
like
I'm,
getting
more
detail.
It
helps
with
the
surface.
Brightness
Bruce
and
I
were
talking.
B
It
means
that
I'm
actually
always
going
to
shoot
at
Ben,
which
means
that
instead
of
imaging
with
each
individual
pixel
in
software,
it's
going
to
in
the
camera,
it's
going
to
treat
each
group
of
four
pixels
as
one
and
normally
you
would
take
like
your
color
data.
Ben
and
you'd.
Take
your
your
luminance
or
your
most
detailed
data
hydrogen-alpha
or
something
in
bin
one.
But
in
this
case,
if
you
look
at
the
the
arcseconds
per
pixel
here
at
bin,
it's
point
nine
arcseconds
per
pixel.
B
So
if
if
a
mature
scene
is
typically
around
two
arcseconds
per
pixel,
then
the
the
rule
of
thumb
or
whatever
you
want
to
call
it.
There's
not
a
lot
of
detail
to
be
gained
by
by
imaging
at
less
than
point
at
less
than
an
arcsecond
per
pixel,
because
you're
just
you're
just
over
sampling
and
there's
you're,
just
you
know
over
sampling
the
the
scene.
B
So
the
advantage
to
this
here
is
that
you
know
it
makes
it
look
like
the
camera
has
bigger
pixels
and
it
helps
even
more
with
being
able
to
capture
a
lot
of
light.
You
know
in
a
short
exposure
which
this
camera
is
already
really
good
at
so
anyway,
I'll
always
shoot
at
that
bin,
and
so
this
field
of
view
works
out.
You
know
it's
about
26
by
35
arc
minutes,
so
I'm
mainly
into
deep
sky
objects,
so
nebulas
and
and
galaxies
and
globulars.
B
So
that's
a
pretty
good
size
for
a
lot
of
objects
will
fit
in
that
frame.
So
it's
not.
You
know
the
the
bigger
super
big
nebula
is
the
wide
field:
nebulas
North
America,
the
the
rosette,
the
heart,
the
soul.
Some
of
those
things
are
too
big,
but
the
the
the
vast
majority
of
things
are
good
planetary.
Nebulas
are
are
too
small
still
so
what
I
may
do?
I
keep
threatening
I've
got
a
two
inch,
Barlow
I
haven't
done.
B
It
ever
tried
it
yet,
but
I'm
gonna,
you
know,
take
the
focal
reducer
out,
put
the
Barlow
in
and
hope.
I
can
still
achieve,
focus
and
I
guess,
put
a
bunch
of
extension
rings
or
something
and
try
to
go
really
deep
and
maybe
I'll
Bend
4x4
for
that.
But
anyway,
so
I
can't
do
wide
field
with
this
rig.
But
you
know
I
have
access
to
other
other
gear
for
that.
B
Okay,
so
one
of
the
differences
you
know
before
I
was
shooting
with
the
DSLRs.
So
you
know,
I
have
a
Canon
t3i,
that's
astro
modified
and
I
made
it
water-cooled,
which
is
a
whole
nother
long
story
and
I
also
have
a
Nikon
d50
100,
which
somebody
removed.
The
Bayer
matrix
on
and
I
was
doing
some
narrowband
with
that.
But
so
in
moving
from
DSLR,
then
into
CCD.
B
And
so
that's
that's
one
of
the
the
big
changes.
If
you're
thinking
about
switching
from
from
DSLR
to
a
dedicated
astro,
camera,
CCD
or
CMOS
I
also
moved
from
deep
sky
stacker
to
CCD
stack
to
I
these
days,
you're,
probably
better
off,
buying
pics
insight
right
just
do
you're
stacking,
rather
don't
spend
money
on
on
CCD
stack,
but
I
already
had
it
so
and
I
haven't
made
the
jump
into
in
depicts
insight.
B
Yet
so
all
the
stuff
in
here
is
about
about
Photoshop
and
I
spent,
maybe
five
or
ten
minutes
thinking
about
how
would
I
do
some
of
the
things
I
do
in
CCD
stack
in
and
deep-sky
stacker
and
I.
Don't
know
that
that
that
I
know
how
but
synthetic
luminance
for
one
and
how
you
would
register
but
not
stack,
different
RGB,
and
maybe
it's
just
because
I
I
haven't
learned
how
to
do
that
and
deep-sky
stacker,
but
anyway
alright.
So
we
can
dive
into
this
first
image
here.
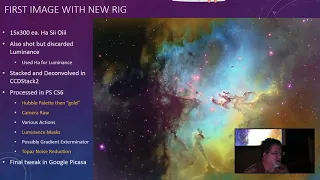
So
this
is
75
minutes
of
data
under
moonlight.
B
So
this
is
the
Hubble
palette,
which
is
hydrogen-alpha
as
green
sulfur.
As
red
and
oxygen
3
as
blue
and
then
translated
into
gold
versus
the
the
green
dominant
and
I'll,
show
you
how
to
do
that.
So
these
things
in
orange
I'm
going
to
demonstrate
for
you
here
in
a
minute
I
use.
Camera
Raw
is
one
of
my
secret
weapons
to
do
kind
of
digital
development
in
between
the
stacked
image
and
Photoshop.
There's
various
actions
in
Photoshop
that
I
use
and
I
just
learned
about
something
called
luminance
masks.
I
was
at
the
last
workshop.
B
I
gave
hanging
out
as
people
came
in
and
overheard
three
of
the
night
photographers
talking
about
luminance
masks.
So
when
I
got
home,
I
googled
it
and
checked
it
out,
and
it's
kind
of
kind
of
a
cool
thing.
Another
tool
to
add
to
the
tool
box
will
go
into
that
and
I
probably
use
gradient
exterminator
one
of
the
things
you
know,
I've
been
going
really
fast.
B
With
this
new
rig
and
I
haven't
I,
don't
think
I
really
have
good
calibration
files
yet
so
like
this
has
got
like
four
darks
or
something
but
I,
don't
think
I've
I
think
my
my
filter
wheel
leaks
some
light
during
the
day.
I
can't
really
take
calibration
files
during
the
day,
so
I
need
to
go
back
at
night
and
redo
my
bias
and
get
more
darks
and
all
of
that.
B
So
if
I
I
think
I'm,
adding
noise
is
what
I'm
trying
to
say,
I
think
I'm,
adding
noise
with
my
calibration
files
now,
but
if
I
leave
them
out,
then
I've
got
vignette
and
other
gradients
to
deal
with.
So
you
know
it's
like
either
way.
I've
got
got
gradients
and
stuff
to
mess
with,
but
grading
an
exterminator
is
a
photoshop
plugin.
That's
that's
one
way
to
deal
with
that
and
then
there's
a
lot
of
different
noise
reduction
programs
that
you
can
use
with.
Photoshop
I
found
this
topaz
noise
reduction.
B
It's
about
80
bucks
to
be
the
the
best
and
I
use
that
a
lot,
and
you
know
one
of
the
sort
of
the
overall
philosophies
with
with
noise
reduction,
and
you
can
there's
a
there's
a
book-
it's
not
in
publication
anymore,
but
I
think
you
can
still
get
copies
from
Amazon.
It's
called
the
zone
system,
but
the
whole
thing
comes
down
to
you
know
where
you've
got
low
detail.
You
want
to
reduce
the
noise
and,
where
you've
got
high
detail,
you
want
to
sharpen
and
increase
the
detail,
increase
the
contrast.
B
B
But
then
you
can
go
back
and
sort
of
add
a
little
yourself,
but
then
I've
also
learned
how
to
do
kind
of
the
same
thing
in
in
lab
color,
we'll
talk
about
it
later
on
and
also
you
could
run
it
back
through
Camera
Raw,
but
I've
found
anything.
That's
quite
the
same,
so
I'm
sort
of
sticking
with
the
Google
Picasa.
But
now
now
you
know
my
secret
weapon
at
the
end
there.
So
so
now
it's
it's
demo
time.
B
B
B
You
know
if
I
decided
that
here's
here's
a
practical
situation
like
a
lot
of
times,
you
have
to
decide
if
you
want
your
your
hydrogen-alpha
to
be
red
or
your
sulfur
to
be
red.
So
you
know
I
can
switch
one
of
them
from
from
red
to
green.
Just
by
by
doing
that,
and
then
you
know,
I'd
have
to
switch
the
other
one
to
red.
B
B
15
in
hydrogen,
alpha
15,
sulfur,
15
in
oxygen,
3
and
then
I'm
going
to
assign
them
to
colors.
So
in
the,
if
you
looked
at
those
those
spectral
lines
in
the
viz
spectrum,
hydrogen-alpha
and
sulfur
are
both
red
and
their
close
together
and
then
oxygen.
3
is
right
between
green
and
blue,
but
you
can
to
make
a
pretty
picture
you
can
assign.
However,
you
want,
and
the
point
of
that
in
terms
of
science
is
to
reveal
the
different,
the
different
structures.
B
So
this
camera
has
some
some
pre
I
mean
they're
sliders
right
for
gain
and
offset,
but
there's
some
presets
too
and
I'm
using
the
one
that
says:
minimum
read
noise,
so
you
could
argue
you
know.
Another
preset
is:
is
unity
gain
but
I'm
I'm
I
have
a
the
club.
Has
another
camera
similar
to
this
another
CMOS
camera
with
it's
a
smaller
chip
and
I'd
played
around
with
it
a
lot
and
I
decided
I
liked
the
the
minimum
read
noise.
It's
high!
It's
higher,
it's
not
highest,
but
yeah.
It's
it's!
You
know.
B
C
B
B
B
Camera
Raw
is
at
the
bottom
and
then
down
here
you
can
teach
it
to
to
do
JPEGs
and
and
Tiff's
okay,
so
that's
important
because
it's
a
powerful
tool
for
Digital
development.
Okay.
So
again,
so
this
is
my
stacked
hydrogen-alpha
image,
and
this
is
what
it
looks
like
coming
out
of
CCD
stack,
even
though
I
did
some
digital
development
in
in
CCD
stack,
but
if
I
hit
auto
here,
if
I
can
get
my
cursor
on
it
boom,
so
you
know
it's
like.
Oh,
it's
been
stretched,
it's
been
adjusted,
you
know
so,
and
sometimes
it's
overblown.
B
So
you
can,
you
know,
turn
the
exposure
down
or
you
could.
You
know,
bring
the
bring
the
blacks
up
or
down
or
what-have-you,
but
you
know
there's
a
lot
of
quick,
a
lot
of
bang
for
your
buck
here,
basically,
by
hitting
that
one
button,
and
if
this
was
a
color
image,
you
could
adjust
the
white
balance
here
as
well
auto
or
what
have
you
so
I
bring
the
three
images
in
and
they've
already
been
aligned
in
in
CCD
stack?
B
B
I
can
do
this
hue
and
saturation
stuff,
so
I
guess
I
can
walk
through
one
of
those
and
I've
made
an
action
that
does
a
mall
it
at
once,
but
I'm
just
learning
how
to
do
two
actions,
but
so
what
you
do
is
so
you've
got
this
layer
and
let's
call
it
h
a
so
you
go
down
here
and
you
say
hue
and
saturation,
okay
and
then
in
your
properties
window.
For
that
you
say:
colorize.
B
You
set
the
lightness
to
minus
fifty
and
you
set
the
saturation
to
a
hundred,
and
then
you
set
the
color
to
whichever
color
you
want.
So
you
know
zero
for
red,
a
hundred
and
twenty
for
green
and
240
for
blue.
But
of
course,
whatever
floats
your
boat
right,
I
mean,
and
then
we
need
to
do
one
more
thing
here.
Now
you
notice
the
whole
image
is
red.
Now,
that's
not
right,
so
we
have
to
create
a
clipping
mask.
B
So
what
that
does
is
it
makes
the
red
only
apply
to
that
layer
below
it,
and
if
we
then
put
that
layer
get
on
the
layer,
we
put
that
layer
in
screen
mode,
then
the
other
stuff
will
will
show
through
so
now,
I've
got
I've
got
two
Reds
in
here,
but
this
is
just
for
demonstration.
So
you
know
this
is
what
you
what
you
end
up
with,
and
then
you
know
you
could
go
into
each
of
these
layers
and
work
with
them
individually.
B
You
can
see
I
went
way
over
on
the
deconvolution
here,
so
there's
a
bunch
of
noise
and
stuff,
but
you
could,
you
know,
apply
gradient
exterminator
to
get
rid
of
that
vignette,
enormous
and
and
stretching
and
whatnot.
Although
later
when
in
the
next
image,
where
we're
going
to
do
tone
mapping,
you
know
you
probably
want
to
have
a
lighter,
a
lighter
touch,
but
this
is
just
going
to
be
a
straight
L
RGB
in
terms
of
the
the
layers
and
stuff.
B
B
A
B
Okay-
and
let
me
just
check
my
cheat
sheet
here-
little
pellegrino
luminance
masks.
Okay,
we
can
talk
about
luminance
masks,
so
Greg
Benz
is
a
photographer
that
that
has
made
some
plugins
for
luminance
masks
that
are
free.
He
also
sells
something
I
didn't
try
the
thingy
sells,
but
there's
a
free
action
that
makes
luminance
masks.
I've
got
all
the
the
links
at
the
end
that
point
to
these
different
websites
of
people
I'm
talking
about
and
you
can
go
and
see
the
demos
and
get
the
software.
B
So
these
can
be
masks
that
you
can
use
in
your
in
your
layers.
So
let's
say
you
just
wanted
to
focus
on.
You
know
kind
of
the
the
core
of
the
nebula
here
with
with
this
one.
So
if
I
control
click
and
that
makes
a
selection
and
I
go
back
over
here
into
the
layers
now
I've
I've
got
that
selection
for
me
and
I
can
further
modify
it
with
with
feathering
or
expansion
or
whatever.
B
But
so
that's
a
that's
a
great
way
to
pick
different
parts
of
your
of
your
DSO
and
one
thing
to
keep
in
mind
is
these:
you
know
the
marching
ants
are
drawn
where
there's
a
50%
pixel
selection.
So
if
we
go
back
and
we
look
at
that
mask-
you
know
in
it's,
not
all.
Let
me
you
select
here,
so
you
can
see
it.
You
know
it's
not
all
black
and
white
right.
It's
there's
Gray's
in
here!
So,
what's
your
your
mask
is
actually
going
to
have
different
amounts
of
pixels
selected?
It's
not
going
to
be.
B
You
know
if
that,
then
it's
either
gonna
be
on
or
off
across
that
that
border,
whereas
with
the
luminance
mask
it's
going
to
be
a
gradual
change
and
you
can't
really
see
it
because
of
the
way
that
Photoshop
does
the
the
marching
ants
there,
but
so
anyway,
so
there's
all
these
different
masks
than
that
you
could
use.
So
that's
something
I
just
learned,
so
that's
luminance,
masks
and
then
get
back
over
here.
B
B
B
From
this
website
here,
he
walks
you
through
starting
here
some
selective
color
adjustments
to
go
from
that
green
look
to
the
gold
look
and
in
fact,
if
we
go
on
the
history
here,
so
that's
what
we
started
with
and
the
first
adjustment
gets
you
there
and
the
next
one
gets
you
there
and
there
and
then
the
last
one.
So
that's
how
we
do
the
green
to
gold,
any
questions
all
right
so
back
to
PowerPoint.
B
This
is
supposed
to
be
the
wizard
nebula,
it's
kind
of
a
big
ugly
mess
and,
frankly,
because
of
images
like
this
and
and
worse
ones,
I'm
too
embarrassed
to
show
that
I
tried
to
do
with
narrowband
on
a
DSLR
which
is
its
own
challenge.
I
didn't
even
know
what,
where
you
see
the
wizard
in
that,
in
fact,
I
didn't
even
know
it
until
bruce
told
me,
looked
at
my
image
and
said
you
need
to
rotate
at
90
degrees,
so
you
can
see
the
wizard
so.
B
B
So
we'll
talk
about
that
so
Annie's
Astro
actions
are
some
actions
you
can
buy
for
Photoshop
and
one
of
the
things
she
has
is
a
star
removal.
I
used
the
H
a
for
luminance
again
and
then
one
other
tweak
in
here.
That's
from
another
website
was
using
lab
color
jumping
into
lab
color,
making
a
couple
adjustments
jumping
back
into
our
G
at
the
end,
to
try
to
make
it
pop
okay,
so
back
to
general
time
so
tone
mapping.
So
that's
what
you're
looking
at
there
is
the
tone
map
right.
B
So
that's
the
starless
image
and
sometimes
they
look
pretty
ugly
and
they
don't
have
a
lot
of
detail.
But
that's
okay,
because
you're
gonna
add
the
detail
back
with
the
with
the
luminance
layer
and
in
fact,
I've
sort
of
learned
that
you
know
you
don't
want
to
spend
a
lot
of
time
trying
to
make
a
lot
of
detail
there,
because
it
just
turns
into
it
too,
to
a
mush
when
you,
when
you
try
to
add
the
luminance
on
top
of
it.
So
you
better
off.
You
might
even
do
like
a
blur
to
soften
it.
B
B
Okay,
so
we
start
with
our
our
three
color
layers,
again,
which
those
are
the
the
three
color
layers,
and
you
know
if
we
just
added
the
the
H
a
as
as
luminance
that's
what
it
what
it
looks
like,
but
we're
gonna
do
this
tone
mapping
thing.
So
we
would
leave
that
off
and
you
know
we
make
it
look,
make
it
look
pretty
first
and
then.
B
So
then,
this
is
after
I've,
you
know
adjusted
the
colors
and
whatnot
and
flattened
the
colors
into
a
single
layer.
Now
you
know,
one
of
our
good
friends
had
pointed
out
that
I
had
these
violet
halos
and
that's
the
the
result
of
some
interaction
between
optical
coatings
between
the
focal
reducer
and
the
and
the
filter
and
the
fix
for
that
is
probably
way
more
money
than
I
want
to
spend
on
Astrid
on
filters
or
have
to
do
without
the
focal
reducer,
but
in
later
images.
What
I've
started
doing
now
is
on
the
color
layer.
B
B
B
So
it
says
you
may
still
have
some
remnants
on
larger
stars
use
the
clone
tool
to
remove
so
that's
kind
of
what
I
was
I
was
doing
right,
I
just
do
it
after
you
know,
so
you
could
go
in
and
wipe
out
the
remaining
stars
and
create
your,
and
this
is
where
people
spend
hours
and
I
have
to
you
know:
I
I
usually
don't
demonstrate
processing
because
I'm
pretty
lazy
at
it.
I
mostly
just
demonstrate
image
acquisition,
but
you
know
people
spend
hours
on
some
of
these
finer
details
and
they
get.
You
know
the
results.
B
So
here
we've
we've
and
this
is
Bruce
telling
me
to
rotate
it.
So
we
can
see
the
see
the
wizard.
So
you
know
there's
our
tone
map
and
there's
the
the
luminance
and
now
see
those
halos
are
white.
Now
right,
because
we
we
took
out
the
color
underneath
them
and
then
it
looks
like
I
did
something
different
here.
Yeah,
so
I
also
experimented
with
reducing
the
number
of
stars
using
actions.
I
think
Annie
has
son,
but
I
think
I
probably
used.
B
Tone
map
and
a
change
that
what
I've
got
yeah
okay,
so
we
can
do
the
lab
color
here.
So
if
we're
happy
with
this,
you
know
we
could
flatten
it
flatten
image,
discard
hidden
layers,
okay,
so
one
way
to
make
this
pop
and
the
link
to
the
website
where
I
learned
this
is
in
the
appendix
and
I'll
post,
the
video
and
a
PDF
of
the
presentation
in
the
meetup.
B
Is
you
take
the
image
and
you
jump
over
into
if
I
can
make
my
mouse
work
into
lab
color
and
you
go
into
curves,
and
that
was
levels
that
wasn't
what
I
wanted
curves
so
now
you've
got
different
channels
in
lab.
Color
you've
got
lightness,
the
a
channel
and
the
B
channel.
So
you
know
you
can
try
this.
This
looks
a
lot
like
that
fill
light
control
in
in
Picasa.
B
Okay
and
just
makes
it
makes
it
pop
a
little
bit
so
and
then
you
go
back
into
your
your
RGB
mode
and
save
it
save
it
out.
So
if
we
go
to
history,
we
can
probably
compare
the
difference
here
yeah.
So
we
went
from
that
to
that
with
the
lab,
color
tweak,
and
so
there's
probably
other
ways
to
to
do
that.
But
that's
that's
a
trick.
I
learned
recently.
B
B
B
B
So
you
know
if
we
looked
at
just
the
the
blue,
for
instance,
and
take
the
color
off
you
know,
there's
the
the
blue
right,
so
I'm
not
worried
about
noise
in
the
background
or
any
of
that
stuff,
because
I'm
gonna
probably
do
you
know
something
like
pulling
the
blacks
way
up
because
I'm
only
interested
in
the
in
the
stars,
but
I
need
to
do
that
on
the
whole
image.
Not
just
red,
like
I
just
did
so.
B
B
C
B
Yeah,
so
it
well,
so
let
me
talk
about
the
moon
for
a
minute,
so
so
I'm
in
Scotts,
Valley
and
and
so
in
the
last
few
weeks.
You
know
the
moon
is.
If,
if
this
is
north,
you
know
I'm
imaging
sort
of
around
here
and
the
moon
is
over
here.
So
you
want
it,
you
you
want
the
moon
to
be
at
least
like
60
degrees,
away
from
your
target
right.
B
There
is,
unfortunately,
for
me,
the
city
of
Scotts
Valley
is
right
here
too,
so
there
is
kind
of
a
light
Dome
right
where
I'm
right
wearing
imaging,
but
just
as
an
example,
you
know
the
Eagle
Nebula
is
is
to
the
south,
so
it
would
have
been
away
from
that
light
dome,
but
these
other
nebulas
the
bubble
and
the
The
Wizard
are
more
towards
the
north
towards
the
light
dome.
But
yeah
darker
darker
is
always
better,
so
you
would,
in
theory,
need
more
integration
time
under
light,
polluted
skies
or
moonlit
skies.
B
To
get
the
same
result
than
you
would
at
a
at
a
dark
site.
Is
that
does
that
answer
your
question?
Yeah!
You
need
to
shoot
more.
Okay:
let's
go
to
the
the
bubble,
nebula
so
again
back
to
circa
2014.
So
here
you
can
see
my
RC
a
carbon
fiber
and
at
this
point,
I'm
still
on
the
on
the
serious
mount,
probably
grossly
overloaded
there
with
the
t
counterweights
on
it
to
shield.
B
That's
those
pixels!
You
just
have
to
throw
that
away.
So
it's
not
it's!
It's
challenging
and
I
was
having
to
do
like
half
hour
sub
exposures,
which,
with
this
kind
of
a
rig,
is
super
challenging
but
anyway,
so
what
I
ended
up
hit
with
here?
It
says
that
I
used
the
one
shot,
color
and
then
layered
in
the
the
H
alpha
to
create
that
image.
B
So
that's
what
it
looked
like
back,
then
with
the
8
inch
and
then
here's
what
I'm
getting
again
in
75
minutes
under
moonlit
skies
and
a
little
different
a
couple
different
techniques
with
this
one.
First
of
all,
the
the
science,
the
colors
are
wrong
here
and
I'll.
Tell
you
why
I
just
didn't
like
the
stuff,
that's
blue
was
like
a
really
bright,
pink
or
really
electric
magenta
and
I
wanted
it
to
be
red
and
I.
B
Couldn't
I
just
couldn't
make
it
red,
no
matter
how
hard
I
tried,
but
I,
just
you
know
fooling
around
and
it
turned
it
blue
and
I
liked
it
so
and
when
I
post
on
Astro
Ben
I
said
it's
art
not
in
science,
so
and
I,
you
know
people
like
it
so
whatever
so,
you
know
one
of
a
different
technique.
Here
is
the
synthetic
luminance
so,
rather
than
just
a
che,
I
stacked
without
rejection,
all
three
narrow
band
filters
to
create
a
single
luminance
channel
with
all
of
the
detail
of
all
three
filters
in
it.
B
B
B
Camera
Raw-
and
you
know
I
think
this
is
you
know
things
that
noise
that
should
that
either
I
forget
now
what
I
did
with
calibration
files
on
this
one,
but
you
know
I
had
to
I
had
to
deal
with
this
I.
Don't
think
that
should
be
there
all
this
noise
in
this
corner
here
but
anyway,
that's
that's
the
sum
or
the
average
of
the
three
channels
together
as
a
synthetic
luminance.
B
B
B
B
B
That's
what
came
directly
out
of
the
normal
sh,
o
or
Hubble
palette
stuff.
So
that's
why
I
went
to
that
colored
layer-
and
you
know
here's
the
synthetic
luminance
here
is
pretty
subtle
too
actually,
but
then
this
really
makes
the
detail
pop.
So
so
what
this
is
is
a
bunch
of
different
high-pass
filters.
Copies
of
the
layer
and
I'll
show
you
that
in
a
minute.
B
So
it's
sort
of
like
wavelet
transformations
right,
it's
sort
of
like
the
the
fine
detail.
You
know
medium
detail,
so
you
can
start
and
so
the
way
this
is
how
he
does
it.
His
puts
it
in
a
folder
but
I'll
just
I'll.
Just
do
it
again
here
so
we'll
turn
that
off.
So
you
know
we're
starting
with
the
synthetic
luminance.
So
we're
gonna
make
like
five
copies
of
that
right.
So.
B
So
you
select
one
and
you
go
to
filter
other
High
Pass,
and
then
you
start
with
you
know,
maybe
one
one
pixel
to
where
you
can
just
barely
see
some
edges.
Okay
and
then
I
turn
these
other
layers
off.
So
we
can
see
what
we're
doing
okay.
So
that
looks
like
that
and
it's
I
don't
know
if
you
can
see
it,
but
I
can
sort
of
just
barely
see
the
bubble
there,
and
then
we
want
to
turn
that
layer.
B
It
was
a
luminosity
layer
because
it
was
copied
from
aluminum
solutely
I
want
to
turn
that
to
an
overlay.
Okay.
So
now,
if
I
turn
that
on
and
off
I
can
just
barely
see
some
detail
coming
in
there
all
right.
So
then,
for
these
other
layers,
you
just
repeat
the
process
right,
so
filter,
I'm,
okay,
make
sure
that
the
layers
selected,
visible
filter.
B
And
then
you
know
we
can
turn
the
whole
group
on
or
off
and
you
can
see
the
results
of
of
that.
So
that's
just
it's
a
sharpening
detail.
Enhancing
and
you
can,
you
know,
keep
going
up
the
the
chain
to
ten
pixels
or
whatever.
So
that's
one
way
to
get
some
detail
back
in
there
and
and
so
again,
if
we
look
at
I
think
this
is
pretty
close
to
my
final
image,
not
that
one
this
one
well
I,
probably
then
went
back
and
softened
it
a
little
bit
with
some
some
D
noise.
B
Oh
and
I
never
showed
you
topaz
D
noise.
Let's
do
it
now!
So
and
again
you
know
I'm
about
to
denoise
something
I
just
made
sharp.
So
actually,
let's,
let's
just
you
know
this
stuff
on
the
outside
here-
looks
noisy
and
gross.
So
let's
maybe
we
could
use
you
know
this
would
be
a
good
time
for
the
luminance
mask
right.
So
we
could
go
actions.
B
B
Okay,
so
we're
not
actually
going
to
denoise
that
part
but
down
here
where
it's
gritty
and
ugly.
So
you
know
obviously
I'm
not
I,
don't
know
if
you
can
see
these
presets
they're
there,
äôs
camera,
presets
and
obviously
I,
don't
I'm
not
using
an
EOS
camera,
but
I
generally
use
these
as
presets
and
then
I
just
you
know,
use
the
keep
going
up
in
the
ISO
and
kind
of
use,
the
least
destructive
one.
That's
so
probably
like
there.
B
And
we'll
see
if
that
luminance
mask
did
the
right
thing
here
too:
okay,
so
yeah.
So,
even
though
it
looks
like
all
this
stuff
out
here,
maybe
shouldn't
have
been
selected
it
it
got
the
got
the
D
noise,
but
we've
still
got
our
detail
here
so
anyway,
that's
the
Topaz,
D
noise
and
they've
got
a
pretty.
You
know
just
the
front
page
of
their
website.
B
So
if
you
slide
this
guy,
you
can
see
kind
of
dramatically
the
difference
between
you
know:
here's
a
bunch
of
color
noise.
It
would
be
like
for
us,
it
would
be
like
you
know,
thermal
noise
or
your
ISO
was
too
high
same
thing,
and
you
know
this
is
what
what
this
plug-in
can
can
do
to
make.
It
look
make
it
look
better.
So
it's
pretty
cool
so
I
like
that
one.
B
So
let
me
just
check
so
we
did
the
synthetic
luminance.
We
did,
the
high-pass
filter
overlay.
We
went
back
and
did
the
Topaz
D
noise
I
forgot
to
show
you
okay,
just
another
example:
I'm,
not
gonna.
That's
it
for
the
for
the
demos,
but
just
to
talk
about
this
thing
about
the
the
aperture
versus
the
light
pollution
versus
the
number
of
images
and
all
that
so
the
bottom
image
you
know,
probably
the
darkest
place
I've
imaged
from
is-
is
pinnacles
and
the
Westside.
So
we
did
a
camping
trip.
B
That's
I,
don't
have
a
lot
of
notes
about
that
image,
but
that's
what
it
looked
like
in
the
end
and
then
here
at
the
top
and
I
have
to
admit
that
I
processed
that
top
image
all
the
way
through
from
beginning
to
end
four
different
times,
especially
after
I,
saw
the
bottom
one
that
I
had
done
before
before
I
liked
it
top
and
range
new
rink
rig
this
time.
2.5
hours
of
integration,
it's
by
color.
B
So
no
there's
not
really
any
sulfur
going
on
there
in
that
nebula
and
then
the
RGB
stars
and
again
from
Scotts
Valley
and
under
moonlight
with
all
of
the
methods
that
I
just
showed
you
so
I,
don't
think
I
can
zoom
in
here.
But
you
know
I
if
you
I'm
still
working
on.
You
know
the
deconvolution
and
other
things
for
bringing
in
the
detail
here:
I,
probably
overdid.
B
B
You
know
the
focuser
can
move
relative
to
the
OTA,
so
you're
trying
to
make
sure
that
that
focuser
is
pointed
right
down
the
center
of
the
optical
axis
and
there's
a
little
target
on
the
secondary
mirror,
and
you
just
aim
the
center
of
the
focuser
to
that
target.
So
a
couple
different
ways
you
can
do
that.
A
cheshire
is
just
a
big
hunk
of
metal
with
a
with
a
hole
drilled
through
it.
B
So
you
can
sight
through
that
thing
and
just
see
the
the
center
of
the
mirror
and
then
there's
also
laser
and
targets
and
for
the
first
two
steps
it
turns
out.
You
can
use
just
this
orion
laser,
that's
designed
for
collimating
newtonian
telescopes,
so
I
got
I
got
one
of
those
too.
So
again,
the
first
step
line
the
focuser.
So
it's
pointed
right
down
the
optical
axis
to
the
center
of
the
center
of
the
secondary
mirror.
B
Then
you
adjust
the
secondary
milled
mirror
and
it's
just
going
to
tip
tilt
around
that
center
piece
so
that
if
you
shoot
a
laser
down
there,
that
the
laser
comes
right
back
to
the
exact
same
spot
and
then,
if
you
can
also
do
it
with
the
with
the
cheshire
and
it's
kind
of
hard
to
describe
without
you
can't
really
photograph
through
that
narrow
hole.
All
right,
there's,
probably
you
tubes
or
stuff,
but
there's
a
way
to
do
it
with
the
chest
higher
to
the
the
new
laser
from
Orion.
B
Has
it
has
a
45
degree
angle
target?
So
the
laser
comes
out
the
center.
That
target
goes
down,
hits
the
mirror
and
comes
back,
and
if
it's
you
know
somewhere
other
than
the
hole
that
came
out
of
then
it's
then
it's
wrong.
So
you
adjust
that
secondary
mirror
to
get
the
red
dot
of
a
laser
to
go
back
in
the
hole
that
it's
being
emitted
from.
B
So
that's
the
secondary
and
then
lastly,
the
the
primary
you're
trying
to
align
so
that
it's
you
know,
aligned
with
with
everything
else
and
again
you
can
I
did
it
mostly
with
the
the
chick
well
I
did
it
with
the
Cheshire
Iyer,
and
in
that
case
you
can
see
the
housing
of
the
secondary
and
just
making
sure
that
it's
centered
around
the
circle,
that's
the
top
side
of
the
Cheshire
and
the
target
on
the
secondary.
All
those
things
are
lined
up
in
concentric
circles,
and
then
you
could
get
the
the
laser
that's
recommended
for
this.
B
B
Here
is
a
little
a
little
out.
It's
sort
of
telling
me
that
the
whole
scope
is
well
collimated,
except
maybe
for
that
one
corner
which
might
be
some
curvature
or
something.
But
anyway
you
know
I
was
able
to
do
this
in
maybe
40
minutes
the
first
time
and
I
think
you
know
you'd
get
better
at
it,
the
more
the
more
you
did
it
and
in
theory,
even
if
you
had
to
do
it
each
time
you
set
up.
B
You
know
you
drive
the
bumpy
road
and
get
somewhere
and
set
up,
and
then
you
could
check
your
collimation
and
and
whip
it
into
shape.
I
guess
same
you'd
have
to
do
with
a
visual
Newt
or
something
probably
too,
but
it
doesn't
seem
too
too
daunting
anymore,
that
now
that
I
understand
it.
So
that's
the
RC,
collimation
and
and
again
you
know
these.
These.
B
B
Another
was
the
focuser
everybody
says:
oh,
they
had
to
replace
the
focuser,
but
I
found
that
once
I
put
the
the
focus
motor,
the
servo
on
there
that
the
the
reason
people
were
replacing
it
was
because
it
wasn't
holding
their
camera
well.
First
of
all,
this
cameras
really
light
and
the
filter
wheel
is
really
light.
And,
secondly,
you
know
my
my
servo.
You
can't
move
the
focuser
with
the
servo
on
there
in
any
way,
shape
or
form
so
that
you
know
the
focuser
is
basically
holding
it
at
whatever
positions.
B
This
is
just
you
know,
other
rigs
I've
had
access
to
and
played
with
along
the
way
my
journey
in
in
Astro
imaging.
So
you
know,
I
have
the
six
and
eight
inch
our
C's
at
home,
I
built
two
rigs
for
the
club,
eight-inch
SC
t
and
the
c
102
F,
and
then
I've
collected
a
bunch
of
prime
lenses
for
wide
field,
from
eight
millimeters
to
500,
millimeters
I've
played
with
different
amounts,
mostly
all
of
the
sky.
B
Since
inta
or
Sky
Watcher,
Orion
they're,
all
the
same
manufacturer,
so
the
Cirrus
and
the
Atlas
and
the
HDX
110
are
also
known
as
the
eq8
in
Europe
they're
all
use
the
same
software
and
everything
the
club
has
an
eye:
Opteron
sky
tracker,
I've
used
it
for
for
wide
field
with
lenses
and
I
talked
about.
You
know:
I've
got
a
collection
of
for
me
and
for
the
club,
various
Hastur
modified
DSLR
as
I
picked
up
and
that
the
monochrome
Nikon
and
then
the
the
camera.
B
The
club
has
the
a
s:
174
mm
cool
camera
for
their
ccd
rig
and
then
I
picked
up
the
the
1600
for
mine
and
then
I
use
a
telescope
net
a
lot.
So
now
you're
talking,
you
know
up
to
2
meters,
scopes
and
plan,
plane,
wave
and
all
the
high-end
stuff
on
mountaintops
in
Australia
Spain
in
the
desert
of
New
Mexico
and
there's
one
scope
in
the
in
the
Sierra
so
kind
of
the
full
spectrum.
There.
D
B
Know
there
haven't
been
any
dark
nights.
Yeah
I've
only
had
this
scope
for
this
month.
Right
so
I
mean
it's
not
even
polar
aligned.
I
mean
it's
just
like
I'm,
just
like
going
crazy
with
the
scope.
So
it's
every
night
that
that
hasn't
been
completely
socked
in
I've,
been
collecting
narrowband
imaging,
so
I
mean
that
you
know
that
I
took
my
I.
B
So
there's
a
number
of
steps
that
I
haven't.
You
know
that
that
you
would
normally
do
I
am
doing
PEC
now
Bruce,
you
know
so,
but
yeah,
but
it's
it
hasn't
been.
You
know
this
next
weekend
will
be
the
the
new
moon
so
we'll
be
out
at
at
at
coyote.
Doing
a
workshop
and
that'll
be
the
first
dark.
You
know
no
moon
to
deal
with
so.
B
I
cropped
this
to
make
a
metal
print,
so
this
is
a
mosaic
of
three
frames
that
are
kind
of
vertical
across
this
thing,
and
this
is
actually
a
diagonal
crop
of
the
original
picture.
But
there's
like
250
sub
exposures
here
and
it's
it's
L,
RGB
and
they're
all
through
this
takahashi,
that's
in
Australia
at
sighting
Springs,
and
then
they
have
another
one
in
New
Mexico
that
set
up
exactly
the
same
except
the
cameras,
flipped
90
to
90
degrees.
B
So
for
this
mosaic,
I
needed
to
use
the
one
in
Australia
and
I
spent
over
a
year
gathering
the
data
for
this.
So
anyway,
it
was
kind
of
a
long
effort.
But-
and
this
was
you
know-
I
stole
this
idea
from
Rogelio
I
saw
his.
You
know,
of
course,
his
is
bigger
and
wider,
and
better
and
I
think
he's
done
it
yet
again
after
that,
even
bigger
and
wider.
B
B
Refractor,
you
should
get
a
one
of
these:
what's
the
quad
Astrotech
yeah
1865
edq
as
a
beginning
scope,
and
that
might
have
been
the
smart
thing
to
do
less
challenging
because
of
the
wider
field
easier
to
guide.
But
you
know
I
looked
at
what
he
was
shooting
with
that
you
know
the
North
American
nebula
and
in
California,
and
it's
like
whoa
K,
that's
nice!
Now
what
you
know
I
wanted
to
I
was
impatient.
I
guess:
I
wanted
to
go
deeper.
I
wanted
to
you
know
so.
B
I
went
for
the
point
for
the
RC
and
the
diffraction.
Spikes.
Don't
bother
me
there
in
the
Hubble
images.
So
what's
you
know
regarding
the
SCT,
so
I
didn't
have
any
experience
with
an
SCT
until
I
put
together
the
rig
for
the
club
and
that
particular
one
is,
is
old
and
it's
got
holes
drilled
in
it
and
all
kinds
of
funky
stuff,
but
they
do
up
really
easy
compared
to
the
to
the
RC,
because
you
get
that
big
hunk
of
glass
in
the
front.
B
All
right,
you
get
an
eight
inch
flat
piece
of
glass
and
it
dudes
up
really
easy.
So
that
was
the
first
time
that
I
had
to
had
to
use
a
do
heater
versus
just
a
do
shield
and
then
it
you
know
it
would
do
up
on
the
inside
and
then
what
do
you
do
right?
You
know
you
got
there
with
a
blow
dryer
up
the
wazoo
yeah,
it's
probably
not
a
smart
so
anyway.
So
that
was
a
challenge.
Then
the
other
thing
is
mirror
flop,
so
that
particular
scope
doesn't
have
a
mirror
lock
on
it.
B
So
when,
when
you
get
to
the
point
where
you're
trying
to
automate
stuff
so
that
you
can
sleep
at
night,
you
know,
and
they
kind
of
do
it
in
steps
like
I,
was
imaging
up
to
the
Meridian
and
having
everything
shut
down
or
parkour
stopped
at
that
point.
But
you
know:
I
want
to
I
want
to
use
the
whole
night,
so
I
want
to
do
an
auto,
Meridian
flip.
So
you
know
sequence
generator!
B
Pro
can
do
that,
but
once
you
flip
the
flip,
the
the
mirror,
oh
there's
some
slop
and
that
particular
rig
doesn't
have
a
autofocus
on
it.
So
it
goes
out
of
focus
when
you
do
the
Meridian
flip.
So
if
I
was
out
there,
I
could
refocus
it
or
if
I
had
auto
focus,
I
could
refocus
it,
but
without
a
mirror,
lock
or
auto
focus
it's
not
going
to
run
by
itself.
So
those
are
some
things
about
s,
CTS
I,
don't
know.
B
If
there's
others
again,
my
perception
is
they're
that
they're
more
expensive
for
a
given
aperture,
because
you
know
the
RC
is
a
pretty
simple
design.
I'm.
The
only
thing
that
makes
it
challenging
is
the
the
shape
of
the
mirrors
is
hard
to
do
right.
There,
they're,
hyperbolic
I,
believe
versus
parabolas
or
round,
and
you
know
with
so
they're
less
they're
less
complicated
with
an
SCT
you've
got
that
big
corrector
plate
with
the
secondary
embedded
in
it,
and
and
all
of
that
so
I
think
that
it'll
cost
you
more
so.
B
So
when
I
first
I
tried
to
use
the
field,
flattener
and
I
could
never
get
it
to
work
with
the
focal
reducer
and
they're
not
really
designed
to
work
together
so
I.
Finally,
you
know
I
had
some
help
with
the
machining
and
all
that
from
Mark,
not
try
back
but
yeah
the
other
mark
and
still
could
never
quite
get
the
two
to
play
nice
together.
So
I
do
have
with
the
8-inch.
I
did
have
a
little
bit
of
curvature,
I'm,
not
really
seeing
anything.