►
From YouTube: Importing and Scaling Photos in Blender
Description
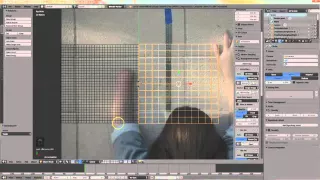
Here is a methodology for bringing client images into the Blender scene to help with the fitting and designing of upper-limb prostheses.
Here is the whole video series, beginning with taking good orthographic client photos:
https://www.youtube.com/watch?v=ewdC3BVUNmg&list=PLBHsuyNYSpxs4Xqj4_kzcbBiSby2tKqrH
The device sizing Blender file is here:
http://www.thingiverse.com/thing:564844
A
You
will
need
to
start
with
good
quality
photos,
watch
and
follow
the
video
taking
recipient
photos
for
enable
to
get
the
best
results
for
this
blender
tutorial.
You
will
need
photo
1
the
top
view
and
photo
to
the
side
view
if
you
have
never
used
blender,
please
watch
and
follow
one
or
two
getting
started
with
blender
videos
on
YouTube.
You
should
be
able
to
pan
and
zoom
around
the
3d
space
open
the
email
device
sizing
blender
file,
which
you
can
download
on
Thingiverse
device.
A
A
A
Now
use
the
up-down
position,
control
to
slide
the
clients
distal
outline
to
the
end
of
the
grid
and
where
it
says
axis,
click
on
all
views
and
change
it
to
top
okay,
your
top
view
photo
is
now
properly
scaled
and
in
position
next,
we'll
import
the
side
view
photo
scale
it
to
the
scene
and
match
it
up
with
the
end
of
the
grid,
just
like
we
did
with
the
top
photo
use.
The
next
background
image
panel
to
open
up
a
side
view
photo
the
affected.