►
From YouTube: e-NABLEcon 2019 - Chad Coarsey - 3D Scanning Demo
Description
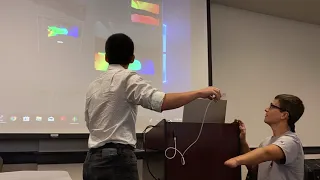
Chad Coarsey (Director of Operations, The Bionic Glove Project) gives a demonstration of 3D scanning for custom prosthetic design using a Structure.io scanner (https://structure.io/).
More information and discussion about EnableCon 2019 here: https://hub.e-nable.org/s/e-nablecon-2019/
More information about e-NABLE here: https://enablingthefuture.org
A
All
right
so
hello,
everyone,
my
name,
is
Chad
Corsi
and
I
am
from
the
Bionic
love
project.
We
are
located
in
Boca,
Raton
Florida
and
we
started
out
of
Florida
Atlantic
University,
our
local
university,
my
co-founder
in
the
audience
here.
Perry
wine
Thal
approached
me
for
a
class
project
and
said
you
won
a
hand
and
that's
how
it
kind
of
all
started.
A
So
from
that
we
had
our
company
and
we
were
providing
some
of
the
enable
prosthetics
and
devices,
and
then
we
recognized
that
a
lot
of
the
people
that
were
coming
to
us
had
maybe
some
Anatomy
that
you
know
enabled
devices
Woods
and
you
know,
pertain
to
or
couldn't
really
be
built
around,
and
so
that
kind
of
led
us
to
the
idea
of
3d
scanning
3d
scanning
has
been
emerging.
You
know
more
on
the
cost
side
going
down
in
past
couple
years.
The
way
we're
using
is
called
the
occipital
structure
sensor
here
and
later.
A
All
right
so,
with
this
little
design,
we're
able
to
kind
of
put
together
a
3d
scan
by
simply
plug
and
play,
so
the
software
that
we
use
is
called
Skynet
Pro
it's
right
here
and
it
has
multiple
modes
of
how
you
want
to
scan
so
I've
seen
this
used
in
the
architectural
industry,
a
real
estate
industry,
you
know
if
people
want
to
scan
a
room
and
have
a
virtual
tour
or
have
the
architecture
most
recently,
you
know
no
trade
on
with
the
fire.
We
had
3d
scans
of
that
now
that
they
rendered.
A
So
it's
you
bigger
sley
used
now,
but
what
we
can
do
is
actually
tailor
it
to
someone
that
might
need
a
prosthesis,
and
so
that
starts
with
again
the
scan
any
questions
right
now
before
I
jump
into
it,
No,
okay,
so
again,
with
the
structure
sensor.
Originally
it
ran
off
an
iPad
scanner,
sorry
iPad
with
a
bracket
and
what
we
found
was
when
we're
interfacing
with
the
Windows
software,
not
on
the
iPad,
when
we're
keeping
it
on
the
computer.
With
our
work
flow,
we
had
some
bandwidth
issues
because
we
had
to
stay
intact
without
Wi-Fi.
A
We
had
lots
of
information,
you
can
imagine
a
3d
scan,
it's
taking
thousands
of
images
at
once
in
real
time,
so
we
have
to
have
a
significant
amount
of
bandwidth
or
data
capacity,
and
so
what
the
structure
sensor
people
have
done
is
they
created
an
open,
SDK
and
actually
interfacing
with
the
open
ni.
That's
a
Windows
driver.
You
can
run
it
directly
to
Windows
programs
and
also,
equally,
you
can
run
it
using
an
apple
device
and
I'm
sure
Jeremy
who
actually
has
mentioned.
A
That
can
tell
you
more
about
it,
but
just
for
our
purpose,
I
want
to
show
you
just
how
it
works,
so
it
uses
a
bounding
box
geometry
here,
we'll
toss
this
one
out
so
within
this
bounding
box
is
what
it's
looking
for.
So
if
you
have
an
object
within
that
bounding
box,
it'll
trap
it
and
recognize
it
as
an
independent
object
and
that's
what
it
will
build.
The
scan
around
so
I
will
quickly
throw
things
together.
So
here
is
the
bounding
box
parameters
here,
typically,
0.3
has
been
kind
of
a
good,
a
good
number.
A
We
have
a
constant
trickery
now
that
we
operate
in
to
get
a
standardized
scan
and
that
bounding
box
is
ideal
for
that.
We'll
make
this
one
just
a
little
smaller,
though
just
because
you're
right
beside
me
and
if
you
won't
actually
core
on
the
aside
I'm
gonna
hand
this
to
you,
okay,
so
once
we
get
that
started,
we
can
actually
move.
A
A
You
can
see
it's
creating
a
heat
map.
So
basically,
if
you
look
at
Marti
here,
maari's
multicolored
now,
alright,
so,
but
that
heat
map
tells
you
is
distance.
So
you
get
colder
as
you
move
away
and
you
get
warmer
as
you
move
close
right,
and
so,
similarly
with
anatomy,
you
can
kind
of
gauge
where
your
box
limitations
are
and
what
dimensions
you
can
work
in.
A
As
far
as
the
scan
itself,
you
do
have
to
do
kind
of
a
little
bit
of
thinking
as
far
as
your
path
of
scanning
when
you're
taking
a
scan,
sometimes
when
you're
getting
the
side
profile
of
an
arm,
there's
just
not
enough
Anatomy
there,
sometimes
so
you'll
see
I
mean
you
have
it
here,
but
as
we
get
further
and
further
away,
it's
getting.
You
know
a
little
bit
more
inaccurate.
So
that's
one
thing
you
have
to
consider.
Another
thing
is
it's
not
gonna?
A
You
know
intuitively
fill
in
a
hole
unless
you
tell
it
to
in
the
processing
software.
So
if
you're
missing
a
side
or
if
there's
negative
space,
you
kind
of
have
to
think
about
that
too,
when
you're
counting
for
the
scan
itself,
so
I'm
gonna,
let
you
drive
it
I'm
gonna
come
around
here,
so
you
can
focus
it.
A
So
it's
got
my
knee
in
there
sorry,
but
you
can
kind
of
see
the
general
point
and
you
can
imagine
when
we
have
this
on
standardized
apparatus.
That's
you
know
concentric
scanning.
We
can
do
multiple
rotations
of
scans
and
what
you'll
end
up
getting
is
a
more
finer
and
smoother
and
more
robust
image,
3d
image
of
the
scan
itself
and
more
accurate,
and
what
you
want
to
get
is
that
Green
Green
is
good.
A
And
I
think
at
the
bottom
you'll
see
it's
measuring
at
frames
per
second,
so
you
just
have
to
be
mindful
of
that
too.
If
you
move
too
quickly,
you
can
kind
of,
let's
just
any
topside
for
now.
Okay,
yeah,
that's
fine!
So
if
you
move
too
quickly,
you
can
kind
of
lose
some
of
that
tracking
and
you'll
lose
the
image.
A
So
that's
another
thing
you
have
to
kind
of
be
mindful
of,
and
so
once
we
get
the
scan,
we
can
do
some
basic
processing
and
these
tools
up
here,
I
like
to
save
the
scan
file
as
an
original
file.
First,
before
I
do
any
processing
so
I
have
an
independent
file.
I
can
work
from
part
of
our
process
control
right
though
we
were
talking
about
yesterday.
So
in
that
regard
we
create
another
image
from
that
same
scan
and
we
can
do
processing.
A
A
Similarly,
for
SolidWorks,
you
can
convert
this
into
an
obj
or
export
as
an
obj
and
then
convert
to
a
quad
mesh
and
then
pull
t-splines
to
create
a
more
formal
object
around
that
organic
object.
So,
as
you
can
see,
here
got
a
little
bit
of
my
knee
in
there
too,
but
we
have
roughly
a
nice
patterning
of
the
arm
itself.
Obviously
he
didn't
get
the
underside
of
my
arm,
so
we
have
holes
there.
A
A
You
know
that
literally
applies
to
a
human,
so,
like
an
actual
body
body,
you
can
actually
do
it,
so
it
scales
the
height.
Why
so
you
can
do
a
full
length
body
of
someone
and
peri.
We
went
to
a
maker
faire
and
they
had
one
of
these
set
up
and
he
has
a
fool
like
bust
of
himself
like
fully
standing.
It's
the
oh
yeah.
A
C
B
B
A
B
A
Is
yeah
this
is
directly
plugged
in
and
then
similarly
what
Jeremy
was
doing
is
taking
an
iPad
itself
and
not
interfacing
into
another
program,
so
it
actually
had
the
software
built
into
the
iPad
and
that's
maybe
something
new,
or
that
they've
done
and
I'll
also
mention
that
this
is
like
the
older
one.
So
they've
come
out
with
the
mark
2,
which
is
much
more
robust,
higher
processing
power,
probably
20
times
better
than
this
one.
So
I
have
a
few
more
minutes.
Any
other
questions.
C
A
C
A
So
another
thing
is,
you
can
do
pre-processing
in
this
software,
so
one
thing
we
definitely
do
is
the
move
in
crop,
and
so
this
allows
you
to
essentially,
you
know
eliminate
most
of
that
need
that's
not
necessary
for
our
hand
model
right.
So
that's
that's
one
of
the
workflow
steps
that
we
do.
Ok,
any
last
questions
I
will
be
in
the
back
room
if
you
have
any
further
questions.
Thank
you
very
much.