►
From YouTube: Microsoft Power Apps community call-September 2020
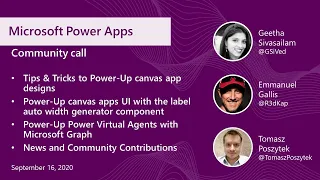
Description
Hosted by Charles Sterling and Todd Baginski, this month's call included Tips & Tricks to Power-Up canvas app designs, Power-Up canvas apps UI with the label auto width generator component, Power-Up Power Virtual Agents with Microsoft Graph and as always news and community contributions.
Speakers: Geetha Sivasailam, Emmanuel Gallis, Tomasz Poszytek
For more information, visit https://powerapps.microsoft.com
A
A
In
this
call
we
do
the
latest
news
and
community
contributions
all
around
the
powerapps
community
around
the
world.
We
get
to
meet
the
product
teams,
who
actually
develop
power
apps
and
invent
them
and
support
them
and
put
all
these
cool
features
in
it
for
us
to
play
with.
We
have
technical,
deep,
dives
and
folks
from
the
community
like
three
folks.
We
have
on
today
to
share
their
expertise
and
cool
things
they're
doing
with
powerapps.
A
So
thanks
for
joining
us
today
and
we
hope
to
see
you
another
call
as
well
so
a
little
bit
about
how
this
call
comes
together.
That's
myself
on
the
left.
There
I'm
todd
baginski,
I'm
a
partner
and
cto
at
canvas,
a
microsoft
mvp,
and
I
love
all
things:
azure
office,
365,
sharepoint
and
putting
way
too
many
animated
christmas
lights
on
my
house.
I'm
very
happy.
I'm
recovering
from
a
broken
arm
and
I
really
feel
like
myself
this
month
compared
to
last
month.
A
B
A
That
is
very
cool.
You
know
my
uncle
is
actually
with
the
police
department
down
there.
He,
I
believe,
he's
a
deputy
sheriff.
I
hope
I
don't
meet
him,
don't
get
in
any
trouble
all
right.
So
yes,
we,
oh
before
I
go
on
I'd,
also
like
to
mention.
I
didn't
have
a
chance
to
get
this
slide
updated,
but
it's
not
just
me
and
chuck
who
make
this
call
come
together.
A
Dana
wicken
is
also
a
really
big
part
of
this
organizing
it.
She
helps
us
every
month
to
organize
it
and
promote
it
and
do
many
other
things.
Heather
hernandez
is
also
helping
us
out
with
it
all
the
time
as
well
and
then
andrew
benson.
He
does
the
post-production
on
the
video.
So
by
the
time
you
listen
and
watch
this
on
youtube,
he's
already
done
his
magic
on
it
and
made
it
really
awesome
so
we'd
just
like
to
give
a
shout
out
to
all
them
as
well.
A
Okay,
so
moving
on
to
what
we're
going
to
talk
about
today,
we'll
talk
about
the
other
folks
who
are
part
of
our
team
on
the
call
today
as
well,
and
then
we're
going
to
get
right
into
the
content.
Today's
theme
is
powering
up,
so
we're
going
to
power
up
canvas,
app
designs,
we're
going
to
power
up
canvas,
app
ui
and
we're
also
going
to
power
up
canvas
virtual
agents
with
the
graph
api.
A
So
before
we
move
on
I'd
like
to
point
out
that
you
have
a
chat
window
available
to
you
to
ask
questions
if
you
are
stuck
on
powerapps
or
have
a
question
about
it,
or
can
it
do
this
or
that
this
is
the
perfect
place
to
ask?
You've
got
all
kinds
of
folks
here
in
this
call:
every
month
who
are
power,
ups,
mvps
champions
power,
addicts
or
just
playing
awesome
at
powerapps.
A
We
really
encourage
you
to
reach
out
and
ask
questions.
That's
what
the
community
is
all
about,
and
we
give
a
big
shout
out
to
all
the
folks
who
continue
to
do
that
and
help
out
every
month
that
tease
us
up
for
the
first
part
of
our
presentation.
Today
so
keitha
welcome
to
the
call
and
thank
you
for
coming
to
share
your
time
today,
you're
going
to
talk
to
us
about
how
to
power
up
your
canvas,
app
designs.
C
A
C
I
did
not
come
from
a
design
background.
I
come
from
more
like
a
pro
code
developer
background,
and
so
these
are
stuff
that
I
learned
along
the
way,
and
I
think-
and
this
is
what
I
want
to
share,
because
you
don't
really
have
to
be
a
ui
or
ux
designer
or
a
professional
web
designer
to
be
able
to
amp
up
your
app
designs.
So
I'm
hoping
these
tips
will
help
everyone
in
their
journey
of
app.
Designing
awesome,
wait,
hey,
hey
everybody!
C
It
is
important
that
you
have
a
sketch
or
a
visual,
a
visualization
of
how
you
want
your
apps
to
look
like,
and
that
can
happen
right
after
you
have
a
good
understanding
of
foundational
information
architecture
that
you
have,
or
even
if,
once
you
have
a
good
functional
design,
and
you
know
how
the
user
flow
and
data
flow
needs
to
be.
So
it
is
important
that
you
start
prototyping
before
you.
You
know
get
started
with
your
actual
app
building
exercise
and
there
are
several
tools
out
there.
C
It
could
be
something
as
simple
as
in
powerpoint
or
it
could
be
something
that
you
use
like
a
third-party
tool
like
say:
adobe,
xd
or
lucidchart.
There
are
several
products
out
there
that
can
help
you,
but
powerpoint
is
more
than
enough.
That's
something
that
I
generally
turn
towards
for
my
prototyping
and
sketching
and
then
another
a
good
tip
for
you.
If
you're
like
me-
and
you
don't
know
where
to
start
and
you're,
not
a
professional
web
designer
is
to
get
inspired.
Look
at
templates
that
the
powerapps
maker
portal
has.
C
There
are
several
app
templates,
like
the
customer
success
management
app
template
the
meetings
app
just
have
some
really
good,
ui
ux
designs
that
you
can
look
at
and
you
can
adapt
and
extend
based
on
your
business
processes.
And
then
you
also
have
professional
developer
based
sites
like
ui
movement
and
ux
matters
where
you
have
professional
designers
who
share
their
top
designs
with
theming
branding,
colors,
typography
and
so
much
more
and
speaking
of
branding.
I
know
sanchez
on
the
call
today
and
that
is
another
great
place
to
get
started.
C
He
has
a
branding
template
and
there's
version
two
out
there
that
he
put
out
in
the
powerapps
forums
where
you
can
download
the
template
open
up
the
app,
how
configure
the
controls,
how
you
want
it
to
be,
save
them,
and
then
it
generates
an
msap
e
file
that
you
can
use
as
a
template
to
have
a
consistent
look
and
feel
for
all
the
apps
that
are
built
in
your
organization
below.
Here
I
have
a
bunch
of
power
addicts
listed.
You
know
alan
shai
and
yusuf.
C
The
next
tip
over
here
is
specific
to
colors,
so
when,
once
you
have
your
design
and
you
have
a
user
flow
of
how
the
navigation
needs
to
work
first
thing
you
really
want
is
to
decide
on
the
theming
of
your
apps.
I
usually
tend
to
stick
to
three
colors,
but
recommendations
that
you
can
go
anywhere
between
one
to
three
primary
colors
or
secondary
colors.
C
I
tend
to
put
my
colors
and
accents
in
a
variable
on
the
app
start
and,
and
that
way
I
can
reuse
them
across
all
of
the
controls
and
screens
within
the
app,
and
I
don't
have
to
you-
know,
copy
paste
or
start
typing
in
the
actual
color
codes,
and
one
other
way
to
do.
It
is
to
actually
store
it
in
a
data
source
if
needed
and-
and
that
enables
consistency.
C
C
C
C
It
does
a
great
job
of
telling
you
what
color
text
will
be
visible
on
a
primary
background
or
a
secondary
background.
So
this
tells
me
that
using
a
black
color
text
on
this
indigo
background
is
not
legible,
so
these
go
hand
in
hand
with
the
wcag
compliancy,
and
so
this
is.
This.
Is
somewhere
that
I
usually
go
to
to
get
started
because
it
kind
of
comes
with
recommendations
around
how
it
has
to
be
accessible
and
also
gives
you
a
trending
palette
that
you
can
use
another
site
that
I
go
to
is
coolers.
C
This
is
another
one
of
my
favorites,
this
kind
of
keeps
it
minimal.
It
gives
you
a
palette
with
very
minimal
colors.
Let's
say
we
have
a
black
and
a
white,
and
then
these
are
just
the
three
colors
that
that
are
generated.
What
I
really
like
about
this
is
that
you
can
use
shades
if
you
feel
like
you,
don't
like
some
of
them
and
then
and
another
good
tip
here
is
you
can
go
export
it.
C
So
that's
one
now.
Our
my
second
tip
here
is
to
see
how
you
can
use
some
of
the
controls.
There
are
several
controls
available
in
the
powerapp
studio
maker
portal
that
you
can
go
above
and
beyond
to
you
know,
to
create
incredible.
Looking
apps
now,
one
such
control
that
I
think
has
is
a
little
underrated
and
people
don't
really
grasp
the
benefits
of
using
the
controls.
The
html
control,
the
html
control
is
a
very
powerful
control.
You
can
use
that
to
create
css
three
properties
and
there
are
some
supportive
properties.
C
There
are
some
that
are
not.
You
can
create
box
shadows,
you
can
have
gradients,
you
can
even
create
icons
using
html
controls
using
unicode
characters
and
then
the
only
thing
to
note
that
it
only
allows
you
to
have
inline
styles.
You
cannot
have
global
styles
in
the
sense
you
can't
have
a
style
tag
and
have
styles
in
there
that
would
be
used
by
the
rest
of
your
app.
The
control
pretty
much
just
allows
you
to
have
styles.
C
C
For
example,
if
you
mouse
over
or
there's
a
custom
scroll
bar
that
would
you
know
that
you
require
to
change
the
color
on
those
are
things
that
you
can
do,
but
there's
a
lot
more
that
you
can
do,
and
you
know
you
can
get
creative
with
it
and
and
you
can
really
amp
up
your
app
designs.
So
let's
look
at
that
one.
So
I'm
going
to
go
ahead
and
show
you
an
app.
So
this
is
an
app
that
I
have.
C
This
is
a
pto
app
and
there
are
several
nuggets
within
this
app
and
if
you
notice
this
little
piece
over
here
is
an
svg.
Svgs
are
pretty
light
on
your
app
and
you
want
to
make
sure
that
you
use
svgs
wherever
possible,
places
where
you
want
some
complex,
animation
or
graphics,
and
you
can
also
plug
in
your
variables
and
make
them
dynamic.
C
C
One
other
tip
over
here
is
the
icon.
If
you
have
a
lot
of
icons
and
if
you
want
to
make
your
apps
more
performant,
one
good
way
for
you
to
steer
away
from
actually
having
images
loaded
is
to
use
unicode
character
icons.
So
here
you
can
see
that
this
is
a
a
right
arrow
and
let's
say
I
don't
want
to
use
the
one
that's
available
out
of
the
box.
C
Then
I
can
actually
drop
in
an
html
unicode
character
and
that
usually
starts
with
an
ampersand
hash
and
ends
with
a
semicolon
and
really
this
x2192
is
the
unicode
for
the
arrow,
and
you
can
also
specify
the
font,
size
and
colors
and
recently
allen
and
rory.
They
both
had
tips
shared
where
they
used
unicorn
characters
on
power.
Bi
and
you
know
it
was,
and
they
have
links
and
there's
a
unicode
table
out
there,
that
you
can
go
and
search
for
a
specific
style
of
icon
and
it
will
give
you
what
the
character
is.
C
So
that's
one
tip
that
I
wanted
to
share
and
one
other
thing
I
wanted
to
show
you
is
that
there
are
actually
different
types
of
box
shadows,
just
a
quick
tip
here.
If
there
are
cards
and
layouts
that
you
want
to
display,
then
you
don't
want
to
get
aggressive
with
the
box
shadows.
You
want
to
keep
them
pretty
mild,
but
then,
if
there
are
buttons
and
they're
clickable,
then
you
know
you
can
have
a
much
darker
block
shadow.
So
it
kind
of
gives
you
a
3d
effect
and
it
implies
that
it
can
be
clickable.
C
You
can
also
have
gradients
set
up
in
your
html
control.
So
what
we
have
here
is
a
linear
gradient
going
from
going
from
left
to
the
right
and
it
has
a
lighter
shade
and
it
gets
darker
towards
the
ref,
and
you
can
see
that
this
is
set
by
the
background
property
within
your
html
control.
And
now,
if
you
don't
know
html
and
if
you're
completely
new,
there
are
sites
out
there
and
one
such
site
is
a
css
generator
dot
org
and
that
led
generates
the
html
for
you.
C
You
can
pick
what
the
colors
that
you
want,
how
the
offsets
need
to
be
how
your
box
shadows
need
to
look
like,
and
it
will
generate
the
html
that
you
can
just
copy
paste
and
embed
it
as
well.
One
other
tip
a
bonus
tip
that
I
wanted
to
show
you
is
you
know
if
you
ever
needed
to
truncate
text
within
you
know.
Let's
say
you
have
chunk
of
text
within
your
gallery
control
and
you
want
to
truncate
it.
You
can
do
that
using
html
control
as
well.
C
So
what
we're
really
doing
here
is
making
sure
that
the
text
overflow
is
set
to
ellipses,
and
so
that's
what
you
see
that
it
actually
has
a
width
set
to
4
450
and
it
truncated
it
with
an
ellipsis.
So
that's
another
trick
that
you
can
use.
If
you
want
to
truncate
text
in
in
zones
where
you
want
to
just
show
a
preview
and
then
you
know
take
them
over
to
another
screen
or
a
form
where
you
want
to
show
them
a
more
enlarged
view
of
the
context.
C
So
here
is
our
third
tip.
This
is
the
wcag
compliance
that
we
already
looked
at,
which
is
the
web
content
access
guidelines.
Now
we
looked
at
how
you
want
to
you
know
when
you
decide
your
colors
and
variations,
you
want
to
make
sure
that
they're
compliant,
but
then
you
also
want
to
make
sure
that
you
add
labels
and
tool
tips
to
your
forms
and
inputs.
Because
they're
you
know
as
designers,
we
have
the
responsibility
to
make
sure
that
everybody
has
access
to
what
we
create,
regardless
of
the
ability,
context
and
situations
end
of
the
day.
C
We
want
to
make
sure
it's
a
better
experience
for
everybody.
So
make
sure
that
if
you
on
the
powerapps
app
checker,
there
is
an
accessibility
area
that
will
display
all
the
controls
that
don't
have
the
accessible
label.
So
that's
something
you
want
to
make
sure
that
you
add
them,
because
people
who
use
screen
readers
are
going
to
be
hearing
what
those
controls
are
for.
So
if
you
don't
have
an
accessible
label
and
or
if
it's
named
something
that
doesn't
provide
context,
then
it's
not
going
to
be
useful
for
the
users.
C
So
make
sure
you
add
them,
and
then
here
is
another
example
where
you
do
want
to
make
sure
that
you
add
some
visual
cues
and
not
just
rely
on
colors
to
provide
important
information.
For
example,
these
are
required
fields
for
submission
and
for
a
regular
user.
Yes,
these
would
appear
red,
and
I
know
that
I'm
missing
these,
but
for
a
user
who
cannot
perceive
color
as
the
rest
of
us
do.
C
It
is
going
to
look
like
it's
just
normal,
so
you
want
to
make
sure
that
you
add
some
visual
cues
like
an
icon
and
that
you
know
that
would
tell
the
user
that
oh
there's
something
wrong.
It's
a
warning
icon
and
then
there's
also
another
theme
designer
by
office
ui
fabric,
and
that
also
does
a
good
accessibility
check
for
you.
You
know
on
texts
and
color
variations
and
we'll
look
at
the
look
at
that
as
part
of
my
last
demo.
C
So
this
next
tip
over
here
is
around
effective
and
engaging
ux,
and
I'm
going
to
cover
like
two
tips
that
that
would
really
enhance
your
apps.
The
number
one
tip
is
the
text
overlay,
because
it's
become
really
popular.
These
days,
where
you
see
overlay
of
text,
labels
on
background
images,
but
the
last
thing
you
want
is
your
users
to
be
training
to
read
such
text
now.
The
image
on
the
left
over
here
has
text
it.
You
know
it
has
these
numbers
and
it
has
a
date.
C
It
can
either
be
a
scream
is
a
semi-transparent
black
or
white
overlay,
or
you
can
even
have
a
colored
overlay
to
neutralize
the
busy
background
behind.
This
is
just
another
tip
to
make
your
user
experience
engaging
one
other
tip
is
designing
fat
finger
friendly
apps.
If
you
haven't
heard
this
term
it.
You
know
it
is
a
real
syndrome.
It's
called
the
fat
finger
syndrome
and
it
is
when
a
user
inadvertently
triggers
a
secondary
action
when
navigating
touchscreen
ui
and
then
you
know
you
either
have
a
gallery.
You
have
an
edit
icon
and
a
delete.
C
Icon
and
icons
are
either
too
close
or
there's
not
enough
padding,
and
so
there's
not
a
separation
between
your
controls
or
call
to
action.
So
here's
the
recommendation
from
material
design
ui
and
their
recommendation
is
that
you
have
a
minimum
of
48
pixels
with
at
least
an
eight
pixel
space
between
your
targets
and
matt
recently
also
shared
a
tweet
about
how
he
uses
the
padding
on
an
icon
to
cover
the
text
around
it.
So
that
way,
there's
a
more
hit
zone
and
target
zone
when
you
are
clicking
on
on
icons.
C
One
quick
tip
here
is
that
you
can
use
the
one
thumb
one
eyeball
test
for
mobile
designs.
It's
just
a
way
to
find
out
if
your
mobile
design
allows
for
users
to
easily
use
the
app
in
one
hand,
with
partially
distracted
attention,
and
it's
just
it's
a
way
to
test.
If
users
can
perform
certain
actions
in
just
one
hand
and
160
seconds.
My
last
tip
for
the
day
is
to
reduce
complexity.
It
is
important
that
you
remember,
performance
is
key
and
less
is
more.
C
I
like
this
quote
from
april
from
her
ignite
session,
where
she
says
marie
condor.
Your
apps
keep
the
controls
that
really
provide
value
to
your
app
and
then
you
know
clean
the
rest
of
them
out.
I
use
svgs
where
there
are
complex,
animations
involved
and
replace
their
icons
and
images
with
html
unicodes.
C
If
you
can
use
html
controls
to
combine
bunch
of
controls
or
data
that
you
would
want
to
display
and
also
galleries
as
another
workaround,
if
you
want
to
keep
your
number
of
controls
to
be
less
than
500
and
another
tip
is
also
when
you
have
forms-
and
you
have
scrolling
forms,
people
can
scroll,
but
then
it
makes
it
easier
for
them
to
engage
with
the
app.
If
you
have
them
logically
grouped
or
you
have
tap
layouts
or
fly-out
menus
and
last
tip
is
also
to
use
components.
A
A
B
C
B
A
Great
okay,
so
next
up,
we
have
manuel
here
to
tell
us
about
his
cool
canvas,
app
ui
label,
auto
with
generator
component
and
it
for
those
of
you
who
may
have
not
built
a
power
app
before.
If
this
is
your
first
time
doing
it
this
this
right
here
what
he
is
about
to
show,
you
can
save
you
a
ton
of
time
and
effort
so
manuel.
Let
you
take
it
away
here
and
thanks
for
joining
us.
D
D
D
D
D
D
If
I
change
the
the
label
here,
you
see
that
if
it's
too
long
for
the
the
width
of
the
label,
then
you
have
these
ellipses
shown
showing
up,
and
you
don't
see
your
the
label
in
its
full
length.
You
see
what
I
mean,
so
this
is
one
one
case,
for
instance,
in
tabs
you
can
encounter
the
same
problem
in
menus
if
you
make
a
multi-language
application,
where
often
well.
According
to
the
language,
the
length
of
a
translation
varies
a
lot
between
french
english,
german,
etc.
D
This
can
be
a
really
tricky
and
usually
what
you
do
you
you
define
words
that
is
sufficient
to
hold
any
translation
for
for
the
text
you're
trying
to
to
display,
but
it's
not
very
handy
because
then
you
have
white
spaces
between
your
types
or
your
labels
when
the
the
translucents
are
short,
etc.
So
it's
not
very,
very
nice
to
see
you
can
have
the
need
of
it
also
eventually
on
buttons,
if
you
want
your
button
to
resize
depending
of
its
label
etc.
D
D
What
I
did
is
that
I'm
going
to
show
you
here
on
the
screen.
I
just
put
a
simple
label
here.
I
put
some
text
in
it
and
I've
set
it
auto
hide
property.
I
activated
it's
what
photoright
property,
which
means
that
whenever
I
will
add
some
text,
the
text
will
wrap
down
to
the
next
line
and,
of
course,
since
I
have
activated
auto
height,
the
height
of
the
label
will
change
and
just
to
to
show
you
this.
I
I've
put
another
label
here
where
I
display
the
height
of
this
label.
D
D
D
So
I
thought
this
is
very
interesting,
because
this
means
that
if
I
know
that
I
have
20
a
characters
here
and
I
reduce
the
size
and
when
it
changes
height,
then
I
know
that
this
exact
width
is
the
correct
width
for
20
a
characters
in
this
font
and
for
this
size.
So
if
I
divide
this,
the
width
of
my
label
here,
which
have
20
a
characters
by
20-
I
divide
it
by
20-
then
I
know
the
size
of
one
a
character.
D
I
hope
everybody
is
following
what
I'm
trying
to
explain?
Okay,
and
so
the
idea
then
was
to
determine
and
calculate
for
each
character
in
the
ascii
table.
What
unitary
size
is
for
for
each
character.
So
I
I
wanted
to
build
like
a
collection
where
I
wouldn't
have
for
the
a
character
when
it's
this
font
and
this
size.
This
is
the
exact
size
with
the
six
decimals.
You
know
the
exact
size
of
one
character
and
then
I
would
use
this
to
calculate
the
width
of
the
label.
Whatever
is
inside
the
label?
D
Okay,
so
that's
the
main
id.
But
of
course
I
I
tried
to
find
on
the
internet
some
resources
giving
me
this.
These
values,
giving
me
the
sizes
of
each
font,
each
each
font
size
the
size
of
a
unitary
character,
but
I
didn't
find
it
so
I
decided
to
build
it
myself
using
powerapps
and
I'll.
Show
you
how
I
did
this
so
I
created
an
application
here,
which
I
call
the
phone
char
with
builder,
so
I'm
going
to
zoom
a
little
bit
first
to
show
you
what
happens.
D
So
I
built
this
application,
in
which
I
did
exactly
what
I
just
explained.
I
have
a
label
here
where
I
put
20
times
the
same
character:
okay
and
I
start
with
the
first
character.
I
start
with
the
the
space
character,
the
number
32
in
the
ascii
table
and
then
I
go
to
the
next
character:
character,
33
in
ascii
table
and
then
34,
35,
36,
etc.
D
Every
time
I
set
this
character
to
this
label,
and
then
I
have
a
timer
which
will
reduce
the
size
of
the
label
here
and
once
I
detect
that
the
height
changes,
I
know
that
the
exact
size
of
the
of
the
label
for
20
characters,
and
then
I
divide
it
and
calculate
the
the
width
of
one
unitary
character.
Okay,
so
I'll
show
you
how
it
how
it
works
very
quickly,
my
pc
is
pretty
slow,
and
so
it
doesn't
detect
the
height
change.
D
D
For
each
of
these
characters
it
will,
through
a
timer,
reduce
the
size
of
the
label
until
it
sees
the
height
variation
and
then
calculate
divide
this
width
by
20
to
identify
the
width
of
one
one
instant
of
the
the
character
and
then
every
time
it
changes
of
character.
I
will
store
every
side
unitary
size
of
each
character.
As
you
can
see
here
on
the
right
side
of
the
of
the
screen,
I
will
store
in
a
collection
every
size
of
each
character.
D
So
if
I
select,
as
you
can
see
it
on
the
screen,
the
aerial
font
and
the
later
font
for
the
normal
widths,
normal
font,
weight,
gold,
font,
weight,
etc,
I
will
build
a
huge
collection
containing
for
each
font,
each
front
weight
and
each
character,
its
exact
size,
and
once
I
have
calculated
the
sizes
for
the
fonts
and
the
size,
I
click
on
the
generate
button,
which
will
create
a
perhaps
formula
that
defines
this
huge
collection
as
a
code.
You
can
implement
inside
your
application.
D
D
So
I
made
a
component
here
which
is
called
the
auto
width
label:
generator.
Okay,
when
you
will
import
it
in
your
application.
You
will
see
exactly
this,
so
you
have
to
initialize
the
components
so
that
loads
up
the
the
whole
huge
collection,
okay
and
once
it
has
been
initialized,
you
will
see
this
screen.
So
here
you
will
be
able
to
select
a
font.
Let's
say
I
want
latto
and
I
want
the
normal
font
weight.
D
That's
it.
You
can
select
many
font
weights.
If
you
want,
I
just
take
I'll
just
stick
normal
and
then
you
will
select
a
char
set.
Charset
is
a
it's
a
set
of
characters
that
you
will,
for
which
you
would
like
to
store
in
your
application
in
a
huge
collection,
the
list
of
individual
sizes
for
the
correctors,
so
I'll
I'll,
just
take
tiny,
and
then
it
will
generate
here,
as
you
can
see,
a
call
to
a
set
formula
function
which
will
define
a
a
collection,
a
table
in
fact
called
charge
widths.
D
D
You
go
to
the
app
onstart
event
here.
You
paste
it
here,
since
we
are
inside
the
editor.
I'll
just
run
the
onstart
event
directly
from
here.
So
now
we
have
in
memory
a
collection
of
all
sizes
for
the
characters.
From
a
to
z,
to
z
for
the
latto
font
and
normal
font
weight,
okay,
and
then
I
will
go
back
to
the
component
here.
The
auto
width
label
generator.
D
B
D
D
Okay
and
the
the
interesting
thing
is
that
it
takes
into
account
the
fact
that
you
might
want
to
put
some
left
and
right
padding
to
your
label.
So
if
I
add
some
padding
here
and
I
put
25
pixels
for
left
padding
as
you
can
see,
the
formula
that
calculates
the
new
widths
takes
into
account
is
a
left
and
right,
padding.
Okay.
So
so,
using
this
trick
and
using
this
component
here,
you
will
be
able
to
adjust
the
weights
of
any
label
in
your
application
in
whatever
font
and
font
weight.
D
You
want,
of
course,
the
the
formula
that
calculates
the
widths
also
takes
into
account
the
font
size.
So
here
we
have
a
font
size
of
13..
So
if
I
put
18
now
the
font
just
resizes
bring
to
the
font
size,
okay.
So
this
is
really
interesting,
because
now
you
can
build
screens
where
your
labels
and
your
tap
labels,
so
I
didn't
implement
it
here,
but
I
could
in
fact
I
can
just
take
the
same
formula
I
put
on
my
label
here
for
the
width.
D
D
A
This
is
great
lots
of
lots
of
cool
feedback
in
there
originally,
when
you
said
it
was
a
component,
I
was
thinking
you're
going
to
have
to
add
it
to
the
app
as
a
component,
but
it's
not
really
a
component.
Is
it
it's?
It's
just
a
formula
you
built
with
an
extremely
impressive
app
to
crank
that
onstart
code
out
in
your
formula,
but
that's
great
so
that
you
can
use
this
in
any
power
app
over
and
over.
You
don't
need
to
get
permission
to
deploy
a
component
or
anything.
D
Exactly
the
only
aim,
the
only
goal
is
to
get
this
formula
which
will
initialize
the
the
like
a
collection
of
all
sizes
for
the
font
and
font
weight.
You
choose
and
then
copy
paste,
this
formula
in
your
width,
property
of
your
labels-
and
I
just
posted
this
weekend-
a
new
version
of
this
component
using
the
self
operator
in
the
formula
so
that
you
don't
have
to
change
the
label
of
your
the
name
of
your
label.
D
The
only
thing
you
have
to
understand-
and
this
is
very
important-
is
that,
of
course,
you
see
that
the
size
of
this
collection
here
can
be
pretty
huge
if
you
decide
to
generate
this
collection
for
many
different
fonts
and
many
font
weights,
and
you
decide
to
take
the
full
255
characters
in
the
chart
set
yeah.
Of
course,
as
you
can
see
now,
it's
my
pc
just
hanged
up.
D
Well,
it's
going
to
generate
a
huge
collection
and,
of
course
performance
would
be
a
bit
worse
in
your
application.
So
the
idea
really
is
to
select
the
the
the
font
family
and
the
font
weight
and
the
char
set
really
to
have
the
minimum
you
need
for
what
you
want
to
do.
For
instance,
that's
what
I
use
now
for
creating
breadcrumbs,
because
breadcrumbs
often
you
have
11
1
and
then
you
have
this
chevron
icon.
D
A
D
Make
sure
you
just
select
the
correct
char
set
if
you
want
to
have
some
information
about?
What's
in
the
char
set,
I've
made
a
little
a
little
table
here,
showing
you
that
for
the
tiny
charset
you
will
have
the
space
character
and
then
only
characters
from
0
to
9
and
a
to
z
in
uppercase
and
lowercase
for
the
the
minimum
one
you
will
get
also
some
other
special
characters,
etc,
etc.
B
A
D
Yeah
I
decided
to
make
a
component
because
then
you
can
just
import
it
into
whatever
application,
but
I
really
recommend-
and
that's
what
I
put
on
the
the
forum-
it's
better.
If
you
put
this
component
in
a
separate
application,
because
the
component
itself
holds
the
huge
mega
collection
with
all
sizes
for
all
fonts
and
font
weights,
so
put
it
in
a
separate
application.
Use
it
to
generate
the
formulas
and
just
use
the
formulas
in
your
application.
B
D
D
Do
that
yes,
general
release
exactly
that's
correct
generally
in
a
per
wrap
application,
you
use
one
font,
maybe
two,
but
usually
one
font,
probably
one
or
two
font
weights,
and
that
should
be
enough
for
the
application,
so
the
collection
will
be
not
too
too
big.
The
only
problem
of
performance
is
if
the
collection
is
too
big
there,
but
using
the
formula
in
many
screens
will
not
slow
down
your
application.
E
B
E
Correct
so
what
I
wanted
to
do
now
and
just
need
to
find
out
which
monitor,
should
I
present
the
slide
now
on
this
one
right.
So
just
a
few
words
about
myself,
I'm
the
business
applications
mvp
and
working
with
those
power
platform
tools
for
over
three
years,
so
I
quite
got
sunk
into
and
well
just
long
story
short.
E
E
We're
gonna
switch
now
into
something
different,
so
from
powerapps
and
all
these
cool
stuff
around
powerapps
uis,
which
I
really
loved
to
something
more
near
the
automation
in
many
other
processes
that
I
love.
I
know
that
most
of
you
who
are
on
the
call
is
aware
that
we
have
this
powerful
agent's
edition
where
we
can
build
the
no-code
chat,
bots
that
can
interact
with
our
internal
employees
with
our
customers,
so
they
can
be
public
facing.
E
I
know
this
costs
quite
a
lot
because,
like
one
thousand
dollar
per
one,
when
per
100
sessions
or
the
other
way
around.
Nevertheless,
this
is
a
cool
tool,
because
you
can
actually
create
great
chat
bots
that
can
really
help
your
business
work
more
smooth
and
can
just
put
a
lot
of
workload
from
your
customer
services.
Your
contact
centers
onto
the
chat
bots,
so
that
customers
can
use
them
to
ask
questions
now.
E
What
I
want
to
show
you
is
that
when
we
want
to
use
these
chat
bots
internally,
we
can
actually
or
even
not
internally.
But
if
you,
if
you
want
to
use
the
chatbot
with
an
oauth
2.0
provider,
then
we
can
actually
get
the
user
context
and
when
speaking
about
microsoft,
this
provider
is
obviously
azure
ide.
So
like
in
my
case
when
I
started
conversation
with
the
bot-
and
I
asked.
E
Can
you
show
sorry
me
my
data,
for
example,
and
then
because
this
triggers
a
topic
where
bot
is
actually
requesting
me
to
provide
my
error
token.
Therefore,
it
is
asking
me
first
to
log
in
so
because
now
I'm
in
a
very
private
session,
therefore,
I
will
now
go
through
the
regular
sign
up
process
or
authentication
process.
E
B
E
So
now
what
is
going
to
happen
right
now
is:
I
will
be
directed
to
a
web
page
where
there
is
a
token
generated
this
validation
code.
Now,
once
I
copied
the
bot
is
actually
able
to
acknowledge
that
I
actually
got
logged
in,
and
so
it
was
able
to
generate
us
for
the
better
token,
which
I
can
later
use,
for
example,
to
graph
api
in
the
context
or
on
behalf
of
the
user
with
which
the
body
is
conversating.
E
Nevertheless,
today,
when
we
want
to
go
and
authenticate
a
user,
you
need
to
first
go
under
the
authentication
setting
in
your
power
tool
agents
and
there
you
need
to
feel
a
lot
of
fields
actually
with
information
that
is
coming
from
azure
id
now
on
this
web
page
here
that
is
present
inside
this
configuration
page,
you
have
a
very
detailed
walkthrough
on
what
information
is
required
in
each
of
these
fields
in
regards
to
azure
id.
So
there
are
those
those
examples
just
for
the
azure
id.
However,
I
said
you
can
actually
use
any
other
oauth
provider.
E
E
Flow,
you
will
realize
that
there
is
a
new
action
under
calling
action
group
of
activities.
So
besides,
so
besides,
all
these
flows
that
you
can
choose
from
there
should
be
as
well
an
action
that
is
called
authenticate.
Oh
yes,
there
is,
there
is
one
so
yeah.
It
has
to
be
like
the
one,
the
last
action
in
the
in
the
set
of
control
in
the
flow
of
the
conversation.
E
So
now,
once
I
put
it
in
it,
will
automatically
generate
me
the
action
to
authenticate
and
the
branching.
What
should
happen
once
the
user
is
logged
in
and
what
should
happen
if
the
login
fails?
One
of
the
outcomes
of
the
application
is
this
off
token.
So
that's
actually
the
better
token
that
we
can
use
to
call
graph
api
in
the
context
of
the
user.
E
So
now,
once
I
go
to
flow
and
that's
the
example
of
the
flow
that
asks
that
tries
to
gather
user
users
data,
then
the
first
thing
I'm
doing
is
actually
calling
graph
api
in
the
context
of
myself.
So
just
calling
the
endpoint
zero
one
one
zero,
slash
me
and
then
in
advanced
I'm
using
the
raw
authentication
and
simply
providing
this
bearer
and
the
token
that
is
being
passed
from
the
particular
agents.
Once
I
call
this
flow,
so
let
me
show
you
how
it
works
in
the
virtual
agent.
E
I'm
just
clicking
too
fast,
if
I'd
like
now
to
call
in
action,
then
find
the
one
that
says:
wow,
there's
so
many
of
them.
I
get
user
info,
then,
because
I
have
configured
the
flow
to
actually
expect
that
there
is
one
input
variable
or
input
value.
That
is
called
token
and
therefore
I
need
to
provide
here
a
value,
and
this
is
going
to
be
this
variable
that
stores
the
better
token
now.
What
is
also
important
in
this
authentication
approach
that
we
have
in
particular
agents,
is
that.
E
A
E
E
And
then
create
new
application
in
your
azure.
Well,
you
know
azure
id
actually,
then
you
need
to
grant
this
application
well
open
id
permission
and
user
read
all
this
is
exactly
on
the
application
level
and
ground
this
admin
constant
and
then,
once
you
grant
this
those
application
permissions,
you
need
to
simply
go
into
certificates
to
generate
a
new
certificate
that
you
need
to
copy
over
to
the
configuration
page
plus.
E
You
need
to
go
to
overview
to
copy
the
application
client
id
so
that
one
and
now
once
all
is
done
then
or
you're
simply
home.
So
this
is
actually
the
only
the
only
thing
that
you
are
requested
to
do
regarding
this
configuration,
the
rest
is
actually
the
information
can
copy
directly
from
the
recommendation.
B
E
So
I
can
remember
that
this
test
topic
doesn't
have
any
authentication
action
added
directly.
It
is
just
using
this
global
variable
and
therefore,
even
if
I
now
start
trigger
it,
will
ask
me
to
authenticate
right,
because
this
is
how
the
global
variables
work,
so
they
are
just
navigating
the
user
to
the
place
where
that
variable
is
going
to
be
initialized.
E
So
in
this
case
this
all
works
fine.
So
right
now
it
is
just
going
to
call
the
graph
api
via
the
power
automate
and
should
get
me
back
the
information
about
myself
and
possibly
did,
but
I
didn't
add
any
action
to
actually
write
the
output
from
the
power
automate.
So
it
worked,
the
authentication
went
smoothly.
There
is
no
action
needed
because
the
variable
is
in
place,
so
this
is
actually
how
you
can
use
the
authentication
in
particular
agents.
Then
one
last
thing
I
wanted
to
show
you
is
about
the
situation.
E
E
E
Right
so
in
here
also,
even
though
I'm
logged
into
microsoft
teams,
let
it
be
microsoft,
teams
desktop
or
web
browser
version,
then
I
still
need
to
log
in
because
this
session
that
the
bot
is
actually
running
is
not
authenticated.
So
the
user
here
is
just
an
unknown
persona
and
about
is
not
having
an
access
to
my
information
within
teams,
although,
as
you
saw,
this
authentication
was
faster
now,
it
worked
was
faster
because
I
wasn't
actually
requested
to
copy
paste
this
confirmation
code.
It
was
just
once
I
hit
to
login.
A
Add
this
I
I
have
a
question.
I've
never
tried
this
before
I'm
curious.
So
if,
if
you're
running
in
one
of
these-
and
you
pull
back
that
property,
that
gives
you
the
bearer
token,
can
you
go,
they
can
invoke
another
flow
and
throw
the
bearer
token
at
that
flow
and
do
that
action
on
behalf
of
that
user
and
the
other
flow.
A
E
E
E
This
is
rather
to
well
okay,
sort
of
authentication,
but
you
need
to
be
authenticated
in
the
first
place
to
be
able
to
use
this
security,
I
mean
secure
calls
to
graph
api
from
pva.
So
it's
not
meant
to
be
the
authentication,
endpoint
or
sort
of,
but
you
can.
If
you
have
your
own
oauth
2.0
provider
and
it's
working
with
the
cloud
applications,
you
can
obviously
use
it
as
the
authentication
provider
for
private
agents
as
well
all
right,
okay.
So
thank
you
very
much.
A
Very
good,
thank
you
for
being
here
and
showing
that
to
us.
So
on
the
recent
news
and
cool
stuff
front.
Emanuel
also
dropped
a
new
comp,
another
new
component
out
in
the
gallery
a
few
days
ago.
I
saw
this
one
on
twitter
and
this
is
an
iband
checker
component.
So
I,
if
you're
working
with
ibands,
I
suggest
you
check
that
one
out
as
well.
Then
the
big
news
yesterday,
in
my
opinion,
is
the
second
bullet
point.
Solution,
import
and
export
now
works
with
connections
and
environment
variables.
A
If
you
did
learn
about
one
new
thing
with
the
platform
this
week,
I
would
go
check
that
one
out
powerapps
portals
I'll
now
have
web
api
support.
So
if
you're
in
a
portal,
you
can
call
the
apis
that
support
the
portal
to
do
crowd
operations,
so
that
can
extend
a
lot
of
user
interface
scenarios
that
you
could
customize
within
a
portal.
If
you
think
about
that,
then
also
powerapps
obviously
will
be
at
microsoft,
ignite
and
so
please
go
register
for
ignite.
A
A
We
always
like
to
take
a
moment
to
talk
about
our
community.
That's
why
we
have
this
call
to
begin
with
so
the
first
one
that
I
would
like
to
talk
about
emmanuel
brought
this
up
if
you're
running
into
something's
powerapps,
and
it's
not
working
the
way
you
wanted
to
or
you've
got
an
idea
for
something
better.
Let
your
voice
be
heard,
go
tell
microsoft
about
it.
You
can
see
the
link
at
the
bottom
of
the
page
here
it's
in
the
powerusers.microsoft.com
website,
and
here
is
a
screenshot
of
it
and
someone
who
submitted
an
idea.
A
You
can
submit
any
idea
you
want
and
people
vote
them
up
and
down
microsoft.
Triages
these
things,
I
don't
know
what
the
magic
number
is,
but
when
enough
votes
get
on
something
they
start
working
on
it
and
it
finds
its
way
into
the
product.
So
definitely
don't
forget
about
your
opportunity
to
improve
the
product
and
help
yourself
and
your
customers
too,
thanks
to
everybody
again
who
uses
powerapps
cc
to
share
the
great
things
they're
doing
in
the
community.
A
All
these
folks
shared
something
awesome
last
week
and
finally
there's
yet
another
one
last
thing
you
can
learn
more
about
powerapps
with
it.
It's
this
less
code,
more
power
series-
and
this
is
by
donna
and
sarah,
and
they
use
the
channel
9
studio
to
produce
15
20
minute
segments
where
you
can
learn
really
kind
of
snacky
type,
powerapp
tips
so
check
out
all
the
cool
things
and
folks
that
they're
interviewing
there
to
learn
more
as
well.
A
Finally,
we'd
all
like
to
say
thanks
as
usual:
this
is
all
about
the
community
and
everybody
who
came
on
today
to
share
their
time
and
expertise
thanks
for
being
part
of
this
great
community,
I'm
glad
to
be
a
part
of
it.
I
really
enjoy
this
call.
Every
month
our
recording
will
be
posted
on
the
microsoft
365
developer,
youtube
channel.
You
can
follow
us
on
twitter,
at
microsoft,
365
dev
as
well
to
learn
about
all
the
things
related
to
powerapps
and
office
dev.