►
From YouTube: OSE Dev Team Meeting - May 15, 2018
Description
See notes at
http://opensourceecology.org/wiki/Development_Team_Log
Current meetings are at
http://opensourceecology.org/wiki/Current_Meeting
This week:
1. Power Cube
2. OSE Part Library Workbench in FreeCAD
3. Immersion Program and Boot Camp
4. MicroTrac
What you see here at Open Source Ecology is an ambitious program based on a volunteer effort. To help us reach the goals - please consider joining as an OSE Developer in 2017-
http://opensourceecology.org/wiki/OSE_Developers
Take a minute to subscribe to our email newsletter (updates, workshops, etc): http://bit.ly/1LtcM44
A
A
A
Keeping
track
of
that
so
I'm
still
looking
forward
to
having
that
increase
significantly
as
we
go
into
the
weeks
forward.
So
with
the
immersion
program
planning
announcement
is
almost
out,
I
mean
wow.
It
took
me
a
long
time
to
actually
organize
in
terms
of
writing
the
curriculum
for
both
the
immersion
program
and
a
boot
camp.
So
what's
gonna
happen
is
so
if
you
look
at
Aussie
immersion
can
click
on
that
look
at
the
wiki
page?
For
that
there's
a
video!
That's
up,
and
that's
that's
all
good.
That's
that's
all
done!
A
There's
a
section
on
the
OSC
boot
camp,
which
is
actually
the
first
week
of
the
five-week
program.
So
it's
something
where,
if
you
don't
want
to
take
the
full
program
and
get
really
but
still
get
very
much
immersed
in
all
that
we
do.
We
cover
a
lot
of
stuff,
it's
a
very
exciting,
covering
the
open
source
micro
Factory.
And
if
you
look
at
the
the
open
source
micro
factory
boot
camp
curriculum,
you
will
see
some
pretty
impressive
things
and
there,
so
you
can
go
through
that.
A
Here's
one
highlight:
did
you
know
that
so
the
laser
small
laser
cutter
is
part
of
the
the
open
source
micro
factory,
just
a
simple
diode
laser
that
fits
on
the
d3d
platform,
the
universal
access
platform.
But
in
studying
for
you
know,
what
do
we
do
with
larger
power
lasers?
It
turns
out
that
carbon
dioxide,
laser
tubes
are
actually
not
difficult
to
make,
and
you
can
even
the
most
difficult
part
is
aligning
a
little
mirror
that
get
that
you
use
there,
but
all
the
parts
already
are
readily
available.
A
You
can
be
as
simple
as
making
one
out
of
PVC
pipe
well,
ladies
and
gentlemen,
that's
all
doing
a
boot
camp.
We'll
do
a
simple
experiment
which
should
take
an
hour
to
of
actually
doing
that.
So
that's
one
one
crazy
example
that
will
happen
and
otherwise
getting
in
hands
on
all
the
machines
building
a
3d
printer
working
with
the
circuit
mill
working
with
the
filament
maker,
the
idea
of
the
full
closed-loop
cycle
of
starting
with
scrap
plastic,
making
filament
printing.
A
All
of
that
that's
gonna,
be
covered,
and
as
far
as
the
larger
immersion
training,
that's
you
can
click
on
the
curriculum
down.
At
the
bottom
of
the
page,
immersion
program
curriculum
and
that's
I'm,
aiming
to
finish
that
up
today
and
and
hopefully
post
like
today
or
so,
but
it
just
takes
time
because
it's
really
setting
this
setting
very
clear
learning
goals
for
what
what?
A
What
really
does
it
take
for
somebody
to
to
pick
up
on
being
able
to
work
with
OSC
full-time
to
develop,
as
well
as
to
run
workshops
so
there's
training
both
on
the
technology
and
also
some
leadership,
and
then
how
do
you
teach
effectively?
How
do
you
run
a
workshop
like
that?
So
elements
go
into
that.
A
So,
besides
the
immersion
program,
there's
a
bit
of
I,
don't
if
you've
seen
on
a
micro
track,
the
just
been
running
that
lately
take
digging
that
into
the
ground,
but
there's
a
little
video.
If
you
go
to
the
OSC
workshops,
Facebook
page,
which
shows
the
micro
track
doing
some
digging
in
a
garden
basically
making
these
growing
beds.
As
you
can
see
here
so
I
I
broke
the
thing
I
actually
ended
up
breaking
the
thing.
So
there's
a
big
weld
that
came
off
so
I
got
to
fix
that
up,
but
that
was
kind
of
funny.
A
Actually
it
was
one
of
those
things
where,
as
we
remounted
like
during
the
build
itself,
we
basically
had
to
cut
the
frame
apart
and
then
reweld
it
because
the
motors
wouldn't
fit
and
that's
that's.
The
part
actually
broke
right
now,
but
been
running
that
for
last
week,
just
just
filling
up
these
beds.
A
The
thing
is:
roughed
you
stand
behind
on
it
and
it
kind
of
shakes
you
around
quite
a
bit
so
I'm
I'm
thinking
about
like
what
in
the
future.
What
do
we
do?
It's
like
suspension
for
little
tractors
even
like
that
I,
don't
know,
I
have
to
think
about
that
for
the
future,
but
yeah.
That's
that's
a
little
things
here.
My
full
effort
is
on
immersion
and
getting
all
the
printers
and
upgrades
on
the
printers
so
I
think
by
this
year.
We
want
to
upgrade
to
there's.
A
A
So
these
are
a
snap
and
replacement,
but
the
very
amazing
thing
about
it
is
when
you
snap,
those
in
and
they're
a
little
more
instead
of
like
a
couple
of
bucks,
each
they're
like
10
bucks,
each
and
there's
four
of
them
four
or
five,
so
forty
or
fifty
dollars,
instead
of
like
ten
or
twenty
dollars,
two
for
the
stepper
drivers,
but
the
beautiful
thing
about
them.
The
way
their
logic
inside
works,
they're
able
to
be
absolutely
silent.
A
So
if
you've
ever
heard
a
3d
printer,
it
makes
quite
a
bit
of
noise,
but
these
things
are
absolutely
silent
as
far
as
the
electronic
side,
no
humming.
So
all
you
would
get
is
like
any
mechanical
noise,
but
not,
but
the
electronic
noise
is
completely
eliminated
because
printers
typically
hum
around
they
almost
sync
to
you,
they're
quite
loud,
but
the
other
thing
is
for
this
and
Marlin
supports
this
out
of
the
box.
Is
you
can
set
simply
enable
and
stop
less
home
Wow?
A
All
it
does
is,
but
it
basically
goes
it
rams
into
the
end
and
it
detects
the
fact
from
from
what
I
understand
it
detects
the
fact
that
it
hits
something
because
it
senses
the
current
inside
the
little
driver.
So
it
stops
and
you
don't
need
an
end,
stop
a
physical
and
stop
the
the
little
electronic
component
that
we
right
now
use
with
a
3d
printed
part
and
it's
magnetically
attached
to
the
to
the
to
the
axis
so
further
further
part
count
reduction.
So
this
is
awesome
just
making
the
machine
ever
simpler
and
so
forth.
A
So
that's
my
report,
so
other
people,
let's
see
what
we
have
here
so
I-
was
gonna,
actually
ask
Ruslan,
so
so
further
immersion
program,
either
myself
or
somebody
else
like
Ruslan
or
somebody
who
knows
how
to
work
with
the
workbenches
and
programmed
them.
We're
gonna
have
a
little
little
school
on
that
for
everybody,
because
I
think
as
a
team,
we
want
to
get
much
more
familiarity
with
that.
So
I
was
actually
gonna.
Ask
if
I
know
what
you
which
you
have
to
report
on
Ruslan
today,
but
can
we
maybe
talk
a
little
bit
about.
A
The
twelve
step
process
started
on
page
three:
okay,
okay,
let's
talk
about
what
the
just
a
conceptual
framework
of
how
you
go
about
programming
and
freak
out,
because
when
we
know
so
far,
is
that
when
you,
when
you
install
new
workbenches,
they
end
up
showing
up
in
the
mod
folder
on
your
on
your
computer.
It's
just
a
folder!
You
navigate
to
that
and
you
see
the
new
workbench.
If
some,
if
some
workbench
is
in
that
new
folder,
it
appears
in
your
free
CAD
interface
in
your
drop-down
for
all
them
all
the
work
benches.
So.
A
A
A
You
want
to
substantiate
that
icon
with
some
actions
they're
programmed
in
Python
within
the
the
workbench
file
itself,
but
let's
see
so,
for
example,
you
know
you
go
to
the
say:
there's
the
D
3d
printer
workbench
looks
like
this:
hey
we've
got
this
little
icon
here,
where
supposedly
it's
supposed
to
do
some
action,
so
you
click
on
this
icon
and
what
does
it
do
the
creative
part
somewhere,
but
I'm,
not
sure
if
anything
got
created
here?
Oh
no,
but
there's
the
frames.
The
frame
icons
are
here,
I
believe
this
one
works.
A
A
A
B
A
A
B
A
B
B
A
Yeah
yeah
excellent
excellent.
Let's
see!
Oh,
can
you
paste
in
the
link
for
everybody
in
the
working
document
to
to
this
code
for
that
yep,
and
that
is
called
so
we've
seen
this
before.
This
is
some
of
the
original
work
from
Steven
that
which-which
Rousillon
that
then
took
to
continue
on
developing
the
3d
printer
workbench.
Let's
see,
do
I
see
that
in
my.
B
B
A
A
A
A
B
B
B
A
D
A
B
B
A
Yeah
so
I
mean
that's,
that's
good,
so
essentially
we're
saying
okay,
so
you
know
just
to
kind
of
break
this
down
here.
So
we've
got
your
workbench
starter.
I've
got
a
few
files.
You
got
the
actual
icon,
the
actual
graphic
for
that
icon
that
we
press
and
resources
icons.
What
does
this
get
get
ignore.
A
A
B
A
Lesser,
so
are
we
doing
like?
Okay?
Let's
lesser
lesser
GPL?
Okay,
oh
yeah,
that's
a
template!
That's
standard
usage
within
freecad
mm-hmm,
yeah!
Okay,
so
we
had
the
initial
init
GUI
that
PI
obviously
base
which
we
call
those
you
command
button.
That
PI
and
read
me
read
me
just
contains
the
installation,
okay,
so
in
a
typical
free
CAD
file
like,
for
example,
in
your
other
work
bench
on
the
piping,
you
have
CSS
files
within
your
directory
correct.
A
B
A
Okay,
all
right
so,
ladies
and
gentlemen,
I
think
here
we
have
a
basic
introduction
to
how
you
can
do
your
first
program
in
an
freecad,
I,
guess
one
one
simple
exercise
would
be
you.
We
can
change
the
icon
or
possibly
add
another
icon,
but
but
yeah
like
basic
entry-level
exercise,
change
the
icon
and
attach
a
function
to
that
icon.
So
let's
actually
go
through
that,
so
we
saw
okay.
We
can
probably
change
that
icon
by
what
we
just
talked
about.
What
about
the
action?
A
A
B
A
A
A
A
It's
supposed
to
draw
a
circle,
so,
let's
see
I
mean
let's
see
if
that
actually
works.
So
if
you
go
to
the
exact
so
create
a
new
file.
Example
workbench
and
then
I
press
on
this
part
right
here
create
a
new
part
and
make
it
active.
So
I
click
on
that
and
I
saw
it
generate
a
part.
I
don't
see
it.
Where
is
that
thing.
A
A
A
So
we
kind
of
seen
how
the
source
code,
which
is
on
github
there,
which
adds
that
circle
I
guess
what's
happening
technically
on
my
screen,
that
that
should
have
happened
when
I
press
the
left
button
on
the
left
hand
side
here,
if
you
can
see
that
right,
that
was
probably
Stephens
original
but
then
I
think
rousillon.
You
added
this
frame
button
right,
yeah
sounds
like
it,
but
anyway
we
when
I
clicked
on
that
frame
button.
We
got
this
circle
to
show
up.
A
A
Okay,
okay,
then
my
that's
that
might
have
been
aha
ya,
know
that
actually
makes
sense.
So
get
resources
actually
said,
draw
the
the
style,
wireframe
SVG,
okay,
that's,
okay,
and
then
activated
it
does
the
actual
circle
there
in
this
code
right
here,
yeah
now
this
is
good.
This
is
good,
so
I
mean
we
have
a
little
template.
For
example,
if
we
replace
this
circle
here,
this
code
for
the
circle,
with
some
more
advanced
stuff
like
say,
we
wanted
to
insert
our
universe,
universal
access
piece
or
something
well,
I
mean
say
it
again.
B
A
B
B
B
A
A
Yeah
and
then
at
that
point
you
can
put
multiple
buttons
and
each
does
a
certain
function
and
you
can
be
dwell
on
your
way
to
designing
a
full
workbench
for
some
new
machine.
So
that's
excellent,
so
this
is
even
better
than
I
thought,
because
now
you
just
told
me
that
we
only
need
four
or
five
steps
to
create
a
new
workbench,
that's
great,
okay,
so
workbench
of
design
and
freecad
in
four
steps.
So
that's
actually
a
good
good
practice,
so
so
steps
to
experiment
with
workbenches.
A
A
A
A
A
Yeah,
that's
excellent!
That's
that's!
That's
a
way
to
start
learning,
so
we
see
what
commands
actually
happen
when
you
do
something.
So,
for
example,
you
know
say:
I
go
into
a
regular
workbench
such
as
the
standard,
sketcher
right
and
I
say:
I
try
to
draw
draw
something
like
so
I
just
opened
a
new
document.
A
B
B
A
Accent
position:
I
cannot
change
the
size
here.
Can
I
place.
Oh
wait,
yeah!
Okay,
right!
Thank
you.
Also,
I
go
to
the
cube.
Oh
yeah
there
you
go
so
cube,
for
example,
like
height,
let's
say:
I
change
it
to
one
like
that.
Yeah
there
you
go
so
freecad
get
document
unnamed,
get
object.
Box
height
equals
25.4,
millimeter,
okay,
yeah.
A
A
Yeah
yep
yeah
excellent.
Well
so
so
there
we
go.
We
have
some
examples.
So
so
we
went
to
the
Python
console.
We
experimented
a
little
bit
with
command
line
of
how
you
can
actually
draw
some
things.
So
that's
the
console
right.
There
then
do
a
macro
to
do
the
same
thing
and
then
write
the
Python
module.
So
for
the
macro.
How
do
you
actually
record
a
macro
here.
B
B
B
B
B
A
A
A
A
C
A
B
A
B
B
B
A
A
A
Right:
yeah,
okay,
yeah.
We
don't
have
to
get
into
the
details
because
we're
running
a
little
long
here
but
yeah
this
is.
This
is
good,
just
it's
kind
of
getting
it
familiar
with
the
way
we
can
start
programming
within
freecad
I.
Think
that's
a
good
offer,
but
let's
maybe
start
stop
here
since
we've
got
other
people
to
go.
But
thank
you
for
that
that
excellent
for
step
game
plan
for
creating
macros
and
programming
well
program
is
starting
to
program
new
new
workbenches
yeah.
That's
excellent.
A
A
And,
of
course,
you
have
to
have
knowledge
of
how
how
some
machine
goes
together
and
that
comes
from
design
guides
that
we
can
publish,
but
the
parts
the
good
thing
about
the
work
benches
themselves
is
that
the
parts
are
already
correct.
So
all
that
hard
work
of
getting
it
to
a
correct
part
has
already
been
done
so
this
this
could
be
it's
really
about
kind
of
like
the
building
blocks
of
civilization.
A
Some
people
have
already
done
the
hard
work
and
say
engineering,
the
part,
and
now
you
can
use
it,
but
you
can
modify
it
within
freecad
and
you
can
pull
it
into
a
working
document
readily
so
yeah
very
powerful
functionality.
So
let's
leave
it
at
that
and
move
on
to
to
a
band.
Thank
you,
Bruce
Ilan.
That's
that's
pretty
good
babe.
Do
you
want
to
continue?
Oh
wow,
look
at
that
some
further
upgrades
Abe.
Can
we
have
you
pipe
in
now,
yep
yep.
A
C
A
E
E
E
E
Getting
the
standard
right,
I
think
leave
sandy
is
pretty
important
and
I've
tried
to
get
my
pipe
designs
and
so
for
the
other
parts
based
off
the
information.
I
thought
mine
should
be
pretty
accurate,
but
not
everything
is
this
bested
by
that
back
that
I
think
that's
when
you
read
that
was
looking
for
the
some
of
this
tighter
specifications
of
Kwami.
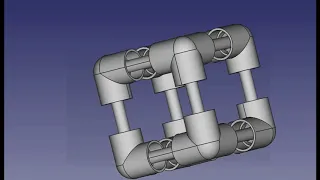
E
E
E
E
A
lot
of
time,
so
we
did
more
of
that,
but
there
is
a
need
for
a
lot
more
I
guess
the
new
updates
are
educational
material
entry
catch
it
off
because
0.17
I
miss
this.
It's
a
lot
different
I'm
dead
until
we
get
her
out
to
some
of
that.
But
that
takes
a
lot
of
time,
so
I'm
trying
to
spread
out
what
up
focusing
on
a
little
bit.
E
A
E
A
Right
and
that's
yeah
and
we
need
the
individual
parts
anyway,
so
I
mean
the
full
due
diligence
that
we
need
to
do
anyway
means
that
we
have
individual
part
files
in
addition
to
the
overall
files,
so
I
think
there's
really
no
shortcuts
and
in
terms
of
trying
to
say,
oh
we're,
gonna
have
this
grand
master
file.
That's
got
everything
because
we've
got
the
best
software
in
the
world.
Now
I
mean
you,
don't
really
need
the
best
software.
A
You
just
need
what
freecad
already
has
and
the
ability
to
to
work
with
individual
files
and
be
adept
at
putting
them
together
into
larger
assemblies.
By
importing,
like
the
thing
that
we
were
talking
a
lot
about
last
year,
which
is
just
simply
merging
files
into
one
document,
I
mean
that's
the
still.
As
far
as
I
know
the
recommended
workflow
for
free
CAD
were
you
merging
files
from
simply
other
documents.
E
E
E
E
E
E
E
A
E
A
E
A
Yeah
that
could
be
okay.
Just
one
comment:
there
I
do
notice
like
when,
when
I
had
the
micro
track
running
when
you
throttled
down
like
when
you
go
into
a
lot
of
resistance,
the
engine
can
vibrate,
probably
up
to
like
on
the
rubber
mounts.
When
you
hit
like
against
its
limit
in
some
places,
it
vibrates
I
would
estimate
up
to
like
3/4
of
an
inch
because
of
the
nice
rubber
couplers,
like
we
got
these
big
rubber
feet.
E
E
E
E
A
A
E
E
A
A
A
E
E
A
A
E
E
A
Let's
do
that
cuz,
then
you
don't
have
to
some
be
easier
to
take
out
the
engine.
Yeah
I
mean
the
main
thing
we
want
to
allow
for.
Is
that
easy
take
in
and
out
of
engine?
That's
like!
That's
the
part.
That's
if
you
talk
about
longevity,
that's
that's
the
thing.
We're
gonna!
That's
the
main
service
point.
A
A
A
E
A
E
A
E
A
E
E
C
A
Okay,
that
sounds
good.
Keep
going
at
it.
A
lot
of
detail
here,
yep
it'll,
be
nice.
I
was
thinking
about
water.
What's
this
cube
is
related
to
water.
If
you
talk
about
any
parcel
of
land
like
here,
it's
very
interesting
but
the
by
the
CD
go
home.
The
pond
there
is
completely
drained
empty
last
year
was
full
at
this
time.
In
the
spring
this
this
spring
we
got
no
rain.
We
got
to
do
some
ponds
here
and
that's
that's
how
you're
gonna
get
ten
times
more
plants
to
grow?
A
Actually
we
don't
have
any
ponds
on
the
site,
but
that's
the
relevance
of
you
know
say
80
horsepower
and
up.
That's
that's
good
enough
to
get
you
bulldozing
activity
for
a
pond.
So
that's
this
is
related
to
it.
So
I
was
kind
of
thinking
yeah.
Let's,
let's
give
the
bigger
machine
that
could
actually
do
some
earthworks
here.
Yeah.
D
A
A
E
E
A
B
B
B
A
A
A
A
B
A
B
A
B
A
No,
that's
pretty
good,
and,
and
the
idea
is
these
parts
when
you
make
a
workbench,
so,
for
example,
we
could
do
a
workbench
later.
How
does
this
so
you're
doing
you're
doing
the
the
work
of
say,
for
example,
these
uni
Pro
kit
parts?
How
how
much
difficulty
is
there
for
another
person
to
actually
create
their
own
workbench
using
this.
B
A
A
A
B
B
C
A
A
A
A
No
I
I
think
it'll
be
so
nice
to
have
toolbars
got
so
like
all
these
parts,
so
so
the
design
procedure
is
like,
like
we
could
even
design
work
benches
where
there's
as
many
parts
as
corresponding
to
the
actual
design
steps.
So
you
know,
for
example,
that
if
you
clicked
on
every
single
one,
just
in
the
order
that
there
are
you
actually
have
at
the
end
of
the
day,
come
up
with
a
full
machine.
A
B
A
B
B
A
A
A
A
A
A
Yeah
the
way
it
works
is
when
you
so-called
import
or
merge.
It
saves
the
position.
It
understands
the
position
of
the
original
part,
so
it
won't
put
at
the
origin.
It
will
put
it
where
it
was
in
the
original
document.
So
I
don't
know
if
you
can
maybe
take
a
look
at
that
a
little
bit,
because
that
that
would
be
pretty
important
as
a
feature
to
have
in
this
just
the
way.
The
fundamental
architecture
of
this
yeah.
B
B
A
A
Well,
like,
oh
just
just
that
you
imported
in
a
way
that
wasn't
an
original
file
like
it
doesn't
collapse
it
all
to
the
origin
or
something
like
that,
but
as
far
as
modification
like
changing
positions,
I
think
we
can
use
regular
freecad
for
that,
just,
as
you
said,
don't
build
another
freak
out
with
and
freecad
yeah
yeah
yep.
But
basically
what
we're
getting
out
of
this
is
okay,
there's
a
visual
representation
of
all
the
parts
and
the
ability
to
pull
on
them
readily.
So
you
can
make
compositions
of
parts
for
design
purposes.
A
E
E
D
F
Online,
by
called
the
library
but
like
more
specific
diagrams,
is
my
understanding
and
so
I
looked
online
and
found
our
local
Technical
College
the
best
plumbing
that
it
looks
like
I,
be
better.
He
comes
with
like
a
local
union
and
incidents,
we're
doing
the
meeting,
and
then
it's
try
calling
Mike
local
unions
and
guilds
and
see
what
I
can
find
out
about
like
what
standard
fittings
are
that
are
used.
F
E
Usually
the
standards
of
that
mother
to
use
of
these
these
plumbing
standards,
not
necessarily
the
beautiful
colored
something
uniform
code,
might
be
about
the
regulations,
local
local
region,
about
the
standards
specified
by
some
organization
and
ISO,
or
something
like
that.
I,
don't
know
what
the
parts.
E
E
E
A
A
A
A
Yeah
that
sounds
good
I
gotta
get
going
here,
though.
Let's,
let's
wrap
up
the
meeting,
we've
been
at
it
two
hours
but
I
give
a
challenge.
Can
somebody
find
any
any
hints
on
our
bio
digester
in
the
uniform
plumbing
code?
Well,
they
may
not
have
that
yet,
but
they
will
in
the
open
source
future
we'll
see.
But
let's
see
anything
else
before
we
wrap
up
here.
A
Just
yeah-
let's,
let's
close
up
here,
so
we've
got
a
work
cut
out
and
the
power
cubes
still
working
on
it,
yeah
good
job
on
the
free,
CAD,
workbench
work:
Ruslan,
that's
really
good,
really
useful,
and
hopefully
we
can
get
you
possibly
to
teach
in
the
immersion
program.
Maybe
we
could
have
you
pipe
in
because
I'm
gonna
have
a
lot
of
people
typing
in
for
like
a
session
here
and
there
on
the
different
topics
that
we
learn.