►
From YouTube: OSE Dev Team Meeting - July 5, 2017
Description
See meeting notes at http://opensourceecology.org/wiki/Development_Team_Log#Wed_Jul_5.2C_2017
----------
What you see here at Open Source Ecology is an ambitious program based on a volunteer effort. To help us reach the goals - please consider joining as an OSE Developer in 2017-
http://opensourceecology.org/wiki/OSE_Developers
Take a minute to subscribe to our email newsletter (updates, workshops, etc): http://bit.ly/1LtcM44
A
Please
look
at
the
working
document
and
here
is
okay,
so
we're
moving
right
along
the
development
numbers
here
actually.
Interestingly,
last
week
we
had
a
peek.
So
if
we
look
at
the
actually
reached
a
little
micro
peak
in
terms
of
development
team
hours,
so
we
always
track
our
number
of
people
who
are
contributing
actually
logging
in
the
work
logs
and
a
total
number
of
hours
divided
by
ten.
So
last
week
we
actually
had
about
a
hundred
sixty
development
hours.
A
I
was
a
little
over
that
essentially
four
full-time
equivalent,
that's
great
little
micro
peak,
but
we're
still
kind
of
at
a
plateau.
Here,
as
we
refine
our
methods,
there's
a
big
recruiting
spree
with
a
lot
of
people
from
Saudi
Arabia
that
are
actually
going
to
join
a
team.
So
so
there's
that
in
progress
should
have
a
spike
in
developer
population.
As
we
start
another
team,
the
tractor
team-
actually
we're
going
to
get
into
that.
A
But,
of
course,
the
goal
here
is
the
160
hours
is
essentially
four
full-time
equivalent
well,
but
at
the
full
glory
of
the
project
we'd
like
to
build
up
to
about
a
hundred
times,
then
so
four
hundred
full-time
developers
by
comparison
Linux
has
four
thousand
full-time
developers
or
contributors
who
are
supporting
the
Linux
kernel
development
project.
So
that's
the
kind
of
scale
we're
talking
about
and
right
now
we're
our
very
baby
stages
of
where
we
are
with
open
source
ecology.
A
So
this
is
but
definitely
on
a
path,
and
we
want
to
see
this
this
growing
here.
So
let's
talk
first
about
progress
of
what's
happened
over
the
last
week
right
here
on
the
home
base.
Here
we
did
a
lot
of
work.
We
have
Shane
over
lawyer
from
Michigan
Tech
University
visit
us
for
two
weeks
and
we
built
a
CNC
circuit
mill,
which
you
see
here.
We
were
working
on
the
main.
The
main
project
that
we
were
actually
working
on
is
a
power
open-source
power
meter
for
the
seed
eco-home.
A
What
you
see
here
is
the
second
story
of
the
CD
Cajon
we're
currently
working
on
it.
There's
the
power
panel
running
from
the
photovoltaics
and
we've
got
all
these
different
nodes.
Like
you
see
here,
connecting
to
measure
all
the
different
power
points
from
what
are
we
getting
from
the
batter
from
the
photovoltaics?
A
How
much
is
passed
through
the
charge
controller
through
the
batteries
through
AC
load,
the
DC
loads?
It's
a
hundred
percent
off
grid
system.
We
are
not
tied
to
the
grid
there,
so
we
want
to
know
exactly
what
we
what
we
are
using,
and
here
we
have
sample
measuring
nodes
here.
It's
a
logging
system,
so
an
Arduino
logging
system
that
measures
power.
What
we
did
here
was
we
actually
took
our
nuts,
the
big
1
inch,
nuts,
the
same
as
we
use
in
tracked
in
the
tractor.
We
use
them
as
a
current
transformer.
A
We
wrapped
a
bunch
of
wire
around
that.
So
if
you
slip
a
wire
into
that
nut,
you're
going
to
be
measuring
the
current
the
AC
current,
because
there's
a
electric
field
and
get
set
up
and
a
coil
is
pick
it
up
to
to
get
a
voltage.
So
you
can
actually
be
measuring
current
with
this,
so
these
are.
This
is
the
open
source
board
that
was
milled
partly
on
Shane's
mill,
and
here
we've
got
work
on
a
circuit
mill
here,
so
to
return
to
that,
it's
actually
quite
exciting.
A
So
the
first
run
like
look
at
this
right
here.
Those
are
half
a
millimeter
wide
that
little
distance
in
between
the
two
lines
is
one
half
millimeter,
that's
pretty
good
for
a
first
try.
What
we
did
here
was
use
the
D
3
D
CNC
circuit
mill
with
a
spindle,
so
the
same
construction
as
the
3d
printer,
so
showing
that
we
can
use
use
the
universal
access
for
different
purposes.
So
we
have
a
board
and
a
spindle.
A
That's
milling
with
this
tiny
drill
bit
or
mill
bit,
and
we
put
the
XY
gantry
pretty
low,
so
we
have
the
optimal
distance.
So
it's
really
stupid.
The
structure
here
is:
quite
nice.
There's
two
two
y
axes
to
X
axes
and
two
z
axes
very,
very
stiff
like
when
you
try
to
move
the
bottom
here,
it's
nice
and
tight.
So
we
can
get
this
kind
of
work,
but
it's
try
one
and
where
we're
moving
forward
on
it
here.
What
you
should
you
see
here
is
we're
actually
probing
the
surface.
A
So
when
you're
mailing,
you
you're
milling
only
0.1
millimeter
deep,
that
is
tiny.
So
to
get
that
you
have
to
get
the
board
perfectly
level
with
that.
How
you
do
that
is
by
probing
the
surface
of
your
little
Scentsy
little
circuit
board,
and
you
probe
it
by
making
an
electrical
connection
between
Sochi.
A
You
see
here
are
two
leads:
one
is
to
the
milled
board
itself
and
one
to
the
actual
bit
the
milling
bit
so
that
upon
hitting
the
surfaces,
you're,
probing
you're,
probing
the
bed
at
multiple
points
to
get
a
height
map
and
the
way
you
detect
that
it
touched
is
when
electrical
contact
is
made.
So
hence
those
two
leads
there.
That's
what
we
did
so
check
this
out.
A
So
this
is
a
initial
try
with
broken
bits,
so
it
turned
out
the
brick
bit
was
broken,
so
we
got
that,
then
we
it's
very
easy
to
break
this
little
bit.
So
so
we
did
this
and
then
we
we
got
this
result
here
and
then
went
even
better
on
try
to,
and
that
was
done
by
lowering
the
gantry
meaning,
instead
of
basically
making
the
distance
from
the
bit
to
where
it's
held
on
the
XY
axis,
the
smallest.
A
So
what
we
did
was
we
lowered
the
XY
gantry
so
that
we're
milling
with
as
much
stiffness
as
possible.
If
you,
you
know
what
I
mean
here,
so
that's
pretty
good
and
we're
refining.
So
that's
that's
the
stage
we're
refining
right
now.
So
let's
take
a
look
at
progress
on
a
13-inch
d,
3d
3d
printer
itself,
so
I've
been
printing
a
lot
of
parts
these
days,
there's
a
bunch
of
Tyla
time
lapses.
If
you
go
into
the
View
mode
present
mode,
you
can
see
this
video
some
parts
being
built,
so
next
is
building
more.
A
So
this
is
in
production,
so
I'm
made
nine
more
frames.
These
are
13
inch
cluster
for
3d
printing.
So
here's
some
steps
in
the
process,
all
the
3d
printed
parts,
putting
the
bearings
putting
a
bunch
of
screws
together
and
so
forth.
So
that's
moving
along
the
ideas.
Our
goal
for
the
next
workshop
is
to
is
to
build
24
printers.
That
means
a
lot
of
printing
of
parts.
It
takes
about
a
full
day
to
print
one
set
of
parts
like
24
hours.
So
it's
really
like
one
or
two
days
so
thinking
about
24
printers.
A
We
would
need
24
24
days
of
printing
non-stop
with
a
single
printer,
or
you
have
multiple
printers.
You
divide
that
accordingly,
so
if
we
have
our,
what
we're
going
to
have
is
10
printers
so
take
only
a
few
days
to
print
all
the
parts,
so
that
would
be
really
good.
Okay,
next
next
product,
so
we're
working
on
a
print
cluster
here.
So
we
came
up
so
this
is
Christian
or
new
developer
and
working
on
on
a
an
architecture
for
how
you
take
a
little
little
microcontroller
like
a
like
a
Raspberry
Pi.
A
A
These
are
these
little
wireless
modules
working
through
the
UART,
which
is
a
serial
thingy
and
then
the
then
a
3d
printer
itself
has
its
Arduino
with
the
Ramseys
board,
with
a
receiver
and
an
SD
card
so
that
you
can
basically
lob
over.
You
can
throw
over
the
file
using
Wireless
just
like
remote
control,
Wireless
style
and
one
single
microcontroller
microcomputer
Raspberry
Pi
is
controlling
the
whole
cluster,
so
for
us
it
would
be
about
10
of
the
3d
printers
using
a
small
Raspberry,
Pi,
so
very
energy-efficient.
A
So
this
is
the
basic
geology
or
architecture
that
we
came
up
came
up
with,
starting
with
a
computer,
with
free
CAD
with
a
router
with
Internet
and
then
throwing
that
onto
the
Raspberry
Pi
and
then
controlling
a
bunch
of
3d
printers
with
that,
so
that's
in
progress,
Christian
is
working
on.
I
should
make
an
instructional
she's
doing
really
well
installing
the
operating.
How
do
you
install
first
an
operating
system
on
a
Raspberry
Pi,
because
you
actually
don't
have
to
do
that?
So
there's
an
instruction
on
christian
log.
A
We
can
take
a
look
at
that
continuing
so
yeah,
more
more
about
Christians
working
on,
maybe
I'll
ask
ask
you
to
pipe
in
a
little
more
okay.
Next
next
item.
So
as
far
as
the
micro
house,
CD
eco
home
rather
see
Nika
home
goes,
we've
started
the
full
CAD
in
free
CAD
as
far
as
like
all
the
plumbing.
This
is
actually
plumbing
for
the
sisters,
the
water
cisterns.
The
point
here
is
altogether
we've
been
doing
a
lot
of
these
diagrams
with
just
cut
out
you
just
basically
two-dimensional
diagrams.
A
Where
you
cut
out
like
visual
bill
of
material
style,
you
cut
out
all
the
parts
and
pieces
together,
but
now,
of
course,
which
one
would
you
rather
have
I,
don't
have
it
for
reference
here,
but
this
3d
picture
is
basically
a
much
more
realistic
representation
idea.
Here.
Is
all
these
parts
were
pulled
down
from
mcmaster-carr?
A
So
that's
that's
a
really
efficient
way
to
go,
and
then
you
can
work
with
a
realistic
design
where
a
lot
of
times
what
you'll
see
is
if
you're
working
in
2d,
you
can't
really
picture
how
the
parts
go
together
when
you're
doing
three-dimensional
design.
So
this
actually
found
this
to
be
just
about
as
fast
as
doing
the
two-dimensional
renderings,
while
using
the
real
actual
parts
to
download
these
are
like
one-inch,
PVC
fittings
and
so
forth.
There
are
actual
real
parts
that
we
are
using
in
the
system.
A
So
that's
that's
an
example
of
using
CAD
for
the
house
design
parts
utilities,
specifically
what
we'll
do
is
as
soon
as
we
have
enough
people
with,
we
can
put
together
a
team
of
people
to
work
on
a
full
utilites
cat.
We've
got
most
of
the
cat
just
about
all
the
cat
for
the
house
and
sweet
home
3d,
but
the
utilities
are
a
major
major.
A
It's
like
they're,
taking
much
longer
than
we
thought,
they're
experimental,
but
a
very
interesting
stuff,
but
full
cat
needs
to
happen
so
that
we
can
then
have
virtual
up
to
virtual
reality,
walkthroughs
and
then
at
the
most
elite
level
of
what
we
can
do
with
3d.
Cad
like
this
is
make
augmented
reality
instructionals,
so
something
we're
actually
wearing
glasses,
which
superimpose
information
on
your
field
of
view.
So
when
you
sew
actually
shows
you
how
you
put
the
parts
together
by
providing
you
with
additional
information
that
you
see
through
glasses,
so
this
is
augmented
reality.
A
Stuff
I
mean
that's
something
we
can
aspire
to
later
on,
as
we
get
the
design
more
complete,
but
that
kind
of
technology
is
available
and
there's
definitely
some
things
in
the
open
source
that
are
available
for
augmented
reality.
So
we
can
do
that.
Okay,
so
that's
a
house
design
next
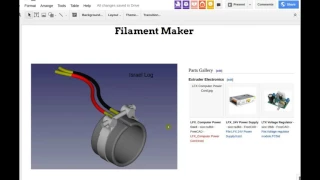
filament
maker,
so
we've
got
these
are
so
we're
populating
the
part
library
of
the
filament
maker
with
actual
3d
designs
for
all
the
parts
so
like,
for
example,
here
electronics
we've
got
simple
renderings
that
we
are
actually
doing
in
the
freaking.
A
I
haven't
actually
checked
how
the
files
look
here.
We've
got
that
a
plenty
another
example
is
I'm,
seeing
the
thermal
components.
So
we
broke
down
the
on.
That's
the
alignment.
Filament
extruder
part
library
broke
down
into
the
we
broke
down
the
work
into
many
modules,
so
thermal
components,
spoiler,
spoiler
school
mechanism,
etc,
I'm,
seeing
they're
getting
populated.
So
that's
really
good.
The
next
step
would
be
to
finish
all
the
different
components
and
and
then
assemble
it
into
final
CAD
files.
A
So
let's
see
what
else
we've
got
here,
so
this
is
the
filament
maker
that
the
currents
current
step
here
is
the
full
cab
that
we're
working
on
website
in
progress.
Jose,
if
you
want
to
let's
see,
are
you
here
now.
Jose
is
not
here,
but
we've
got
a
prototype
of
the
website,
so
tomorrow
I'm
going
to
be
meeting
with
with
Michael
who's
working
on
a
back-end,
revamping
our
back-end
and
installing
the
gypsy
video
bridge.
A
A
A
So,
let's
get
to
the
question
questions
in
a
little
bit,
but
let's
just
go
through
quickly
on
the
the
progress
on
the
main
critical
path
for
the
team.
So
if
you
take
click
on
the
link
on
page
number
two
here,
you
can
actually
be
taken
to
this
real
diagram
which
is
actually
open
for
editing.
So
we
can
contribute
to
that.
But
what's
happening
here.
A
The
basic
idea
is
the
the
green
line
represents
the
current
time,
but
you
see
we're
working
on
a
bunch
of
little
project
and
we're
going
to
add
the
CB
press.
We're
actually
gonna
have
to
start
working
on
that
because
there's
two
main
events
happening
at
the
under
the
workshops:
column
there
or
row
the
I
want
to
see.
If
we
can
do
the
three
printer
workshop,
the
12th
of
August
so
yeah
pushing
this
way
a
way
later
than
we
think.
A
But
twelfth
looks
realistic
because
we
got
to
get
done
the
print
cluster
going
to
print
all
the
parts.
For
that
workshop,
we're
going
to
need
a
lot
of
parts
and
then
the
25th
of
August
is
the
CD
press
power
cube
workshop,
where
we
build
a
power
cube
and
brick
press
for
a
client
which
is
the
University
of
Utah.
Actually,
they
have
a
design-build
architecture
section
where
they're
building
houses
for
underprivileged
people,
like
some
of
the
Native,
American
reservations
and
stuff
they've,
had
projects
but
we're
providing
a
CB
press
for
them.
A
They're
coming
over
a
few
of
their
students
to
actually
build
the
press,
we're
hosting
a
whole
workshop
around
that
that's
a
big
time
on
the
25th,
where
we're
with
the
CNC
torch
table,
we'll
be
cutting
all
the
parts.
So
this
is
going
to
be
one
of
the
firsts
we're
outside
of
some
initial
part.
Cutting
for
tractors
in
the
2012
production
run.
A
We've
never
used
a
CNC
torch
table
sense
because
we've
never
got
it
to
the
level
of
refinement
and
now
we're
working
on
an
automatic,
high
controller
and
height
control
to
make
it
fully
operational
for
part
cutting
for
their
CNC
using
CNC
for
the
brick
press
and
power
cube,
and
if
that
actually
is
in
good
shape
enough.
We
can
actually
consider
cutting
some
of
the
frames
for
d3d
the
3d
printer
I'm,
not
banking,
on
that,
but
we
are
definitely
cutting
the
parts
for
the
brick
press
for
using
our
through
our
CNC
torch
table.
A
So,
just
going
through
all
of
these
here
how
this
fits
together,
the
CNC
circuit
mill
is
the
current
progress
is
to
refine
those
circuit
milling
capacity.
So
we
can
get
very
reputable
meaning,
like
80%
success
rate
on
the
very
fine
circuit
boards,
that
our
point
that
have
point
five
millimeter
traces.
So
that's
like
really
tight.
It's
it's
not
this!
Not
this
rough
one
millimeter
or
a
couple
of
millimeter
and
milling.
This
is
very,
very
fine
traces,
so
you
can
actually
do
things
like
even
make
your
own
arduino,
x'
and
parts
etc.
A
A
Nobody
on
this
planet
has
actually
done
a
circuit
mill
with
belts
that
gets.
This
type
of
resolution
is
0.5
millimeter,
trace
width.
This
is
a
first
and
by
doing
a
very
solid
frame
and
is
doubled
up
axis
work.
It
looks
like
we're
going
to
be
really
able
to
achieve
that
using
gt2,
six
millimeter
wide
belts
and
pulleys,
so
using
a
very,
very
brute
force,
kind
of
a
drive
system.
Typically,
people
use
use
a
lead,
screws
or
threaded
threaded
drive
systems
to
get
this
kind
of
precision.
A
But
the
facts
are:
if
you
want
to
look
at
some
numbers,
the
step
size
on
the
stepper
motor,
if
you
do,
the
math
you're
actually
getting
point
zero
one
millimeter,
so
one
hundredth
of
a
millimeter
step
size
on
the
actual.
What
you
see
here
in
this
picture,
the
actual
step
size
of
what
the
stepper
motor
can
resolve
is
10.
Microns.
That's
point,
oh
one
of
a
millimeter.
So
that
means,
if
the
machine
is
tight
of
the
structure
is
tight
of
the
belts
are
tight.
A
You
can
get
ten
micron
resolution,
which
is
perfectly
fine
for
milling,
very
precise
circuits
like
that.
So
the
theory
says
it's
possible
and
we're
pursue
doing
that.
Okay
back
to
so
that
the
relevance
why
the
CNC!
This
is
really
cool,
because
you
can
then
have
a
very
low-cost
CNC
circuit
mill,
high
price,
very,
very
high
precision,
the
best
there
is,
and
you
can
do
it
with
belts,
very
cool,
okay
print
cluster.
That's
ongoing
I'm
going
to
be
working
on
this
week,
really
getting
all
those
10
up
and
running.
A
So
we
can
do
the
torch
table,
part,
printing
and
then
part
printing
in
production
or
3d.
Printer
workshop,
so
the
torch
table
this
column.
Here
the
build
is
coming
up.
I
mean
I,
got
to
start
data
next
week
here,
because
we're
going
to
start
have
to
start
some
parts.
In
the
meantime,
Oliver
was
has
been
doing
the
electronics
design
and
the
prototype,
including
the
manual
high
control.
A
So
that's
also
I'm
already
building
that
next
week
this
this
week,
I'm
going
to
still
have
to
focus
on
finishing
the
3d
printer
cluster
and
testing
out
the
code
and
are
doing
the
Raspberry
Pi
doing
that
as
far
as
the
print
cluster,
which
which
Christiaan
is,
is
doing
a
great
job
on
in
terms
of
the
print
cluster
software
and
protocol
process
for
that
software
and
hardware
for
that
build
coming
up
next
week.
At
that
point,
I'll
install
the
height
controller.
A
A
Who
is
going
to
join
back
on
that
team
since
he's
very
interested
in
that?
But
idea
there
is
one
like
in
a
recruiting
process.
What's
happened
is
the
one
of
the
developers
who
applied
said:
hey
I've
got
this
hackerspace
I'm
working
on
a
makers
initiative
for
the
North,
Africa
Mideast
region
and
he's
got
a
lot
of
collaborators
there.
So
that
looks
like
a
really
promising
collaboration
where
we're
looking
at
a
very
big
3d
printer
build
in
December,
where
we
build
a
hundred
3d
printers
in
a
single
day.
A
That's
going
to
be
a
major
major
undertaking,
so
so
those
are
the
same
guys.
Ok,
maybe
then
I
can
open
up
the
floor
to
two
for
other
people
to
fill
me
in
on
any
things
that
we
miss
anything
from
people
that
are
on
the
call
to
fill
in
the
gaps
of
where
we
are
in
a
status,
maybe
start
with
Oliver,
maybe
update
us,
please,
where
you
are.
If
I
miss
anything?
A
B
A
B
That
I
utilized
somewhere,
which
I
found,
which
was
from
the
work
from
Aidan
Williamson,
which
was
so
far
as
I,
can
see
in
the
lab.
I
worked
on
this
it's
from
2014
and
yeah
I
was
able
to
find
his
last
undercoat
and
use
that
as
a
firm
lab,
and
it
seems
to
work
how
far
or
I
could
say
from
my
testing
that
I
think
it's
basically
working
awesome.
C
B
B
There,
it
is,
you
see,
it's
a
really
really
simple
structure:
I've,
just
taken
a
plate
of
copper
and
as
a
central
probe,
I
have
just
taken
the
probe
of
my
oscilloscope,
and
so
it's
quite
primitive.
So,
but
with
this,
I
could,
as
I
said,
receive
small
variations
in
the
signal.
But
it
wasn't
a
very
low
range
like
the
normal
range
is
about
eight
Pico
heart,
and
here
we
are
more
in
the
range
of
10
to
far
meaning
back
to
a
thousands
smaller.
A
B
D
D
A
B
A
B
C
B
C
B
The
next
thing
I'm
going
to
do
is
try
to
building
a
sand
or
with
ring
and
causes
using
maybe
the
Trotter
cable,
this
cable.
What
I
have
here
on
the
probe
is
about
1
meter,
maybe
getting
better.
If
we
go
to
20
or
30
centimeters
and
yeah
I
hope
the
ring
will
bring
the
clearer
signals
and
at
the
moment
the
signal-to-noise
ratio
is
a
little
bit
cause
I,
think
and
but
there's
some
hope.
I've
seen
their
worth
in
the
Year
2015
a
dialogue
between
a
maiden
and
the
guy
named
Clement.
B
It
which
also
tried
to
reduce
the
setup
and
was
probably
able
to
achieve
even
better
results.
I
have
put
a
link
on
the
YouTube
video
what
he
made
it
is
in
my
lock
page
the
discussion
page
there.
There
is
a
link
to
that
video
and
there
you
can
see
relative
good
resolution
in
a
range
of
120
meter.
What
he
is
doing
so
I
think
it
might
be
possible
in
principle,
but
there
will
be
maybe
a
fight,
a
challenge
to
get
better
shielding
grounding
whatever
stuff
is
helpful
to
get
to
single
Kyra
I.
B
C
A
A
B
Big
applause
also
to
Aidan,
we've
documented
as
well
as
also
said
willing.
He
had
put
all
this
email
discussion
with
that
guy
into
a
PDF
file
and
have
linked
it
to
the
lock
I.
Did
some
detective
fish
refers
to
follow
all
the
traces
and
followed
all
the
things,
but
yes,
we're
done
yeah
so
far.
It
saves
me
a
lot
of
work
to
find
this
and
to
be
able
to
use
somewhere
and
so
on.
So
it's
a
typical
case
of
you
know.
B
A
You
are
a
giant
and
I'm
going
to
send
you
this
video
okay.
This
is
excellent.
That's
awesome
how
we're
building
a
good
example
of
how,
because
it's
documented
we're
actually
able
to
take
the
work
that
was
done
a
couple
of
years
ago
and
completely
take
off
where
we
left
off
at
that
time,
which
is
good.
Very
nice
yeah
mum.
B
I'm,
a
at
one
point
more
that
is
from
about
the
sampling
theoretically,
would
be
maybe
able
to
do
some
softer
filtering
stuff
like
simple
Everett
ring
together.
Better
signal,
but
point
is
that
the
the
Sanwa
sampling
is
quite
slow,
I
would
guess
or
estimate,
maybe
in
the
range
of
500
milliseconds
per
Center.
That
means
you
have
not
very
much
time
to
get
a
whole
buncha
people
are
doing
an
average
about
an
equal,
thousands
or
something,
but
maybe
nothing
possible
in
the
range
of
of
10
or
something
I,
don't
know
yet.
I
have
no
real
imagination.
B
How
fast
the
torch
is
moving
forward.
You
said
it
more
slowly.
Moving
and
I
mean
on
the
other
end.
One
can
can
maybe
wait
at
one
point
until
the
sampling
this
time,
however,
but
I'm
going
to
play
with
them
and
try
to
maybe
do
an
average
about
more
samples
and
from
those
also
get
a
better
signal,
but
my
main
hope
is
on
the
on
the
ring
sample,
and
that
will
be
my
next
step
and
as
I
mentioned,
if
you
want
I
can
tell
you
one
of
the
board's
over
them.
You
can
also
do
something.
Excellent.
A
Excellent
yeah,
the
speed
that
we're
talking
about
is
about
one
centimeter
per
second,
which
is
in
English,
that's
20,
inches
per
minute
for
half-inch
steel.
That's
a
probably
about
one
centimeter
about
one
centimeter
per
second
right,
because
that's
about
50
centimeters
per
minute,
so
about
a
centimeter
per
second
yeah.
A
B
I
mounted
the
thing
the
probe
on
the
linear
drive
and
then
moved
it.
I
marked
five
marks
in
a
distance
of
one
centimeter,
so
five
centimeters
neat
and
then
I
move.
It
forward
moved
it
forward,
one
centimeter
and
then
the
next
centimeter
and
so
on,
and
meanwhile
letting
lock
the
the
sample
data
on
the
on
the
serial
monitor
of
the
arduino
ide
and
at
the
first
place,
I
get
a
value
which
is
about
eight
point.
B
One
nine
three
picofarads
interesting
is
that
the
same
value,
which
Adan
also
reported
that
he
gets
at
one
point
and
first
it
seemed
to
be
this
value.
But
if
you
take
a
closer
look
and
then
you
feel
suis
places
behind
the
the
Point
C,
some
are
more
or
less
regularly
the
numbers
which
you
can
relate
to.
If
you
doing
the
moving
forward,
meaning
getting
closer
to
the
plate
to
the
surface,
then
the
values
are
arising.
B
B
B
What
I
call
pentalpha,
let's
say,
20
pentalpha
and
if
I
closed
to
the
to
the
surface
than
hire
40
so
I
have
arranged
off
of
20
up
from
20
up
to
40
means
distance
of
20
cent
too
far
in
which
I
as
here
of
the
5
centimeter
distance,
and
it
seems
that
in
the
nearer
range
it's
getting
better
or
Harbor
and
in
the
more
distant
range,
its
the
bits.
It's
more
noisy
or
an
unclear
on
like
that.
B
But
I
think
this
is
all
not
why
some
meaningful,
because
we
still
have
not
the
right
cell
were
set
up.
So
yes,
but
it
was
enough
for
me
to
see,
there's
happening
something
regularly,
which
let
me
assume
that
at
least
I've
soldered
to
work
correctly
and
also
over
designed
them
so
far
at
length
of
its
design
correctly.
A
Now
I
think
this
is
a
yeah
I
think
that's
really
good
progress
that
you
actually
seeing
that
with
like
the
oscilloscope
probe,
which
which
really
has
no
capacitance,
there's
very
small
surface
area.
I.
Think
that
you
have
succeeded
seeing
something
with
that.
That's
that's
a
miracle
right
there,
that's
that's
great!
So
we
can
continue.
That's
true.
B
C
B
A
B
Yeah
and
by
the
way,
one
other
things
I
did
my
my
test
run
two
times.
First,
I
knew
the
carriage
with
probe
by
hand
and
then
secondly,
I
let
the
carriage
move
by
the
manual
height
torch
controller,
which
we
made
last
time
and
when
the
electronics
there
is
no
power,
supply
and
stuff
work
near
it,
then
it
was
getting
a
little
bit
more
noisier
than
when
I
did
it
from
from
hand.
So
I
guess
that
the
general
challenge
will
be
to
fight
the
noise
to
make
better
grounding,
shielding
and
stuff
like
that.
Yeah.
A
B
A
No,
that's
that
is
great
progress,
so
yeah
excellent
work,
so
we'll
continue
doing
that
and
in
the
meantime,
I
can
definitely
implement
your
next
week.
So
next
week,
I'm
hoping
to
implement
your
manual
torch
controller
solution
as
well.
So
that's
good
and
we
can
definitely
get
some
initial
cuts
on
the
CNC
torch
table.
So
moving
right
along
really.
A
B
A
B
A
Okay,
excellent
work;
okay,
very,
very
good,
so
we'll
continue
we'll
continue
on
to
the
next
topic
here
and
just
keep
going
thanks
a
lot.
Mm-Hmm
next
is:
let's
move
to
the
filament
maker
work
as
far
as
what
all
has
been
has
happened
there
who
wants
to
report
in
on
that
I
haven't
studied
in
detail
exactly
what
the
status
is
Dixon.
Do
you
want
to
pipe
in
on
what
what
all
has
transpired
there
I.
D
D
Getting
populated,
there's
free
CAD
files
for
some
of
the
I
guess
non
printed
parts
which
is
good
because
those
are
some
one
for
you.
Oh
ones
will
probably
pay
for
more
work,
I,
think
and
yeah.
So
that's
the
population
happening
and
I
added
a
slide
to
the
end
of
the
step
team
meeting,
where
I
just
have
a
small
amount
of
work
that
was
able
to
I
just
wanted
to
check
that
I
uploaded
one
free
CAD
file
for
the
extruder
barrel
that
you
can
see
right
there
that
four
inch
or
half
inch,
oh
and.
A
D
A
D
D
A
So
that's
that's
right!
On
going
from
900
to
5,
that's
a
definite,
definite
major
reduction
and
just
to
see
how
it
works.
I
mean
that's
perfectly
fine,
yeah
that
that
represents
that's
5
K
and
it
represents
where
the
threads
are.
So
that's
exactly
what
we're
looking
for
and
when
you
do,
the
saving
like
when
you
view
it
go
to
perspective
view.
So
it
looks
kind
of
more
in
perspective
like
when
you
do
screenshots
and
so
forth,
but
that's
exactly
exactly
what
we
need
so
that
that
connect
Wilden.
D
A
D
A
D
Trying
to
save
some
of
the
file
as
the
way
it
has
named
them
in
the
part
for
library
and
OC
Linux
I
got
unfortunate.
Busted
screenshot
of
the
air,
but
I
see
when
X
is
telling
me
no
slashes
and
file
names,
which
is
obviously
this
one.
Now
it
usually
is.
I
was
just
wondering
it.
I
was
wondering
if
there
was
a
file
name
convention
resource
on
the
wiki,
yet
yeah.
A
So,
let's
see
what
about
Roberta
also
says:
what
about
CAD
files
with
same
object
but
with
different
position:
how
to
put
them
in
the
library
like
different
positions
like
different
viewpoints,
different
modifications,
they
could
go
simply
up,
I
would
say
just
upload
them
over
an
existing
file.
So
if
you
show
something
interesting
like
even
if
it's
recoloring
parts
in
a
different
way
or
adding
an
exploded,
part
animation
or
whatever
anything
that
you
change,
you
can
simply
upload
as
a
new
version
and
just
make
the
notes
that
that's
what's
happening
in
that
specific
version.
A
Hopefully,
hopefully
that
answers
it
and
continuing
on
Roberto
log
here,
so
we've
got
yeah,
so
he
piped
in
this
this
this
one
right
here,
but
this
is
this-
is
what
we're
trying
to
do
here
so
basically
label
all
the
parts
for
that
particular
module
so
like
here,
for
example,
we
have
I,
see
we
didn't
really
say
who
has
what
outside
of
the
working
document.
So
let's
go
back
to
the
working
document.
A
A
Yeah,
so
here
is
what
we
have
so,
for
example,
Roberto
here
big
box,
enclosure
plus
hopper.
So
then
we
have
the
resulting
product
right
here.
That's
that's
excellent
work
right
there
and
on
his
log.
So
that's
what
we
wanted
to
have
from
everyone
just
to
keep
good
track
of
what
all
the
parts
are
covered
already
like
it.
These
are
already
linked.
What
I'm
expecting
here?
Look
at
that
final
assembly
with
sketches
without
sketches.
Let's
go
to
this
one.
Ok,
so
Roberto
has
done
some
good
work
here.
A
This
diagram
here
shows
me
that
all
these
parts
are
do
have
links
and
therefore
this
looks
like
it's
very
complete
and
then
you
look
at
the
final
assembly
here
of
20
parts
and
it
is
there
so
after
downloading
that
I'm
going
to
just
double
click
on
that.
Let's
look
at
what
the
final
product
looks
like
in
free
CAD.
A
A
A
A
Now
the
one
thing
for
printing
so
say:
let's
go
back
to
the
document
right
here
so
also,
if
I
go
to
Roberto's
log
I
would
want
to
see
okay,
excellent,
so
there's
all
the
all
the
files
for
the
free
CAD
and
the
next
step
would
be
also
just
export
the
individual
files
and
just
say:
okay,
the
same
thing,
but
that
STL
and
the
so
then
then
I
can
go
down
this
list
download
the
20
SDL's
and
hit
print
now
the
numbers
of
them
like
in
this
diagram.
We
should
have
a
corner
panel.
A
I
think
this
is
that
you
print
each
one
of
them
just
once,
because
they're
breaking
broken
down
looks
like
what
we
have
here
is
they're
broken
down
to
the
individual
part
such
that
the
printing
is
just
simply
one
one
print
of
each,
and
that
is
good
yeah
and
then,
on
this
specific
case,
the
next
would
be
some
of
the
heater
element,
but
that's
another
module.
Isn't
that
so,
if
we
go
to
so
you
have
a
thermal
components
like
this:
the
extruder
barrel,
auger
and
flange.
A
Once
that
is
done,
we
can
append
that
like
here
we
have
that
box
blocking
out
the
extruder
barrel
and
so
forth.
So
that
is
pretty
good
light.
And
if
we
have
that
now
the
auger,
let's
see
the
auger
yeah.
So
that's
all
in
Dixon's
work,
the
auger
plus
flange
extruder
barrel
and
a
way
to
mount
the
auger
to
the
to
the
drive
motor
I,
guess:
spooler,
I
guess
in
this
system.
D
A
We're
supposed
to
paste
in
the
finished
finished
assemblies
into
the
document,
but
that's
that's
really
good,
so
what
I
can
do
is
literally
I
mean
if
I
get
it
the
first
chance
to
start
printing
I
can
start
printing
these
all
these
elements
and
what
I
meant
to
say
is
that
uh-huh
extruder
electronic
module
visual
index
so
this
here,
what
I'm
seeing
is
yet
part
of
the
this
is
I.
Think
where
is
that
aid
was
that
electronics
by
Abe?
A
That's
correct,
so
he's
part
way
done
through
the
visual
diagram,
with
all
the
parts
linked
to
the
files
so
for
Roberto
he's
the
farthest
along
and
the
next
step
on
this
here
would
be
just
to
export
and
link
to
all
the
STL
files.
As
soon
as
that's
done,
I
mean
I
can
I
think
I
can
start
printing
this
within
a
week
or
so
once
I
give
the
cluster.
So
the
main
goal
for
me
is
get
all
the
cluster
going
this
week,
so
I
can
print
things
in
math,
so
we've
got
competing
devices
to
be
printed.
A
There's
the
torch
table,
there's
more
printer
parts
and
there
is
now
the
filament
maker.
So,
as
you
see
that
the
3d
printer
is
a
very,
very
important
tool,
in
fact,
we'll
be
printing,
some
of
the
the
drawer
rail
guides
for
the
brick
press,
also
using
the
3d
printer,
so
good
work,
excellent,
excellent.
A
A
A
E
How
much
done
open
software
by
now
and
we've
come
to
the
conclusion
that
for
for
hosting
does
different
printers,
so
we
will
use
octave
print.
This
is
open
source
already,
and
it's
been
around
for
a
few
years
now
it's
pretty
pretty
refined.
It
is
also
like
those
mentioned
before
it
has
the
option
to
load
the
software
up
to
the
softest
gcode
after
the
SD
card,
so
there's
nothing
new
or
special
that
we
have
to
do
for
them.
E
A
E
Working
on
was
the
of
the
management
how
to
expand
this
for
most
printers,
and
this
is
possible.
It
has
been
done,
however,
only
on
a
small
scale,
no
more
than
two
with
documentation,
as
far
as
I
could
see
so
I
have
to
ride
on
scripts
that
automate
the
process
of
pulling
the
the
printers
together
and
that's
exactly
what
I
did.
A
E
Mm-Hmm,
so
I
can
use
this
scanner
RF,
written
and
patent.
This
thing
automatically
detects
all
of
connected
3d
printers
that
sense
them
g-code,
that
analyzing
that
sense
basic
information
and
one
on
five
for
mullen,
and
it's
just
sending
back
the
printers
name
and
somewhere
and
stuff
like
that,
and
the
name
is
then
written
down
and
kind
of
organized
an
internal
file,
a
little
file
and
the
setup
is
then
corrected
accordingly
to
the
amount
of
3d
printers
and
also
according
to
the
mains
of
3d
printers.
E
F
E
So
up
just
it's
pretty
basic.
Actually,
it's
a
little
food
shuttle
looks
pretty
nice.
We've
got
here
a
few
settings,
so
we
can
get
four
new
devices
here
and
we
stop
the
machine.
I've
got
a
big
copy
right
here,
we'll
fill
in
what's
what's
necessary,
we
can
put
in
here
widgets
or
stuff
we
think
is
necessary
for
for
the
rad
lab
configuration
and
stuff,
and
one
button
is
here.
The
first
button
is
a
3d
printer
managing
the
cluster
and
it
only
dummies
they
will
be
created
dynamically.
E
According
to
the
3d
printers
I
had
known,
I
have
just
observed
symptoms
and
when
I
click
on
them,
they
dynamically
load.
So,
oh,
no,
no
here
is
the
octoprint
and
we
can
work
upload
to
the
system
and
then
to
the
SD
card.
We
have
temperature
here
and,
of
course
this
will
take
the
default
settings
for
different
printers.
E
We
have
to
talk
later
on
how
this
will
exactly
look
like
and
when
how
we're
switching
between
those
it
will
automatically
load
the
most
current
system-
sauce
not
everything's
loaded
at
once,
because
that
would
be
a
lot
with
huge
load
for
the
full
Raspberry
Pi.
But
each
but
each
cap
here
we
belowed
it's
only
when
clicked
upon
you.
B
E
This
is
pipes
last,
so
it's
mainly
tighten,
but
it
yes,
it's
actually
not
that
difficult.
It
looks
so
nice
only
hit
because
of
because
I
was
using
bootstrap
that
that's
all
I've
just
copy
pasted
a
bit
of
bootstrap
that
it
just
looks
nice
it
actually
pretty
simple.
It
doesn't
involve
any
JavaScript
except
automatically
loading.
A
E
Are
this
on
my
on
my
passion
to
get
this
web
server
and
stuff
load
loading
after
all
of
this,
in
a
step-by-step
process
and
I've
created
a
wiki
page
on
how
to
make
out
of
the
occupy
image?
That's
the
basic
of
the
octoprint
to
make
all
of
this
the
system
I
have
right
now
I
get
additionally
to
that.
There
are
all
the
all
the
flattened,
scripts
and
stuff
I
braided.
However,
there
are
mainly
untested,
so
they
will
be
just
there
and
they
will
be
1/4
updated
and
it's
about
400
kilobytes.
E
E
A
E
C
E
A
E
A
E
Can
describe
it
to
the
right
now.
In
short,
if
you
open
this
the
file,
you
have
an
accurate
screen
sharing
and
also
come
from
what
you're
doing,
but
if
you
unzip
it
there's
a
reason
II
and
inside
this
readme
there
is
everything
you
have
to
do
this
thing
to
get
going.
So
it's
pretty
simple
as
that.
If
there
are
any
further
questions
like
I
said,
the
wiki
page
is
actually
even
more
accurate.
The
reason
is
just
the
most
simple,
most
simple
steps,
so.
A
E
Maybe
maybe
a
penis
formulated
that,
but
it's
particularly
at
I,
will
create
the
private
cluster
image
with
that
at
the
moment,
there
is
none,
so
I'll
upload
a
modified
version
of
the
occupy
through
the
to
the
side.
However,
as
we
want
to
be
at
Sanford
as
possible,
I
want
also
to
document
on
how
I've
created
this
image.
E
So
this
is
how
the
image
is
created,
and
this
is
nothing
I,
do
on
the
image
but
I've
just
right
up
to
its
the
SD
card,
hood
up
the
pie
and
then
I
follow
the
instructions
left
here
by
a
SSH
like
I,
like
a
also
set
in
there.
Scroll
down
you'll
see
a
what
kind
of
of
orders.
How
do
you
say
edit?
What
kind
of
light
out
to
the
lines
I
put
in
to
get
the
software?
Exactly
like
this
with
me
on.
A
E
A
E
These,
the
the
write
to
the
SD
card
means
I'm,
taking
a
blank,
hard
drive
or
SD
card
investigate
the
it's
kind
of
the
HDD
or
SSD
of
the
of
the
of
the
reserve
is
be
SD
card,
and
this
has
to
have
some
kind
of
operating
system.
So
the
basic
operating
system
we
need
on
the
on
SD
card
is
the
occupy.
So
I
put
the
SD
card
into
my
computer
and
I've
written
a
little
weekly
page
there
as
well.
Writing
the
image
to
the
SD
card.
A
E
It
in
so
it
just
opened
up
by
default,
and
it
will
just
yeah
like
I
said
it
will
good
up
and
it
will
get
into
the
network
and
there
RSQ
provided
either
an
Ethernet,
cable
or
you
put
in
the
credentials
of
your
Wi-Fi.
This
is
also
described
in
the
SIM
card
set
up
yeah,
so
it
will
be
automatically
be
inside
your
router
inside
your
network
story,
and
you
can
then
SSH
to
it.
So
this
means
a
command
line,
command
line,
connection
to
your
Raspberry
Pi,
and
then
you
can
do
all
kinds
of
things.
E
You
can
also
do
the
subscreen
there's,
however,
no
quiso,
it's
no!
It
has
no
fancy
desktop,
it's
just
a
wide
wide
blinking
line,
indium
putting
ours
and
so
on,
and
the
others
you
need
to
get
the
sip
software
I
have
is
just
left
on
the
second
wiki
page.
So
the
Paris
thing
is
more
general.
You
can
set
up
any
kind
of
operating
system
for
the
PI
would
first,
you
can
actually
set
up
all
the
Linux
with
those
commands.
Well,
okay,.
E
A
Yeah
one
comment
on
the
rap
lab,
so
that's
the
replicating
self-replicating
open
source,
Fab
Lab,
that's
a
term!
We
used
actually
a
long
time
where
we
haven't
used
that
term
of
ret
lab.
But
it's
that's.
That's
for
anyone,
who's
wondering
what
rep
lab
is
it's
another
name
for
open-source
microfactory
open-source
Fablab
for
everybody
actually.
E
Use
this
term
because
I
found
this
most
often
it
seems
to
be
the
most
universal
term.
You
have
for
this
yo
app
just
use
this,
because
I
thought
maybe
this
server
I,
don't
think
it
will
be
kind
of
it
will
be
overheated
because
of
simply
the
two
printers
it
manages,
and
so,
especially
at
all
its
tributes.
The
the
file
to
the
SD
cards
and
chips
will
be
idle,
so
I
thought.
Maybe
this
is
kind
of
viewable.
Also
my
design
of
the
of
the
main
of
this
website.
E
E
E
A
So
so,
just
to
get
the
architecture
clear
here,
so
we're
going
to
use
our
laptop
with
our
C
Linux
or
Linux,
and
we're
going
to
create
the
SD
card
that
then
is
used
to
install
the
operating
system
on
the
Raspberry
Pi.
Once
we
have
that
we're
going
to
communicate
with
the
Raspberry
Pi
via
the
laptop
and
then
have
the
Raspberry
Pi
we're
going
to
put
on
this
other
printer
cluster
software
onto
the
Raspberry
Pi
through
the
through
our
laptop.
Is
that
correct?
Thank
you.
Okay,.
E
We
have
figure
in
it
too,
to
make
it
our
special.
Our
special
OS,
however
I'll
at
the
end,
I'll
load
up
an
image.
That's
already
finished,
so
you
only
have
to
make
a
do
step.
One
so
jump
has
to
put
this
into
your
laptop
and
set
this
up,
and
everything
else
will
then
be
fine
and
already
done
so.
This
is
just
for
the
expert
or
those
who,
like
the
transparency,
to
do
all
themselves,
yeah,
it's
more
less
for
the
on
a
logging,
yep.
A
A
A
E
Gonna
actually
about
the
hopper
side,
so,
like,
like
Marshall,
said
at
the
beginning,
we're
using
this
wireless
communication
between
the
difference
between
your
upper
principle
printers
it's
kind
of
like
a
like
a
wire
connection,
at
least
from
software
side,
as
there's
no
differentiation,
it's
just
taken
to
to
rate
your
wave
and
then
and
then
connected
to
each
switch
otherwise
loop.
This
way
and
they're
different
channels,
you
can
adapt.
So
every
every
3d
printer
will
be
on
its
own
channel.
E
You
know
and
yeah,
as
you
can
see,
on
the
under
on
the
block
materials
will
have
one
one
USB
port
for
call
for
everything
for
every
3d
printer
than
one
one
USB
two
to
tutorial
and
then
put
in
the
wireless
on
on
the
side
of
the
thoroughfare
PI
one
last
receiver
on
the
side
of
the
printer
and,
of
course,
an
SD
card
on
the
side
of
the
printer
and
that's
actually
malas.
It
yeah.
A
E
I
wanted
to
say:
buddy
is
be
happy
with
the
are
cheaper
options
out
there,
but
I
wasn't
quite
sure
of
their
quality.
So
this
is
just
an
amazon
link.
There
are
prices
about
half
of
this
they
can
be
used
be
this
is
the
problem
just
should
be
powered.
There
are
other
options
out
there,
so
other
I
don't
know
how
out
of
this
would
work
with
the
other
options,
just
figure
out
for
yourself
I'm,
just
not
in
the
American
market
I'm,
not
searching
that
much
different
hardware,
so
I
can't
you.
A
A
Yeah
yeah
very
nice,
very
nice,
so
next
step
would
be
for
me
to
get
all
the
parts
and
put
the
system
together.
So
I
can
test
it
here
and
get
you
that
I
have
to
do
the
new
firmware
for
the
3d
printer,
so
it
can
identify
itself
so
that
you
can
see
the
name
of
the
printer
I
can
send
it
to
you
but
yeah.
This
is
great
great
work.
So
please
continue.
E
Do
that,
but
that's
not
actually
in
the
difficult
state
state
stage,
this
can
be
done
within
an
hour,
actually
I'm
kind
of
waiting.
For
you,
though,
because
I
need
to
now
kind
of
feedback
on
how
the
structure
there
are
several
options,
especially
for
the
year
for
the
occiput
itself.
You
can
set
it
up
in
different
ways
and
I
need
the
kind
of
default
setup
that
I
copy
for
each
instance
and
I
have
to
know
how
this
should
be
made
in
a
most
optimal
way.
Right.
A
E
E
After
it's
connected
to
your
tree,
rather
you
can
set
it
up,
so
it
is
called
port
forwarding.
You
can
do
this
on
your
router
and
you
just
set
up
one
specific
part,
and
this
is
then
reachable
through
the
internet
and
don't
panic.
This
ledge
is
pretty
secure.
So
it's
a
secure
as
your
password
is
for
you,
you
send
me,
hopefully
a
pretty
good
password
and
then
I
can
log
into
it,
and
I
can
communicate
with
it
like
I'm
sitting.
Next
to
it.
That's
that's
kind
of
the
warning
out
there.
So
pretty
easy.
E
A
A
E
A
E
Just
stupid
so
which,
if
you
want
to
share
this
over
the
Internet
as
long
as
it's
in
your
heart,
it's
no
problem,
but
if
you
want
to
share
it
over
the
Internet,
you
will
have
to
set
up
some
really
complicated
stuff,
and
if
you
want
to
do
that,
you
should
contact
me
again
about
that,
and
this
would
take
actually
pretty
much
time
and
I.
Don't
think
that
that's
really
worth
it.
E
But
if
you
say
this
is
important
and
just
look
at
it,
I'll
write
an
API,
no,
the
left,
so
maybe
we
can
just
at
this
age.
This
connection
I
am
also
using.
Maybe
we
can
send
over
this
connection,
just
a
command
that
can
set
up
the
printing
process
as
well
about
the
nice
Greek.
So
just
that's!
What
giving
the
single
yeah.
A
Yeah
yeah
now
that's
very
interesting
in
terms
of
how
you
can
have
yeah
towards
a
remote
print
cluster
like,
for
example,
as
an
enterprise
opportunity.
You
can
actually
be
renting
your
print
cluster
through
a
remote
interface
to
other
people.
They
want
to
use.
It
they'll
be
very
interesting
that
that.
E
Could
be
done,
how
hurt
there
should
be
another
layer
of
security,
so
just
kind
of
a
page-
that's
locally
there,
and
there
should
be
in
kind
of
an
enterprise
page
about
that.
That
could
also
make
the
pricing
stuff.
So,
like
I
said
this
layer
of
security
is
only
for
internal
Wi-Fi
where,
where,
where
there's
a
secure,
password
available
or
just
plugged
in
into
the
Ethernet,
so
nothing
with
the
implant.
That
would
be
horrible
because
of
improve
accessibility,
pretty
bad
yeah.
A
Yeah,
yes,
that's
very
good!
Well,
that's
excellent
work,
so
what
I'll
do
is
make
sure
I
can
get
to
that
step.
Maybe
push
that
up.
My
priority
could
be
I
got
to
get
you
that
information
first,
it's
that
it's
about
the
identity,
information
and
I
basically
have
to
do
them.
Get
the
Raspberry
Pi
establish
here
soon.
The.
E
A
E
May
look
instead,
but
I'm
not
quite
sure
on
how
hot
I
can
get
them
to
that
I.
Think
I
can't
do
that.
Maybe
what
I
wanted
to
ask
you
is
I've
got
two
little
prop
projects
on
that
one
one
of
the
API
and
once
the
what
are
some
convert
is
a
conversion
so
I
thought
about.
Maybe
you
could
just
upload
there
an
effort,
FC
STD
file,
and
this
would
just
be
converted
into
the
SDL
equivalent
and
it
directly
uploaded
into
the
octopi
not
into
the
SD
card
at
the
octopi
repository.
E
A
E
So
it
would
just
be
a
button
on
the
website,
like
you
know
it.
When
you
can
upload
someone
something
on
the
website
will
look
about
like
that,
it
will
be
uploaded
and
then
it
will
be
converted
in
internal
algorithm
and
then
it
will
be
pushed
into
the
repository
debt.
That's
containing
the
uploads
of
the
octoprint,
so
you
can
at
once
upload
it
onto
your
sd
card
itself.
Yeah.
A
A
E
A
A
E
Well,
you
shouldn't
do
multiple
at
one
step:
that's
that's
the
thing
that
could
actually
really
be
a
problem.
However,
if
you
do
this
only
one
at
a
time,
so
it's
nothing
to
like
you,
you
just
there
are
not
ten
persons
loading
up
at
once,
but
there's
one
person
that
says:
I've
got
an
SPF,
see
I
can't
bring.
E
E
A
E
A
A
So
I
think
that's
probably
how
does
everyone
else
feel
about
it
sounds
sounds
like
that's
a
good
good
way
to
go
for
convenience
of
printing,
so
you
don't
have
to
keep
twice
the
number
of
files
on
the
wiki,
because
now
we
have
to
maintain
there's
the
free
cat
file
and
then
there's
the
individual
print
file
STL
so
to
combine
it
into
one
I
think
that
would
be.
That
would
be
quite
desirable.
It
seems
to
me
right
now,
unless
once
we
find
some
other
things
that
may
not
work
about
that,
workflow
yeah
don't
be
good.
A
Let's
go
with
it
now:
oh
okay,
yeah
and
phase
it
yeah.
And
it's
like
one
thing
at
a
time.
Can
you
actually
do
that
yeah
yeah
I
mean
I,
think
I
think
you're
doing
doing
work
pretty
rapidly,
so
I
think
that
would
be
it'll,
be
good
good
to
implement
that
as
we
get
this
Raspberry
Pi
in-house
here
mm-hmm,
let's
do
it.
Let's
try
it
it'll,
be
great.
Don't.
E
A
E
I
have
maybe
someone
has
done
this
when
it's
printing,
so
the
other
Reno
is
taking
G
code
from
somewhere
and
just
printing
and
printing
and
doing
stuff
what
is
happening
if
you
send
from
different
source
so
like
I'm,
sending
with
my
scanner
I'm
sending
a
code.
This
is
nothing
that
would
stop
the
machine
or
something
like
that
is
just
resetting
a
string
or
something
like
that.
E
So
just
sending
bit
of
text,
but
would
it
kind
of
disrupts
the
workflow
and
then
just
stop
altogether
or
would
it
just
be
implemented
in
the
current
process,
as
one
line
would
be
caught
back
and
then
it
would
just
go
on
like
like,
like
net
nothing
happens,
or
what
exactly
would
happen?
I'm,
not
quite
sure
about
that
in
rows.
E
E
E
A
E
A
Sure
yeah
well
the
way
that
I
don't
know
how
octo
print
octopi
works.
But
if
you
look
at
my
screen,
if
you
use
I've
been
using
cura,
so
you
start
the
print
before
you
print
you
can
have
you
can
type
in
commands
and
in
basically
command-line
to
send
g-code
commands
to
the
3d
printer
once
you
start
it
just
runs
through
your
file.
That's
that's
all
it
does,
but
also
lets
you
stop
the
print
and
I
and
I.
A
A
F
A
A
E
D
E
E
A
E
E
And
and
well
I
hope,
maybe
this
wouldn't
disrupt
anything
but
I'm
actually
not
sure,
because
when
it's
printing
and
I'm
sending
a
code,
he
sent
me
your
names
make
with
this,
would
disrupt
or
or
or
just
ask
sir
after
done
or
something
like
that,
and
then
with
it
would
take
an
hour
until
the
script
ends.
That
would
be
pretty
bad.
Maybe
10
hours
is
a
big
project
and
now.
A
A
A
A
A
A
Do
you'll
have
for
you
guys
who
are
here?
Do
you
have
enough
to
go
on
to
continue
the
work?
Let's
see
Cassie
tension
mechanism.
Can
you
guys
prioritize
what
Roberto
did
in
terms
of
so
get
the
get
the
two
dimensional
diagram
with
all
the
parts
and
then
start
filling
the
labels
around
it?
Just
like
we
have
in
this
document
here
on
slide
three
and
four.
We
have
examples,
but
let's,
let's
draw
this
up
at
least
three
through
five
here
this
one
being
the
most
complete
here
fully
complete.
A
We
need
to
start
doing
that,
for
the
other
one,
so
next
class
would
be
just
to
start
populating.
I
think
this
document
would
be
good
to
work
in
right
in
this
document
here,
and
you
have
to
set
up
a
new
document,
but
basically
take
slide
six
and
put
in
the
next.
These
are
all
labeled
here
already,
so
please
continue
working
in
there.
A
A
A
A
You
know,
take
the
next
one
like
whichever
ones
not
started.
Just
just
do
it
like
we,
we
all
want
to
coordinate
so
whoever's
watching
this.
A
Roberto
will
Cassie
I,
o
Israel
Dixon,
look
into
this
working
document
as
the
place
to
coordinate
where
all
the
work
is.
So
we
know
that
now
here
Abe
has
started
this
dock,
but
all
the
other
ones.
Please
start
them
right
away
here:
extruder
barrel,
auger,
flange,
thermal
components,
spoiler,
electronics,
tension
mechanism,
spool
mechanism,
so.
A
A
The
way
we're
going
at
this,
so
here's
the
filament
maker
I
didn't
put
too
many
other
steps
here.
Let's
see
oh
wait
it's
this
would
be
in
a
real
length
to
the
actual
document
there
yeah
the
filament
maker
we've
been
studying
right
now,
where
the
CAD
phase,
the
green
line
is
where
we
are
currently
as
soon
as
we
have
all
the
CAD
we're
kind
of
moving
through
the
CAD.
We
need
the
full
model
and
part
sourcing
and
build,
but
at
the
same
time
here.
A
A
A
I
would
say,
jump
in
just
pick
one
and
just
dive
right
in
and
and
if,
if
we
use
this
document
that
everyone
knows
that
we
can
work
on
this
document,
what
idea
is
like
there's
more
than
one
person
can
be
working
on
on
each
one
of
them,
so
so
just
maybe
Roberto
maybe
take
on
the
work
with
Cassie.
Take
on
the
tension
mechanism
and
rollers
I
know
she's
got
a
lot
of
the
parts.
Maybe
do
the
detail.
Diagram
like
you
have
and
continue
working
with
there.
A
So
I
would
say
perhaps
join
Cassie's
effort
here
on
on
the
roller,
the
tension
mechanism
rollers,
so
whichever
okay,
so
thank
you
very
much,
then
I
think
that
kind
of
wraps
up
the
meeting
for
the
week
I
think
all
together
just
great
progress
on
all
fronts.
We're
definitely
moving
along
and
we'll
see
you
next
week
then,
and
please
use
the
OS,
see
the
3d
printer,
open
source,
ecology,
Network
page
continue.
A
There
I
haven't
really
looked
at
what
the
updates
there
are,
but
I
always
post
the
meeting
up
on
a
on
the
main
development
group,
which
is
the
network
that
open
source
ecology
org.
So
you
can
also
keep
posting
there
yeah.
We
had
a
little
down
downtime
on
the
wiki,
but
we're
past
that
there
was
a
service
outing
and
we
couldn't
get
it
back
online.
Okay!
Well,
thank
you
very
much
for
everybody,
we'll
talk
again
next
week,
so
the
next
meeting
would
be
regular
time,
which
is
Tuesday,
1
p.m.
central
USA
time.