►
From YouTube: Development Team Meeting - August 29, 2017
Description
See http://opensourceecology.org/wiki/Development_Team_Log for reference from August 29, 2017
----
What you see here at Open Source Ecology is an ambitious program based on a volunteer effort. To help us reach the goals - please consider joining as an OSE Developer in 2017-
http://opensourceecology.org/wiki/OSE_Developers
Take a minute to subscribe to our email newsletter (updates, workshops, etc): http://bit.ly/1LtcM44
A
A
You
got
three
of
us
so
far.
Okay,
I'll
keep
going
so
updates
updates
so
big
weekend
this
weekend
on
a
brick
press.
So
we
had
a
build
and
it
was
a.
It
was
a
great
event
very,
very
exciting,
but
I
think
also
most
troublesome
out
of
all
the
brick
press.
Events
we've
built
so
far,
just
a
number
of
different
things
didn't
go
as
planned
and
we
ended
up
shipping
off
the
machine
to
Utah
the
power
cube.
We
actually
left
here
and
I
got
invited
to
go
out
there.
A
There's
gonna
be
a
demo
demo
session
at
the
University
of
Utah,
where
we're
gonna
do
like
a
public
workshop
demonstration
of
the
brick
press
and
everything
else.
I'm
gonna
come
out
there
for
that
and
at
that
time
install
the
code.
So
we
didn't,
we
ran
a
machine
with
with
hydraulic
levers.
We
did
not
actually
run
the
controller,
so
we
didn't
have
time
for
that
lots
and
lots
of
different
issues.
It's
like
for
me.
A
A
The
part
order
on
the
engine
we
actually
couldn't
get
the
bolts
to
mount.
The
pump
like
there
were
these
obscure,
m7
bolts
that
looks
like
that
are
used
to
mount
the
pump
mount
to
the
engine
they
just
weren't
available
at
local
stores
and
like
we
had
m6
m8,
it
was
m7
and
it
didn't
say
anything
about
that
in
the
manual,
so
we
kind
of
had
to
search
around
so
a
lot
of
different
details
which
prevented
us
from
getting
total
perfection
of
this
but
I
think
altogether.
The
the
whole
crew
had
a
great
great
time.
A
Great
learning
experience
for
everybody
I,
definitely
look
forward
to
how
the
machines
gonna
be
used
and
then
natural
building
and
design-build
block
program
at
the
University
of
Utah.
So
that's
excellent,
but
really
showing
that
yeah.
We
still
gotta
keep
going.
The
redesign
I
mean
yeah,
it
worked.
There
was
actually
one
mistake
in
the
camp
files
like
the
one
of
the
plates.
Just
did
not
line
up
a
couple
of
details.
The
drawer
was
excellent
with
the
3d
printed
drawer
guides
that
that
worked
really
well.
I
was
glad
for
that.
A
The
cylinder
was
a
was
a
nightmare
to
cut
it,
so
we
had
a
16
inch
cylinder.
We
cut
it
down
to
an
8
inch
cylinder
nightmare
to
actually
weld
it
up
and
had
a
lot
of
had
like
three
little
pinhole
leaks
and
then
to
fix
it
took
like
two
hours.
So
that's
like
that's
a
lot
in
a
workshop
like
this
two
hours
is
like
really
unacceptable.
A
So,
basically,
as
you
know,
when
I
read
welded
the
little
pinhole
another
would
show
up
and
I
had
to
go
through
that,
like
20
times
before,
everything
was
actually
perfectly
sealed.
High-Pressure
cylinder
3000
psi,
so
this
would
be
all
tight,
but
a
new
adventure
we've
never
done
that.
We
never
cut
up
a
cylinder
to
actually
shorten
it
and
make
our
own,
because
we
can't
give
the
right
one
for
this
thing.
So
it's
still
like
a
little
part
sourcing
issue
there
that
we're
going
through
and
on
a
document
you
can
look
at.
A
Just
to
go
over
some
of
the
results
here,
you
can
click
on
the
CB
press
there
for
some
of
the
build
postings
on
Facebook
I
still
have
to
do
a
time
lapse,
I
time-lapse
the
whole
thing,
so
the
nice
thing
about
a
time-lapse
is
that
so
I
had
a
tripod
with
just
a
smartphone,
taking
a
picture,
every
half
half
minute.
So
then
studying
that
whole
time-lapse
over
the
three
days
we
can
actually
reevaluate
and
say:
okay.
A
This
is
how
much
every
single
part
took
and
studying
that
we
can
actually
get
better
at
better
at
assessing
like
the
blocks
and
everything
else.
So
that's
that's
good.
The
controller
looks
like
this.
It's
awesome
I
like
that.
That's
it's
our
new
controller.
We
never
used
this
system
where
you
have
the
two
individual
cylinders.
This
is
how
the
configuration
ends
up.
Looking,
there's
a
pressure
sensor
there,
the
controller
box,
so
it
looks
it
looks
nice
and
compact.
A
The
the
hose
actually
serves
as
a
carrying
handle,
and
this
thing
is
gonna
sit
on
a
post
stuck
in
the
ground
off
the
machine
so
that
you
don't
shake
this
thing
up,
but
because
the
electronics
are
sensitive,
I've
heard
many
issues
where
the
controller,
if
you
have
the
machine
vibrating
around
that
the
controller
tends
to
make
disconnections
and
fail
so
we're
putting
this
off
the
machine
on
a
separate
stake.
You
got
the
Quick
Connect
couplers.
A
You
got
the
cat5
couplers,
going
to
the
controller,
all
nice
and
neat
and
tight
I
like
this,
so
see
me
press
the
power
cube.
This
is
how
it
ended
up
looking
and
that's
really
weird.
We
you
know,
after
considering
everything,
that's
that's
to
be
considered,
including
I'm
gonna.
Point
you
to
a
video
about
on
YouTube
about
the
different
special
configurations.
What
are
the
parts
that
you
have
to
access
and
because
of
that
power
cube?
A
Which
ended
up
that
we
did
the
power
cube
like
you
see
there,
that's
a
little
different
than
we
talked
about
right,
but
that's
the
way
we
could
fit
it
in
the
easiest
way.
It's
actually
20
inches
tall
by
20
inches
wide,
so
tight
20
by
20,
and
then
the
length
is
actually
quite
excessive.
It's
like
about
31
I,
believe
for
the
overall
length,
basically
stretching
everything
out,
lengthwise
the
the
hydraulic
tank
being
at
the
end,
the
engine
shaft
being
right
there.
The
coupler
is
not
attached
here
in
this
picture.
A
You
can
also
look
at
the
pictures
on
the
Google
folder
Google
Drive.
Let
me
know
if
you
can't
see
the
Google
Drive.
It
should
be
open
open
at
it.
If
you
click
on
the
link
to
pictures,
but
that's
that's
how
everything
mounted
to
fan
it
up
being
mounted
on
top
kind
of
like
the
fittings
were
in
different
places,
they
could
pretty
much
shift
around
because
of
the
realistic
considerations
involved
and
in
this
design.
A
Here
we
have
the
what's
nice
about
this
crowd
that
the
people
this
is
basically
like
novices
did
this,
including
up
to
welding
the
tank
and
actually
epoxy
it
on
a
corner,
so
it
doesn't
leak,
but
this
is
cool
that
we
pretty
much
had
novices
build
this
all
together.
So
that's
so
that's
a
good
sign
that
you
know
this.
This
device
can
be
built
by
novices.
That's
great!
A
You
see
the
corners
like.
If
you
look
at
the
detail
of
the
frame,
that's
not
how
the
frame
is
supposed
to
be.
The
frame
is
supposed
to
be
flat,
but
after
explaining
that
and
getting
waylaid
into
other
tasks,
I
wasn't
able
to
look
at
that
the
people,
actually
they
made
it
not
flat.
It's
like
2.5
dimensions.
Look
at
each
side,
the
quarter
by
2
inch
steel
frame
members.
They
overlap,
they
don't
butt
against
each
other.
A
They
overlap
one
on
top
of
each
other,
which
makes
it
not
flat,
which
is
not
what
we're
supposed
to
do,
but
that's
what
we
did
and
the
top
is
left
open,
pretty
much,
no,
no
frame
that
no
frame
at
the
top
really
so
I
can
open
at
the
top
and
the
great
the
great
to
which
the
fan
and
cooler
is
attached
at
the
top.
So
that's
that's
the
realistic
consideration
and
now
can
we
do
better
too
this
in
another
way?
Well,
I
mean
this
was
what
fit
well
here.
A
A
You
always
have
some
some
electricity
source
like
lights
or
something
else,
but
it
looks
like
this
engine
and
I'm
not
even
sure
about
this,
but
I
couldn't
find
a
wire
or
the
instructions
manual
which
said
that
this
has
some
battery
charging
wire,
so
I
mean
there's
a
few
wires.
Sticking
out
but
I
don't
think
it
does
have
a
charging
wire,
so
we
might
have
to
swap
this
engine
out
with
the
electric
start
version
which
absolutely
has
to
have
charging,
because
it
has
to
have
a
battery
for
the
start.
So
I
just
want.
A
A
It
will
probably
put
put
out
50
percent
more
bricks
at
18
horsepower,
we'll
probably
get
8
bricks
per
minute
with
this
16
horsepower
engine
compared
to
6
bricks
per
minute,
with
the
27
horsepower
engine
before,
because
we're
using
this
more
efficient
pump
that
we've
never
used
the
log
splitter
pump,
which
has
a
dual
flow.
So
that's
that's
kind
of
the
workshop
there.
A
Let's
see
what
else
to
be
said
about
the
workshop
yeah
I
mean
in
general,
I'm
committed
to
getting
the
CB
press
like
the
next
steps
in
the
roadmap
are
definitely
to
start
cutting
with
our
own
torch
tables.
So,
for
example,
we
could
avoid
the
issue
of
two
parts
being
missing
in
a
steel
order
from
the
metal
shop.
A
They
end
up
delivering
one
part
actually
the
day
later,
when
we
are
actually
so,
we
actually
did
use
it
and
then
another
part
we
just
substituted,
but
every
every
single
step
is
you
know
it's
time
wasted,
so
it's
cutting
with
our
own
cnc
torch.
Then
we
can
absolutely
guarantee
that
we
have.
We
have
all
the
parts
on
hand-
and
you
know
like
a
week
beforehand,
not
like
the
day
before,
because
we
couldn't
make
up
for
this
little
error
right
now
in
time.
A
As
its
finished,
we
did
have
a
sample
of
the
overall
machine
as
finished
with
with
minor
differences,
so
that
really
doesn't
count,
because
you
can't
say
that's
the
exact
machine,
main
difference
being
the
drawer
guides
which
were
elegant
and
simple,
and
this
time
around,
but
getting
like,
we
really
got
to
get
like.
We
talked
about
this
forever
now
like
overhead
projectors.
A
So
if
you're
stuck
on
something,
you
could
watch
a
quick
video
right
in
a
workshop,
also
a
computer
station
where
you
can
log
data
like
things
that
were
troublesome
and
we
tried
that
before
on
individual
people's
cell
phones.
But
you
know
it's
hit
or
miss.
So
we
think
now
that
a
dedicated
workstation
within
the
workshop
would
help
and
of
course,
getting
Internet
there.
So
we
can
do
real-time,
video
documentation
during
this
build
like
we
did
the
during
one
of
the
builds
of
the
iron
worker.
A
For
example,
we
had
a
a
remote
documentation
team
like
a
design,
sprint
working
at
the
same
time
that
the
workshop
was
happening
so
that
we
produced
an
instructional,
updated
instructional
at
the
time
of
the
workshop,
so
I
think
we
got
to
get
into
these
other
top-notch
pieces
of
making
this
really
well
organized
and
efficient
I'm.
Also
thinking
about
I
mean
we
had
trouble
a
lot
of
trouble
with
the
welders.
Two
welders
of
the
six
went
out
gas
feed
problems.
The
gas
solenoids
appeared
to
have
gone
out
and
one
actually
was
broken
at
the
initial.
A
We
didn't
see
that
the
gas
saw
nine,
so
you
weren't
getting
the
gas
shielding
on
a
weld.
Therefore,
you
can't
really
well
because
weld
becomes
really
low-quality
and
weak,
so
losing
two
out
of
the
six
welders
I
mean
that
kind
of
issue
can
be
addressed
by
open
source
where,
if
we
know
exactly
like
I
mean
I,
don't
know
how
to
fix
that
gas
online
right
now.
I
have
to
look
into
that,
but
if
it
was
an
open
source
welder,
then
we
have
spare
parts
and
immediate
replace
ability
of
everything
as
we
go
along.
A
You
want
to
have
backup
and
I
think
the
simplest
way
to
be
able
to
back
it
up
is
that
you
can
fix
it
on
a
spot.
Of
course,
you
can
have
the
spares
and
a
lot
of
extras
but
being
able
to
lower
costs
by
not
having
to
throw
stuff
away
or
replace
it,
but
just
fixing
it
is
definitely
a
major
could
be
a
major
improvement
for
the
program
next
item,
so
we
got
a
so.
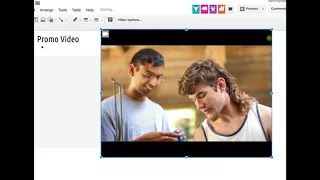
This
is
promo
video,
like
man,
take
a
look
at
this.
A
This
is
good
stuff
here
on
page
page
number,
three,
so
Dixon
thanks
a
lot
a
great
job
on
this
hours,
I
was
like
wow.
This
is
I,
think
that
is
Dixon
here
no
in
Dixon
doesn't
appear
to
be
here.
But
if
you
look
at
that,
video
well
its
first
of
all,
like
pretty
professional
quality
and
kind
of
captures,
the
spirit
of
what
it's
about
it's
a
mess.
You
know
it's
beauty
and
truth
and
action
and
excitement
everything
in
one
I
like
the
video.
A
In
a
sense,
it
kind
of
goes
through
the
people's
experience,
as
opposed
to
focusing
on
a
machine,
so
I
think
it's
I
think
that
video
captured
quite
realistically
what
that
workshop
looks
like
so
excellent
job
Dixon,
as
opposed
to
kind
of
like
just
showing
oh
yeah.
Look
at
this
cool
thing
and
sparks
and
this
and
that
this
was
kind
of
like
the
personal
story
and
nice
nice
Expo
of
what
it's
like
so
we're
gonna
use
that
for
advertising.
Basically,
we
post
that
in
the
next
workshop
announcement.
A
A
The
number
of
people
are
gonna
watch
it
when
it's
four
minutes
versus
eight
minutes,
because
basically
the
the
graph
of
people's
attention
span
falls
off
exponentially
for
the
length
of
a
video.
So
for
promos
you
want
to
be
between
two
and
four
minutes.
When
we
get
beyond
that
five.
Six
seven
eight
ten
I
mean
literally
it
drops
off
like
like
the
exponential
tail,
so
we
I
would
actually
ask
Dixon
if
you
can
ruthlessly
cut
that
into
like
four
mins.
A
We
can
still,
of
course,
keep
the
long
one
for
those
who
want
like
the
full
thing
and
that's
great
to
have,
and
maybe
we
just
do
even
like
a
radical
thrash
down
of
that
into
two
minutes
for
those
who
just
want
to
get
the
flavor
of
that
in
even
a
more
power
packed
way.
But
that
would
be
a
good
thing
to
do
so.
A
So
at
least
I
don't
know
if
I'm
prejudiced
but
see
what
you
guys
think
but
I
think
it's
a
great
video,
so
great
job,
Dixon,
alright,
so
continuing
on
so
so
yeah
filming
maker
and
so
page
eleven
there
filament
make
are
ready
for
experimental,
build
October,
October
first,
which
is
during
the
September
30
October
first
workshop,
so
we're
just
going
right
forward.
We're
gonna
do
the
same
3d
printer.
We
are
gonna,
make
a
couple
of
improvements.
A
The
things
that
we
do
want
to
do
like
for
the
next
workshop,
the
main
missing
link
I,
would
say,
like
the
the
weakest
weakest
point
is
the
extruder
we
want
to
do
the
lulzbot
extruder,
the
one
we
have
is
just
you
know
it's
entry-level.
It
works,
but
not
good
enough.
I
mean
we
want
to
print
rubber,
and
all
that
like
rubber,
for,
like
you,
can
print
your
own
rubber
belts
like
drive
belts
like
even
for
the
torch
table
for
the
printer
and
things
like
that.
I'm
not
sure
the
current
extruder
could
handle
it.
A
Extruder
is
definite
major
improvement
for
the
next
one
immanuel
also
talked
about
saving
space
by
integrating
the
endstops
with
the
actual
carriage
pieces.
So,
instead
of
using
separate
endstops,
you
would
integrate
them
into
the
carriage
printed
pieces.
That
would
be
a
good
idea
too.
I
think
that
would
be
a
high
priority
if
we
have
the
time
because
we
can't
change
too
many
things
or
the
workshop
won't
work.
So
there's
the
extruder
as
the
end
stop
integration.
A
The
third
one
is
I've,
got
the
nichrome
wire
and
and
fiberglass
sleeves
to
make
our
own
bed
so
I'm,
looking
at
in
this
workshop
around
will
offer
12-inch
beds,
so
basically
a
steel
or
aluminum
plate
with
a
nichrome
shielded,
nichrome
wire
underneath
or
your
heated
bed.
So
that's
a
pretty
relatively
quick
demo
like
I,
can
take
the
wire
right
now
put
the
fiberglass
sleeve
on
and
plug
it
into
a
wall
outlet
and
we'll
have
about
800
watts
of
power.
A
So
we
can
test
that
for
the
heating
element
with
an
external
external
relay
driven
by
the
ramps
controller.
So,
instead
of
controlling
the
heat
bed
directly
from
the
ramps,
you're
plugging
in
relay
that
turns
the
bed
on
and
off,
because
it's
more
power
than
the
ramps
can
handle
and
in
fact,
we're
putting
an
external
relays
to
handle
the
bed,
because
the
the
controller
keeps
on
burning
out
is
the
results
after
like
two
months
of
testing
so
heat,
so
12-inch
heated
bed
and
that's
it
as
far
as
the
PVC
frame.
A
A
They
can
test
out
the
PVC
frame,
because
it's
nice
to
have
a
frame
that
you
don't
have
to
don't
have
to
have
metal
cut
by
a
metal
shop,
because
that's
PVC
is
much
easier
if
you
buy
or
print
the
3d
printed
corners-
and
we
have
one
of
the
the
PVC
machines
right
here,
but
to
be
ready
for
a
workshop.
You
kind
of
have
to
test
that
for
like
a
month
or
two
to
make
sure
everything
is
working
like
you
think
it
should
so
I
mean
we're
not
ready
for
that.
A
For
the
next
workshop,
I
mean
if
we
had
more
energy
than
we
could
definitely
test
it
out
in
parallel,
but
it's
a
little
beyond
but
pellets
here,
like
okay,
filament
maker
I
mean
I'm
feeling
pretty
good
about
it.
We've
got
the
complete
absolute
design.
You
click
on
Limon,
film
and
extruder
I
mean
the
work
we
did
is
great
guys,
I
mean
look
at
this.
We've
got
the
full
CAD.
We've
got
the
full
bill
of
materials
I'm
going
to
the
lineman
film
and
extruder
page
I
mean
look
at
that.
So
that's
that's.
A
Definitely
something
that
we're
ready
to
build
I
mean
think
about
it.
So
we've
got
the
auger.
We've
got
the
motors.
We've
got
the
winder
mechanism,
it's
basically
just
thermal
controls,
temperature
control
on
on
an
on
the
heater
controls
just
about
everything
here.
Let's
see
what
is
the
only
control
the
the
speed
of
the
motor
we've
got
the
heat
on
the
on
the
extruder
barrel.
Let's
see
Anna
speed
on
winder,
right
and
I
guess
speed
on
the
puller.
A
A
B
Yeah
you
just
kind
of
have
to
adjust
that
I
think
he
had
some
information
about.
You
know
you
just
adjust
the
voltage
right
could
tell
for
some
of
those
photos.
Yeah
it'll,
be
you
know,
kind
of
a
little
touchy
and
kind
of
look
at
what
settings
he
used
and
then
adjust
it
to
those
and
see
how
it
kind
of
works
together.
Yeah,
it's
not
super
automated
or
anything.
It's
kind
of
it
needs
a
lot
of
human
interaction
to
some
degree.
B
A
B
B
A
I
think
so,
because
I
mean
the
absolute
requirement
is
that
you
have
to
start
it
and
once
you
get
it
started
and
it's
working
I
mean
you
got
to
walk
away
and
this
thing
goes
overnight
or
forever
just
making
your
your
filament.
So
it
has
to
be
to
the
point
where
you
said
it,
then
you
absolutely
have
to
walk
away.
I
mean
obviously
we're
not
gonna.
Be
there
babysitting
that
thing
the
whole
time
so
we'll
see
how
it
works,
but
but
he
he
did
say
that
that
he
once
he
sets
it,
everything
is
tuned.
A
B
A
A
B
A
Do
you
know,
do
you
understand
so
I
know,
there's
the
Pooler
and
a
winder,
obviously
on
a
winder,
you
have
to
wind
the
filament
actively
with
a
little
motor,
but
as
far
as
the
puller
do
you
understand,
of
the
puller
itself
is
I
mean
how
sensitive
that
is,
or
what
that
or
can
even
it
go
without
that?
Or
what
do
you
think
about
that
because
it
seems
like
the
actual
extrusion
happens
by
gravity
and
the
motor
on
the
extruder?
A
B
In
that
previous
version,
they
had
some
kind
of
electronic
sensor
that
was
supposed
to
like
control
the
size
of
it
more
but
I
think
he
went
away
from
that,
just
because
it
wasn't
necessary
and
even
that
the
fans
there's
something
to
cool
it
and
I
assumed
it
was
because
he
cooling
it
and
then
once
it
hardens
a
certain
amount.
It's
not
gonna
change
the
size
or
stretch
anymore
right.
A
B
I
I
don't
think
that
the
size
is
going
to
be
changed
by
the
tension
at
that
point.
I
think
part
of
that
was
just
he
has
the
he
called
the
winder
option
with
the
Louisville
winder
and
things
like
that,
but
I
think
he
did
originally
and
then
decided
that
wasn't
entirely
necessary.
I,
don't
know
how
likely
it
is
to
have
tangling
issues
or
the
only
nice
thing
about
that
might
be
that
you
pack,
if
you
do
a
better
job
of
winding
it
nicely.
B
B
A
Yeah
so
we'll
see
it
well
see
I
mean
then
the
next
major
step
on
yes
see
how
robust
this
thing
looks
and
what
controls,
if
any,
would
seem
desirable
for
this
at
the
current
state,
so
yeah
I
mean
that
would
be
cool
that'll,
be
nice,
I
mean
we'll
definitely
pull
some
pull.
Some
string
well
see
how
how
good
it
is,
and
maybe
we
could
actually
use
it
that
same
day,
mm-hmm
yeah,
yeah.
B
There
was
a
lot
of
similar
stuff
that
I
looked
at
online
later,
more
two
different
people
building
their
own
extruders
and
there
were
a
lot
of
similar
but
slightly
different,
interesting
variations
on
this
to
do.
I,
think
control
of
filament
size
better
but
and
I
have
experience
with
the
extruders
to
know
how
my
size
talks.
Although
I
read
some
about
that,
I
didn't
think
that
he
didn't
see
me
apply
and
he
was
having
a
lot
of
issues
with
thickness
which,
if
it's
good
filament,
that's
consistent
plastic
and
it's
just
being
hanging
by
gravity.
B
A
A
B
A
But
looks
it
looks
pretty
good
I
think
yeah
I
think
we'll
definitely
we'll
end
up
pulling
some
thread,
we'll
see
what
happens
so
yeah.
Okay!
Well,
thank
you.
Definitely
getting
ready
for
that.
So,
if
continuing
on
a
meeting
here,
so
you
might
have
noticed
the
timesheet
we're
getting
an
upgrade
on
a
timesheet
people,
this
is
pretty
cool,
so
Lex
has
been
working
on
this
and
it's
basically
an
automated
platform.
You
you
just
log
your
hours,
you
embed
it
in
your
time,
yeah
your
work
log
and
you
just
type
in
your
hours
and
your
your
tasks.
A
A
So
if
you
click
on
OS,
C,
dev
org,
here's
the
graphs
what's
really
cool
about
it
is
you
can
click
like
get
rid
of
mine
there,
but
you
can
click
on
each
one
of
these
and
they
actually
disappear
like
you
can
make
make
with
view,
whichever
one
all
in
one
graph.
So
this
is
really
cool.
I,
like
it
very
nice
they
can
see
by
person.
This
is
the
overall
total
number
of
developers
and
total
number
of
hours
divided
by
10,
so
very
nice
stuff
and
then
on
a
platform
itself,
Oh
cor.
A
You
basically
type
in
your
name
like,
for
example,
/,
Marcin
and
I.
Have
my
thing
here.
My
luck,
I
guess
I
have
to
log
in,
but
we'll
get
you
the
login
you
have
to
log
into
this.
Just
will
get
you
a
password
and
then
you
can
start
logging.
We
can
do
it
next
week,
so
please,
for
this
week,
continue
just
on
a
timesheet
like
normal,
but
anything
for
starting
next
week.
A
Essentially
we
got
to
get
the
passwords
and
embed
this
and
everybody's
log
Lexa's
still
like
just
fixing
the
username,
so
the
username
is
the
same
as
on
the
wiki,
so
we
don't
have
to
keep
a
separate
database
of
users
so
we'll
be
ready
to
hit
off
on
this
next
week
people.
So
this
is
good,
because
this
will
automate
it
I,
don't
have
to
go
into
the
spreadsheet
and
then
generate
a
graph
by
summing
up
all
the
contributions.
What
I
do
right
now?
Is
this
volunteer
timesheet?
A
It's
like
you
guys
all
log
and
I
just
go
in
there
and
some
the
number
of
all
the
contributor
hours.
So
that's
all
gonna
be
automatic,
which
is
great,
and
then
we
can
also
watch
the
progress
of
everybody
by
person
per
person
very
nice.
So
just
heads
up
this,
we
just
continue
on
the
regular
timesheet
that
we
did,
but
next
week
we're
gonna
migrate
over
after
this
weekend.
So
Lex
is
gonna
finish
up
all
the
little
outstanding
tasks
this
weekend.
A
C
A
C
A
Yeah,
okay,
yeah,
so
I
guess
what
we
want
to
do
is
yeah.
We
can
edit
that
collaboratively,
so
yeah
I'll
take
a
look
at
that
more
and
I
think
what
we
want
to
do
is
put
in
as
much
of
the
detail
and
use
cases
as
we
have
and
make
it
a
nice
tight
edited
video,
because
I
think
this
process
is
going
to
be
critical
to
our
it's.
A
A
very
important
video
I
would
say
it's
critical
to
our
workflow,
so
I
think
we
have
to
take
a
little
bit
of
time
to
make
sure
that
this
is
treated
properly,
and
then
we
all
accept
and
test
the
method
that
we're
using
so
yeah.
We
should
spend
the
time
and
do
the
script
properly,
make
sure
all
the
cases
are
in
there
and
we
can
make
additional
videos
in
the
future
for
now.
A
I
think
just
a
one,
comprehensive
one
that
tries
to
bring
everybody
up
to
speed
on
assembly
would
be
good,
so
yeah
I'll
keep
going
very
important,
but
all
together
it's
it's.
As
we
said,
we've
got
the
individual
parts,
so
the
workflow
would
be
say.
We
have
a
large
number
of
people.
The
number
of
parts
in
a
given
machine
is
large.
Everyone
can
swarm
on
an
individual
part
as
soon
as
an
individual
part
is,
is
initially
done
that
can
be
put
into
the
overall
assembly.
The
biggest
question
I
have
for
speeding
up.
A
This
workflow
currently
is
say
your:
how
do
you
make
this
most
effective
because,
naturally,
the
overall
assembly
is
going
to
be
blocked
by
the
availability
of
parts,
so
the
question
would
be:
how
do
you
get
from
them?
You
know
start
of
a
design
sprint.
Let's
say
the
parts
that
are
available
for
entry
into
the
final
assembly
and
the
easiest
way
to
do.
That,
of
course,
is
to
make
the
parts
simplify
them
as
much
as
possible.
So
you
have
at
least
a
placeholder
that
can
be
worked
with
so
say
in
like
as
little
as
10
minutes.
A
A
Maybe
you
can
actually
address
this
question
like
how
does
does
the
import
know
that
does
it
have
any
limits
to
being
able
to
import
like
if
you,
for
example,
you're
working
on
a
part,
but
then
you
you
change
it
so
much
that
it
effectively
becomes
a
new
part.
Will
the
assembly
import
still
work,
Roberto
Canessa
answer
that
it.
C
A
A
Every
time
you
import,
the
constraints
do
not
get
kept.
So
how
do
you
so?
What's
the
use
of
the
I'm
not
really
clear
about
how
useful
is
that,
because
the
idea
I
thought
it
was
that
you
know
say,
replace
a
part
it
gets
put
into
the
correct
place,
and
so
you
don't
have
to
mess
with
it.
So
how
can
you
achieve
that
part
being
put
in
the
same
place?
That's
by
how
you
setup
the
origin
in
the
original
file.
A
C
A
C
A
C
C
A
C
A
C
A
C
C
D
C
A
Part
yep
yep,
so
essentially,
when
you
edit,
it
takes
you
to
an
to
the
individual
file
and
you
edit,
that
individual
file
and
it
imports
it
automatically
pretty
much
yep.
Okay,
no,
that's
good!
That's
very
good,
okay,
okay,
that
sounds
good,
so
yeah
I
think
we're
on
the
way
to
an
effective
process,
yeah
so
I'm
thinking
that
if
we
do
very
rough
like
so
we're
the
parts
when
we
have
a
large
number
of
parts,
we
start
on
a
project.
We
make
an
initial
rough
sketch,
I
think.
A
As
long
as
some
of
that
rough
sketch,
like,
for
example,
it
has
like
one
plane
that
is
the
critical
interface
plane.
That
plane
remains
the
plane
against
which
we're
constraining
to
say
the
final
assembly.
As
long
as
we
have
one
good
constraint
point,
we
can,
we
can
still
import
it,
import
new
versions
properly,
while
being
constrained
to
the
entire
overall
assembly,
so
I
think
that's
good
for
the
workflow
I
will
have
to
see
how
it
works
in
practice.
A
But
the
promise
promise
like
the
dream
here
is
that
you
get
a
hundred
people
on
a
design
and
you
can
literally
do
a
complete
design
in
one
day
because
you
got
a
hundred
people
x
say
you
know
four
hours
or
eight
hours,
that's
800
hours
of
cad
time.
You
know
in
a
single
day
that
I
mean
that
definitely
gets
you
a
full
full
working
assembly,
but
the
limit
would
be.
How
quickly
can
you
arrange
those
parts?
So
the
quicker
you
can
import
the
initial
parts
into
the
final
assembly,
the
quicker
you
can.
A
You
can
build
the
entire
thing
so
think
about
you've
got
a
bunch
of
very
rough
parts.
You
then
you
create
a
very
rough
assembly
pretty
quickly,
you
know
say
within
one
or
two
hours,
three
hours
you've
got
a
rough
assembly
with
all
the
placeholder
parts
actually
shown
as
blocks
or
blocky
objects
and
then,
as
time
goes
on
for
every
new
part,
that's
updated.
A
You
can
import
those
updates
into
the
final
master
CAD
and
you
can
see
the
finalcad
morphing
from
this
very
rough
structure
to
more
and
more
perfect
detail,
as
each
part
gets
completed
and
imported.
So
that's
the
kind
of
workflow
we
should
be
thinking
about
in
our
mind
that
we
see
the
whole
final
assembly
in
the
rough
shape
and
then
keep
refining
part
by
part
with
the
work
of
individual
people.
So
that
would
be
if
we
can
deliver
that.
That
would
be
really
good.
E
C
Would
be
interesting
if
we
can
import
modules
besides
the
parts,
because
if
we
were
able,
we
are
able
to
assemble
modules
outside
the
master
Cal
and
then
assemble
them
inside
the
master
Cal.
It
would
be
much
more
effective
because
we
cannot
work
at
the
same
time
in
the
master,
Cal
I
mean
many
people
have.
You
said
yeah.
A
A
That's
that's
right.
The
the
trouble
here
is
that,
yes,
everyone
can
work
on
individual
parts,
but
but
only
one
person
can
work
on
a
master
CAD.
So
it'd
have
to
be
a
linear
process.
It
can't
be
paralleled
on
a
master
cap
because
otherwise
there
would
be
edit
conflicts
like
if
you
upgrade
one
part.
Another
person
upgrades
one
part
in
another
document.
You
have
to
merge
those
documents
after
that,
so
would
get
messy
right.
So
that's
kind
of.
B
E
E
Know
a
lot
of
open
source
stuff
that
is
very
good
for
hardware
stuff,
like
CAD
files,
because
one
of
the
great
things
about
it
is,
you
know
you
can
merge
or
you
can.
You
can
see,
you
can
use
diff
and
you
can
tell
what
the
differences
are.
You
know
and
very
quickly.
You
can
see
the
chain
engine
and
that's
easy
for
a
much
easier
for
code.
E
You
know
where
it's
written
in
human
language
and
you
you
can
visually
see
the
points
versus
something
in
a
hardware
place
and
so
yeah
I
think
that
there
might
be
some
value
in
looking
at
sort
of
version
control
system.
Just
maybe
you
know
out
in
the
future
a
little
bit.
I
I
agree
with.
You
know
the
workflow
needing
to
be
there,
but
just
so
you
can
kind
of
scale
the
system
more
yeah.
A
No
that's
right.
We
have
to
do
that,
so
we
have
to
be
thinking
about
at
least
studying
how
that
is
done
in
industry
standards.
What
it,
what
exactly
is
the
system
they
could
they
use?
We
should
also
check
in
with
the
Freak
up
community,
because
I
know
they
they
did
have
some
talk
about
product
data
management,
absolutely
I
mean
I,
know
you're
ik,
one
of
the
developers
at
least
talked
about
it.
A
Now,
look
at
that
look
at
untreated
dead,
Ned.
Look
at
my
screen!
Guess
what
that's
free,
CAD
and
blender
me
like
that
yeah
Yorick
works
only
in
blender
and
free
CAD.
So
this
is
the
kind
of
stuff
we
can
be
doing
it
actually
yeah.
We
got
a
maybe
follow
up
with
Yorick
on
that
point
and
in
fact
I'll
just
point
them
point
them
to
this
video.
But
basically,
what
exactly
is
the
state
of
Product
data
management?
A
That's
capable
within
freaking,
because
I
know
that
York
has
been
developing,
that
for
the
architecture
workbench
for
the
architecture
workflow,
since
he's
an
architect
and
I'd
like
to
just
touch
in
with
him
just
asking
what
the
status
of
that
is
and
our
people
using.
That
is
that
an
experimental
version
you
have
to
kind
of
do
some
programming
in
there
or
is
there
workflow?
That's
pretty
much
well
developed
already.
That's
good
for
production
use
yeah!
So
we'll
we'll
ask
York
about
this
to
fill
us
in
there's
a
there's:
the
free
cat
community.
A
A
A
2
and
I
would
say
that
for
some
projects,
if
it's
a
simple,
if
it's
a
simple
design,
we
can
just
operate
at
level,
one
you
just
import
and
then
you
constrain
so
I
think
we
can
use
all
those
three
depending
on
a
skill
set
of
the
of
the
people
that
are
involved
like,
depending
on
because
I'm
thinking
for
the
long
term.
You
know
we're
gonna
get
a
lot
of
developers.
Some
people
are
gonna,
be
really
skilled.
They
can
operate
at
level
three
with
their
eyes
closed,
but
new
people
coming
on.
A
You
still
want
to
have
them
collaborate
and
large
on
a
large
scale.
It
may
be,
you
know,
maybe
we
can
have
a
mix
of
the
three
different
levels
operating
with
an
open
source,
ecology
so
use
whichever
one
is
most
appropriate
at
the
time
for
the
audience
that
we
have
developing
a
certain
project
because
will
naturally
break
down
into
many
different
teams
and
have
a
lot
of
different
projects
going
on
as
we
grow,
the
actual
team
yeah,
so
yeah
go
ahead.
Uh-Huh
yeah.
E
C
A
C
C
C
A
C
A
Okay,
I
can
open
up
16
yeah
I
mean
it
would
take
some
figuring
out,
so
we'll
have
to
figure
that
out,
but
yeah
we'll
have
to
get
more
sophisticated
for
now.
Let's,
let's
develop
this
one
for
now,
as
like
the
intermediate
step,
I,
don't
think
we
should
let
go
straight
to
the
most
advanced
workflow
yeah.
A
A
Definitely
it
will
be
useful
for
the
future
level.
Yeah
I
see
the
commit
with
you
right
here
and
then
there's
be
IM
server
I
mean
that's
called
Building
Information
Management.
So
that's
also
related
how
you
actually
that's
product
data
management
for
buildings,
so
freecad
is
there.
We
just
would
have
to
go
through
some
more
learning
curve
to
get
everybody
on
board
on
that.
So
let's
not
worry
about
it
for
now,
but
definitely
in
the
future.
Okay.
B
B
A
I,
don't
know
what
kind
of
management
openscad
has,
but
definitely
it's
part
of
the
workflow
and
then
we
can
generate
parts
and
openscad
will
probably
leave
the
higher
level
assembly
functionality
to
freecad
I.
Don't
think
openscad
is
designed
for
that.
It's
just
just
plain
code:
I,
don't
see
much
functionality,
therefore
assembling
things,
not
that
I
know
of
but
definitely
useful,
and
then
we
can
import
from
openscad.
As
we
mentioned
last
week,
I
believe
you
can
convert
from
the
SDL's
into
free
cat
import
free
cat
native.
So
that's
there
we're
pretty
much
set
I.
A
Think
the
question
you're
asking
for
I
think
we're
we're
set
on
that
already.
But
probably
we
cannot
expect
the
higher
level
assembly
functionality
from
openscad.
That's.
That
would
be
my
guess
right
now:
okay,
so,
okay,
let's
just
go
through
just
finishing
up
the
meaning
here.
So
next
on
the
agenda
is
also
also
the
tractor,
so
we're
getting
set
for.
So,
if
you
look
at
page
number
for
CB
power
cube
is
actively.
We
do
want
to
continue
on
a
power
cube,
CAD
and
finish
that
off
and
see.
A
If
we,
we
can
get
the
what
we
built
fully
cat
it
up
and
see
that
within.
If
within
CAD,
we
actually
see
different
opportunities
for
making
the
design
tighter,
but
the
power
cube
design
right
now,
as
I'm
slide
number
eight
makes
it
quite
Lent
long
lengthwise
and
that
may
be
alright.
But
as
we
do
the
CAD,
we
might
discover
something
that
hey.
A
Maybe
what,
if
we
put
it
there
or
elsewhere,
you
know
we
might
be
able
to
rearrange
some
sizes
and
things
so,
but
the
first
step
would
be
to
cut
up
what
we
have
already,
because
that's
a
workable
power
cube.
That's
a
that's,
a
good
design,
it
works
and
we
can
go
from
there
as
the
next
iterations
on
the
tractor
part,
so
that
kind
of
binds
with
a
tractor
team,
because
the
tractor
needs
the
power
cube
and
we
want
to
do
a
four
for
power.
A
Here
we
got
to
do
some
redesign
on
it
to
give
the
motion
perfected,
but
we've
got
like
six
weeks
for
the
CNC
torch
table
workshop,
where
we
prepare
the
bases
just
read:
redoing
the
CAD
doing
them
doing
some
of
the
3d
prints
for
the
improved
parts
working
out
the
long
axis
to
make
it
a
hallow
axis
instead
of
a
solid
axis,
which
is
much
light,
lighter
weight.
But
yes,
so
there's
a
few
things
there.
That's
that's
on
the
plate
and
because
we
need
we're
gonna
need
that
torch
table
for
the
tractor.
A
So
but
tomorrow
what
we
want
to
do
is
meet
for
the
the
tractor
team
and
we
can
discuss
the
power
cube
and
tractor
in
more
detail
like
really
nailing
out
the
power
cube
just
putting
together
all
the
all
the
CAD
and
getting
a
workable
power
cube.
That's
basically
using
that
one
power
cube
that
we
have
for
the
hydraulic
tank
and
the
other
power
cubes.
Don't
have
to
have
a
hydraulic
tank,
so
we're
gonna
think
about
how
do
you
make
it
most
efficient
so
that
you
share
that
hydraulic
tank?
A
And
then
you
have
to
have,
of
course,
separate
engine,
slash
pump
for
the
other
power
cubes,
but
you
can
share
the
cooler
and
you
can
share
the
hydraulic
reservoir.
So,
let's
see
how
we
can
make
that
the
most
efficient
design
using
the
modularity
and
then
going
straight
to
the
tractor
design,
which
is
the
promise
there
is
when
we're
doing
a
sixty-four
horsepower.
We
should
think
as
much
as
we
can
about
doing
it.
A
mod
like
for
scalable
from
1
to
4,
like
from
one
power
cube
to
four
power
cubes.
A
A
So
but
let's
do
that
tomorrow,
so
so
1:00
p.m.
like,
since
we
don't
want
to
run
this
today,
let's
do
the
1
p.m.
tractor
meet
tomorrow
same
time
same
place,
1
p.m.
for
the
container
and
a
power
Cuban
tractor.
So
let's
do
that
now,
as
far
as
the
role
division
like
what?
What
exactly
is
the
status
of
where
we've
gotten
so
far?
So
if
just
just
to
reevaluate
that
real
quick
where
we
are
in
the
power
cube,
burst
version
17
point:
oh
eight
part
library,.
A
Our
cube
version
17
point:
oh
eight,
because
this
is
gonna
turn
into
power.
Cube
version
17.1,
oh
ten,
so
the
power
cube
is
gonna,
build
in
an
october.
Gonna,
be
seventeen
point
ten,
but
let's
see,
let's
see
where
we
are
in
terms
of
the
overall
part
library,
I'm
looking
at
the
the
master
cab
checklist
parts
missing
mounting
kit
for
fam
few
parts
missing,
filter,
filler
breather
will
hose
bar
michelle
suction
hose
0.5
inch,
clamp,
expanded
steel.
A
Yeah
we've
got
a
number
of
parts
missing.
As
far
as
the
how
the
library
looks
here.
Yeah
we
got
to
keep
going
at
it.
You
know,
there's
a
bit
of
parts
roberto.
How
is
the
final
assembly
on
and
have
you
touched
at,
or
what's
the
latest
status
on
that
that
thing,
the
master,
let's
see,
August
29
Roberto
did
one
of
the
last
versions.
A
Let's
see
what
that
looks
like
for
us
here,
just
to
see
where
we
are
for
tomorrow,
but
we
need
to
finish
all
that
up
any
other
outstanding
parts
we're
gonna
have
to
so
tomorrow.
We'll
discuss
the
design
concept
for
the
the
small
tractor
and
start
maybe
building
up
some
parts.
We
do
have
some
parts
in
the
part
library
like,
for
example,
the
universal
rotor
I.
Think
that's
in
a
part
library
from
last
year,
actually
I
believe
Alec
last
year
did
that,
but
let's
see
where
we
are
in
a
power
cube
final
master.
A
I
see,
there's
a
lot
of
constraints:
galore,
okay,
okay,
yeah,
yeah
right
and
the
realistic
geometry
is
such
that
this
is
I
mean
we
can
I,
don't
know.
Maybe
we
could
do
like
if
we
can
fit
all
the
parts
into
this
one
I
mean
we
should
go
ahead,
but
I
mean
in
reality.
We
found
that
we
couldn't
couldn't.
Do
it
basically
based
on
a
geometrical
considerations,
if
you
look
at
what
you
want
to
do
for
tomorrow's
meeting
is
definitely
take
a
look
at
the
the
video.
A
Whether
the
design
we
have
in
this
master
CAD
right
now
is
gonna,
be
workable.
I
mean
this
kind
of
looks
like
things
may
fit
in
this
way,
with
the
pump
would
be
sticking
out
the
back,
but
that
could
be
could
be
workable.
So
we
have
to
just
keep
assembling
it
to
see
if
we
can
get
all
the
hoses
and
try
to
reconcile
that
with
the
actual
pictures
of
the
as-built.
Look
at
the
actual
considerations
like
where
the
suction
hose
and
the
return
is
and
how
much
space
they
take.
A
A
Right
now,
the
way
we
have
it
and
if
we
can
get
a
tighter
that
would
be
good,
I
could
probably
see
that
I'm
looking
at
the
engine
shaft
there
and
a
hydraulic
pump
I
mean
that
I,
don't
think
we're
gonna
need
all
that
space
there
like.
If
you
look
at
my
screen,
we
can
probably
tighten
that
up
a
little
bit
because
behind
the
pump
there's
gonna
be
like
three
or
four
inches.
A
We
might
not
need
all
that
space
there,
so
we
can
kind
of
optimize
the
fit
here
and
also
say
on
the
front
of
the
engine.
Looking
from
the
front,
it
can
possibly
be
pushed
up
like
an
inch
or
two
to
the
front.
I,
don't
know
it's,
it's
gonna
be
tight,
but
I
think
we
can
do
like
if
that
pump
goes
on
the
shaft
like
right
there,
it
looks
like
we
have
a
little
bit
of
space
for
us
to
still
close
up
that
gap
like
that
four
inches
behind
a
pump
there,
that's
so
we
can
save.
A
So
it
would
be
a
20
by
20
by
27,
if
it's
31
right
now,
but
we
also
have
to
make
sure
that
we
can
take
the
pump
off
the
pump
mount
when
we
are
disassembled.
So
the
pump
can
come
up.
We
don't.
We
can't
be
close
enough
to
the
hydraulic
tank
in
the
back,
that
the
pump
can't
go
backwards
and
actually
come
out.
So
we
have
to
think
about
it.
A
But
if
you
want
to
take
the
pump
off
here,
just
a
geometrical
consideration,
then
you
can
also
move
the
engine
forward
by
removing
the
four
engine
mount
bolts.
So
that's
another
option
of
how
you
actually
remove
the
pump
because
I'm
seeing
like
a
good
four
inches
that
we
can
save
by
getting
rid
of
that
gap
behind
the
pump
here.
So
if
we
go
20
by
20
by
27,
that's
a
reasonable
I
mean
that's
a
nice
size.
That's
a
nice
compact
size
for
a
power
cube.
So
that
would
be
quite
good
if
we
can
achieve
that.
A
So
we
can
continue
on
working
on
this.
This
cat
here
working
out
all
the
details
and
now
it
turns
out
look
at
this
I
mean
those
vertical
bars
it
turns
out.
We
don't
need
them
because
we
can
mount
the
mesh
directly
and
mount
the
fan
directly
to
the
mash
that
the
cooler
directly
to
the
mash,
so
the
mesh
acts
as
this
instead
of
these
two
vertical
bars
here,
I
mean
this
vertical,
and
this
vertical
here,
instead
of
those,
were
just
mounting
the
mesh
right
across
the
the
body
of
the
frame.
A
So
it's
actually
a
much
easier
mounting
system.
So
that's
that's
good
yeah
yeah!
So,
let's,
let's
take
this
tomorrow,
continue
on
this
and
so
I'll
discuss
both
the
prime
I
mean
I
would
say
primarily
the
track.
I
mean
both
tractor
and
power
cube,
and
we
want
to
try
to
divide
that
as
much
as
we
can.
But
we've
got
I
mean,
let's
see,
I
mean.
If
we
look
at
our
team
numbers,
we
got
a.
A
A
But
if
we
don't
have
the
torch
table,
we
either
get
a
lot
of
the
parts
cut
or
we
just
do
it
by
hand
like
we
did
last
time
and
it's
not
pleasant
to
do
it
all
by
hand.
So
we
probably
just
really
yeah
and
probably
like.
If
we
want
to
cut
the
tracks,
we
want
to
cut
them
by
CNC,
so
just
send
it
out
to
a
fab
shop.
But
hopefully
we
have
our
CNC
torch
table
and
we
will
have
to
have
it
because
we're
gonna
do
this
experimental
build
workshop.
A
So
we'll
do
all
the
preparation
on
a
torch
table
design
as
much
as
we
can
using
the
the
hollow
shaft
and
I
mean
we
did
get
them.
You
know
some
XY
motion.
We
kind
of
found
out
that
the
axis
is
basically
too
heavy,
so
I
have
to
beef
up
either
light
in
the
axis
by
using
hollow
rods
or
strengthen
up
the
drive.
A
The
drive
is
plenty
strong,
the
belts
slipping,
so
we
just
just
fixed
that
the
the
drive
on
the
belts
by
using
either
wider
belts
like
9,
millimeter
or
12
millimeter,
or
by
getting
larger
sprockets
on
the
on
the
stepper
motor.
So
there's
there's
definite
clear
paths
forward
on
a
CNC
torch
table.
So
I
think
we're
quite
good
on
that.
But
we
want
to
get
everybody
so
I
have
all
the
Aussie
devs.
So
we
got
to
get
people
on
the
tractor
and
on
the
power
cube,
let's
just
nail
that
out.
A
Just
like
we
did
the
filament
maker
I
guess
it's
interesting
how
the
filament
maker
is
our
poster
child,
but
we
kind
of
did
spend
a
lot
of
time
and
got
the
complete,
thorough,
exhaustive
design
and
part
list
for
that.
So
that's
it's!
Actually,
our
poster
child
for
some
of
the
development
we've
been
doing
here
so
yeah,
yeah
I,
think
that's
it
just
the
last
thing,
I
think
so.
Christian
is
here,
and
you
know
as
Christians
still
on
Christian
we're.
A
D
Yes,
yes,
it's
there,
unfortunately,
after
further
and
didn't
work,
but
Martin
reversed
your
machine
and
I'm
a
bit
unsure
whether
it
was
on
my
side
or
on
yours
as
well.
Now,
of
course,
go
work,
move
it
here,
but
I'm
not
quite
sure
what
it's
about
and
I,
unfortunately
have
some
problems
here
on
sitting
after
the
software
I
I
told
you
about
last
week,
so
discipline
order
difficult
because
I
want
to
set
it
up
on
a
Raspberry
Pi,
and
this
is
RM
and
RM
didn't
support,
because
there's
some
emulation
will
often
it's
it's
a
bit
complicated.
D
However,
I
have
to
do
it
on
a
bigger
system,
and
this,
on
the
other
hand,
means
that
the
system
that
is
at
the
moment
down,
we
have
to
replace
it
or
get
it
up
again
or
something
like
that
for
that.
I
cannot
set
up
my
environment
to
let
they
update
the
ISO
so
and
so
then
you're
stuck
with
that
version.
D
A
D
So
I
think
I
can
I
can
set
it
up
again.
Yeah,
but
but,
like
I
said,
I
was
I
was
busy
with
setting
it
up
on
RM
and
that
simply
didn't
work,
because
I
had
to
build
many
things
myself
and
there
were
too
many
variables.
Subject:
Justin
work:
what's
our
I'm
some
ways?
What's
our
I'm
at
that?
That's
that's
a
process
of
structure!
That's
the
reason
why
enough
everything
works
in
raspberry
pi
that
works
on
a
normal
machine.
It's
basically
the
the
main
issue.
What
why
the
Raspberry
Pi
cannot
take
everything
normal
computer
care,
okay,.
A
D
B
D
Said
the
virtual
machine
actually
swallows
apricot
any
problem,
so
just
maybe
I
don't
even
know
what
what
I
use
I
think
I
used
Rufus
on
Windows,
so
it
maybe,
if
I,
just
use
the
default
image
rider
from
from
Linux
that
it
just
works.
But,
like
I
said
that
was
possible
because
the
station
here
just
dropped
out.
Okay,.
A
D
It's
not
probably
it's
not
perfectly
document
a
battle
plan
as
it's
the
first
beta
beta
version,
I
thought
it's
I
just
had
just
left
every
information,
I,
email
plus
one
or
two
extra
things
and
I
kept
the
rest
of
it
for
myself,
because
I
just
wanted
to
test
it
on
this
new
software
I
want
to
set
up
and
then
to
the
rate,
my
my
workflow
with
this
software.
So
we
don't
have
two
different
things:
standing
there
mm-hmm
that's
right,
yeah,.
A
Yeah,
okay,
so
everyone
pretty
much
everybody
you
got
to
download
it
cuz.
This
is
very
important
like
this.
Is
our
I
saw
official
Linux
distribution,
where
you
have
all
the
software
pre-loaded
so
that
all
the
work
benches
for
free
CAD,
like
the
3d
printer
software
Arduino
environment,
I,
mean
there's
cure.
Whatever
work
tools
were
using,
you
have
all
on
a
1:1
distribution
that
just
works.
A
It's
only
a
USB
thumb
drive
that
you
can
run
on
your
computer
to
nail
down
any
kind
of
software
variations
for
workflows,
because
that's
gonna
be
very
important
like
we
want
to
make
sure
that
once
we
get
into
the
flow
of
doing
things
efficiently
that
the
software
shoes
are
not
getting
in
our
way,
so
we
gotta
test
it.
So
everybody
page
to
download
so
download
download
the
highest.
So.
D
A
D
I'm,
sorry,
yeah,
yeah
I
sure
would
be
sure
so
you're,
probably
right,
but
it's
it's
inside
actually
the
most
interesting
part
of
it.
The
the
file
system
itself
has
an
md5
hash
some.
So
if
you
mount
the
eyes
or
you
can
actually
see
the
md5
sum
of
the
actual
of
the
of
the
actual
system,
if
that's
not
enough,
I'll
provide
you
one,
but
I
think
we'll
drive
is
pretty
pretty
crystal.
Is.
D
D
D
D
A
D
We're
at
some
some
and
a
good
point.
We
could
also
try
to
share
that
over
bit
for
how
do
I
understand
that
hey
I
didn't
get
that
quite
right,
but
I
could
host
it
by
a
BitTorrent.
It's
no
problem!
Actually
it
sounds
good
to
me
because
we
could
distribute
it
all
with
each
other.
That's
actually
pretty
nice.
A
D
E
D
Of
course,
when
you're
using
the
elasticy,
nothing
on
it,
the
safe,
that's
just
just
the
way
that
is,
but
it's
you
can
just
use
that
and
let's
say
to
save
the
rest.
You
you've
modified
in
the
cloud
and
we'll
adjust
everything
from
the
settings
and
everything
will
adjust
that
on
the
live
city.
So
you
don't
have
to
modify
anything
as
soon
as
we
are
over
this
version
right.
A
Which
is
which
is
still
consistent
with
our
workflow,
because
you
can
edit
the
wiki.
You
can
do
Google
Docs
you
can.
You
can
create
free,
CAD
files,
but
you
just
can't
save
them
on
your
desktop,
so
it
forces
you
to
upload
it
to
the
wiki.
So
that's
just
just
the
workflow,
which
you
should
be
happening
anyway.
D
A
Yeah
excellent,
so
we'll
talk
we'll
talk
again
tomorrow,
everybody,
let's
get
around
the
tractor
in
power,
cube
doing
that
show
up
tomorrow,
1:00
p.m.
you
can
make
it
and
we'll
talk
we'll
talk,
then
I
do
think.
We
should
also
host
a
design
sprint,
this
Saturday
to
get
everybody
cranking
on
the
tractor.
So
after
we
talk
tomorrow,
I
do
want
to
announce
a
a
tractor
design
sprint
starting
this
week,
so
we've
got
as
I
said
two
months,
two
full
months
at
this
point
for
a
design.
A
Whatever
we
have
designed
we're
building,
because
we
got
to
keep
prototyping
the
next
and
next
iterations
like
we
always
do.
We
can
get
a
lot
of
work
done
in
in
two
months
with
20
people
so
focus
on
getting
an
excellent
version
of
the
tractor
for
the
next
build.
So
with
that
said,
thanks
a
lot,
everyone
keep
going
we're
producing
some
good
product,
I
think
we're
against
some
of
our
team
building
and
processes
in
place.
So
I
think
things
are
coming
together
as
we
make
the
road
by
walking
here.