►
From YouTube: FreeCAD Exploded Part Animations - April 10, 2017
Description
Development team meeting focusing on Exploded Part Animation in FreeCAD. See dev team log for a copy of the working document from the video:
http://opensourceecology.org/wiki/D3D_Meeting_Log#Mon_Apr_10.2C_2017
http://opensourceecology.org/wiki/D3D
http://opensourceecology.org/wiki/D3D_Part_Library
http://opensourceecology.org/wiki/Exploded_Part_Animations
What you see here at Open Source Ecology is an ambitious program based on a volunteer effort. To help us reach the goals - please consider joining as an OSE Developer in 2017-
http://opensourceecology.org/wiki/OSE_Developers
Take a minute to subscribe to our email newsletter (updates, workshops, etc): http://bit.ly/1LtcM44
A
Recording
everybody
welcome.
Everybody.
I've
got
a
lot
of
fresh
blood
today.
This
is
good,
so
I'm
gonna
get
started.
If
anyone
misses
any
of
this
and
there's
some
people
that
can't
make
the
meeting
right
now,
you
can
hear
the
recording
this
is
being
recorded
with
volcko
screen,
open
source,
recording
software
and
posting
on
youtube.
As
soon
as
this
is
done.
Let
me
share
my
screen
and
go
right
into
the
meeting.
There's
a
lot
of
stuff
going
on
perspective,
yeah
a
little-little
perspective.
A
First,
the
workshop
is
coming
up
on
April
29
and
at
factory
farm
in
Missouri.
We've
got
three
people
already
signed
up,
not
bad
at
all
for
the
first
week
and
they
given,
given
that
the
first
week
is
typically
the
slowest
right
after
the
posting
kind
of
picks
up
the
week.
Second
and
third,
but
the
goal
is
twelve
people,
hopefully
as
many
as
24
we
can
handle
24
people
or
so
and
that's
going
well.
The
design
is
complete.
The
build
is
like
you
see
back
there,
that's
the
that's.
A
The
3d
printer
I'm
gonna
be
prototyping
the
other
versions,
which
are
the
twelve
and
eight
inch
versions.
So
I'll
be
posting
some
videos
on
that.
In
the
meantime,
let's
talk
about
the
team,
okay,
so
we're
recruiting
ose
developers.
You
can
go.
Let
me
let
me
share
my
screen
now
and
let's
go
to
the
meeting
so
sharing
the
screen
and
let
me
go
into
the
presentation.
So
I
got
the
presentation
so
as
far
as
the
team
we're
recruiting-
and
you
can
join
that
if
you
go
to
the
OSD
devs
page
here-
you
have
the
invitation.
A
All
of
you
have
become
Aussie
developers,
bypassing
the
OSD
free
cap
test.
Free
cat
is
the
main
tool
that
we
use
here
at
one
of
the
main
tools
for
development
and
documentation.
Now
welcome
to.
We
actually
had
a
flurry
of
five
new
people
join
the
team.
So
this
is
these:
are
the
team
stats
so
hopefully,
the
week
after
this?
As
you
see
here,
this
numbers
gonna
have
a
bump
little
continuous
increase.
A
We
started
essentially
in
February
with
a
team
of
one
or
two
we're
building
the
numbers,
and
this
is
always
see
developers
as
opposed
to
ad
hoc
development,
we're
getting
people
to
pass
the
actual
test
to
make
sure
that
they
have
a
basic
skill
set
and
commitment
to
work
in
a
project
in
an
effective
way.
So
right
here,
what
you
can
see
is
that's
the
number
of
people.
What
we're
tracking
is
the
number
of
active
developers
keyword
being
active,
so
why
is
there
a
drop
here?
Well,
person
didn't
drop
off
the
team.
A
A
person
may
have
not
done
a
work
that
that
week
or
may
have
not
logged
their
hours.
What
we
do
is
we
track
our
hours,
so
we
see
how
this
open-source
product
development
pipeline
works,
as
if
others
want
to
replicate
it
just
to
show
our
record,
because
if
we
can
measure
it,
we
can
improve
it.
We
can.
We
can
get
this
velocity
of
increasing
the
team
numbers
and
team
effort
we're
here.
A
Pardon
okay-
happen
to
my
mouse
there.
It
is
okay,
my
mouse
is
back
up:
okay,
we're
tracking
both
the
number
of
developers
in
blue
and
the
development
hours.
The
development
hours
are
shown
divided
by
ten.
The
weekly
requirement
for
the
Aussie
devs
is
ten
hours
per
week.
So
what
you
should
see
is
that
the
hours
number
divided
by
10
should
follow
roughly
the
number
of
developers,
so
each
developer
gets
one
unit,
one
unit
being
one
unit
should
be
put
in
every
week,
which
is
ten
hours
of
work.
A
So
that's
how
it
works
and
there's
a
for
the
new
people
on
a
team.
You're
gonna
get
a
welcome
email
which
describes
how
to
do
the
timesheet.
The
timesheet
is
on
the
wiki.
Everything
is
on
the
wiki,
but
the
timesheet
is
on
the
wiki
that
timesheet
the
page
called
timesheet,
where
you
simply
fill
that
out.
Just
one
note
on
it,
the
filling
I
know
Hosea
did
this,
but
the
filling
is
worked
for
that
week.
It's
not
cumulative,
so
you
basically
say:
what's
your
name,
what's
you
what
you
worked
on
and
how
many
hours
you
develop?
A
You
worked
on
a
development
team.
It's
this
week:
it's
not
cute
overall!
It's
for
that
week.
Just
make
sure
you
do
that
and
then
break
down
the
tasks
for
the
working
hours.
Okay.
So
let's
get
to
the
write
to
the
topic
of
today.
So
so,
as
far
as
what
we're
doing
on
a
3d
printer,
you
might
have
seen
the
advertisement
on
the.
If
you
haven't
go
to
open
building
Institute
org,
the
video
for
the
3d
printer
workshop
is
there
under
upcoming
workshops.
A
Now,
what's
the
current
status,
the
current
status
is
producing
documentation
for
the
build
now.
One
thing
that
facilitates
that
documentation
has
exploded,
part
diagrams
and
that's
the
main
theme
of
today
so
exploded
part
animations.
It's
a
feature
that's
found
within
free,
CAD
and
accessible
very
easily.
What
I
did
is
a
quick
sample
here
and
free
CAD,
where
you
download
the
oh
yes,
so
let
me
share
the
the
presentation.
The
presentation
is
on
addy
3d.
A
So
check
that
out
the
presentation
that
I'm
looking
at
please
you
can
follow
that
the
notes
for
this
meeting.
You
can
see
the
background
on
the
exploded
parts.
Animation
workbench,
you
download,
that
put
it
in
the
instructions
are
here,
explode
parts
animation
introduction.
Basically
it
allows
you
to
put
the
explode
part
animations.
The
good
thing
about
that
is,
while
I
have
built
the
the
3d
printer
here
and
I
can
take
real
video
instructionals.
A
Other
people
can't
if
they
do
not
have
the
machine,
but
you
can
do
quite
close
with
exploded,
part
animations.
They
allow
you
to
produce
high
quality
assembly
instructionals
using
a
distributed
team.
If
you
have
the
CAD
file.
So
where
do
you
find
the
CAD
file?
Well,
the
first
thing
is:
if
you
look
on
top
on
that
page,
we
can
feel
free
to
go
there
and
you
can
see
the
sizzle
reel
for
meaning
just
exciting.
Indie
3d
well
not
be
3d,
but
other
animations
of
exploded
parts.
A
So
you
can
go
to
the
D
3d
part
library
or
d
3d
integration
page,
which
is
which
has
the
files
that
we
currently
have
in
free
cat.
You
can
start
downloading
them
if
you
go
to
d
3d
integration
just
to
get
you
oriented
when
I
click
on
that
you
see
this
exploded.
Well,
there's
this
kind
of
a
diagram
here.
What
you
want
is
one
is
the
overall
assembly
file
which
is
up
up
in
the
corner.
A
That's
where
you
get
the
files
so
download
the
software
added
to
your
free
CAD
by
the
instructions
that
are
shown
here.
The
procedure
for
downloading
the
and
the
exploded
parts
animation
workbench
is
here,
so
we
can
take
a
look
at
that
and
it's
good.
This
is
pretty
cool.
Actually,
it's
very
easy
to
use
and
just
to
demonstrate
very
quickly.
I
have
the
installed
the
Explorer
part
animation.
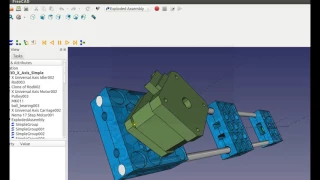
You
select
it
so
expect
exploded
assembly.
Then
you
can
play
it.
A
A
So
that's
that's
pretty
nice
nice
videos
can
be
captured.
You
can
see
that
in
3d
and
therefore
you
can
make
videos
of
how
things
come
together,
and
this
is
just
a
demo,
but
the
idea
is-
and
it
actually
cried
at
least
I
have
freak
at
version
0.16,
it
crashes
all
the
time,
but
it's
very
the
instructions
for
that
are
very
simple.
You.
A
You
click
a
face,
for
example,
that
one
we're
along
which
you
want
to
move
and
just
click
this
blue
button
here
and
it
moves
it
see
it
moves
it
towards
that
direction
of
any
face.
So,
whichever
way
that
face
is
pointing
you
will
see
that
happen,
that
motion
happens,
so
it
just
crashed
on
me.
So
maybe
it
got
better
in
version
point
one:
seven,
but
I'm
just
saving
constantly,
because
at
least
there's
something
some
artifact
where
it
crashes
all
the
time.
So,
okay.
So
how
do
we
do
the
procedures
for
the
the
3d
printer?
A
A
We
divide
the
modules,
you
take
your
module,
you
explode
the
object
as
needed.
You
can
also
vary
the
speed
extent,
an
order
of
the
explosion,
but
that
that
you'd
have
to
learn
I
didn't
we
want
to
put
together
a
nice
instructional
that
shows
how
to
do
that.
You
can
watch
some
of
the
instructions
length
this
presentation,
but
and
then
the
bolts,
rotate
and
stuff
like
that,
so
it
looks
nice.
So
the
second
step
is
a
recorded
voice.
Over
of
the
step
by
step
procedure.
A
Now
the
critical
part
there
is
the
step
by
step
procedure.
Now
that
has
to
be
accurate
and
and
well
proven,
those
are
actually
not
written
and
that's
our
next
step.
So
as
soon
as
this,
this
meeting
is
over
I'm
gonna
work
on
doing
those
and
other
people
can
also
do
those,
but
those
need
to
be
pretty
exact.
So
we
know
we
have
some
instructionals
already
that
have
been
started.
A
You
can
go
out
on
the
d3d
log
page
d3d
log
is
just
exactly
that:
d3d
log,
if
you
look
at
the
title
d3d
log,
but
that
has
our
past
meetings
links
to
the
all
the
video
recordings.
Unfortunately,
we
missed
the
last
week's,
so
you
have
different
videos
of
the
previous
week's
meetings
we
missed
the
last
week.
They
didn't
record
the
voice
right
now.
I
do
have
the
voice
recording.
A
Let's
close
this
so
so
step
by
step
procedure
is
the
next
step
which
we
want
to
work
on
and
then
voice.
So
I'd
like
you
all
to
to
get
on
this
task
and
and
get
some
voice
training
or
go
at
it
and
put
a
length
of
voice
training.
If
you
want
to
learn
things
about
voice
because
voice
is
important
about
a
hundred
thousand
years
ago,
people
have
gained
a
voice
about
5000
years
ago,
we
learned
to
write
in
the
1990s.
A
Wiki's
came
into
existence
which
allowed
people
to
collaborate
and
recorded
knowledge,
and
then
the
2000s
Google
Docs
appeared
or
cloud
collaborative
documents
appeared.
So
we
can
now
work
on
these
collaborative
documents
that
we
can.
We
can.
We
can
work
together
and
the
latest
and
human
evolution
is
the
possibility
to
make
collaborative
video
edits.
So
this
is
this
is
what's
here,
so
voice
voice
is
very
important.
My
point
communication
is
very
important.
A
We
take
that
very
seriously
at
open
source
ecology
because
you
can
have
all
the
great
work,
but
if
no
one
finds
out
about
it
or
if
you
can't
teach
people
quickly,
then
it's
no
good,
and
so
the
idea
is
the
voiceover
and
the
instructional
should
be
rapid,
quickfire
no
dead
space.
Like
you
see
my
free
CAD
101
video,
which
I
humbly
claim
is
the
best
freaking
video
in
the
world.
A
But
the
idea
there
was
zero
dead
time.
Every
millisecond
is
precious
because
because
if
a
million
people
are
gonna,
gonna
watch
that
video,
even
if
you
have
one
second
of
that
space-
that's
hours
of
time
wasted
in
people's
lives.
So
that's
the
idea,
so
you
have
to
describe
every
step
be
rapid.
The
tight
edit
is
what
we
want,
so
you
know
kdenlive
a
little
bit.
You
can
get
better
at
it,
but
here
there's
the
the
freak.
Add
that
exploded
part
of
the
diagram
workbench
you
can
use
kdenlive
to
edit
the
video.
A
15
second
chunk
should
take
you
like
an
hour
to
do
15
seconds
of
actual
real
edit,
like
real
high
quality.
That
should
be
something
that
would
take
an
hour,
so
the
assignment
for
this
week
would
be
to
to
do
that
by
starting
with
the
with
priority
modules
and
breaking
it
down
to
people
for
people
to
do
them,
and
then,
when
you
do
this
further
break
your
module
into
15
seconds
sections.
A
A
To
build
as
a
team
in
order
in
order
for
everyone
to
finish
what
happens
is
that
as
soon
as
any
person
is
done,
they
help
the
people
that
are
slower,
so
it
will
have
as
video
video
monitors
or
monitors
in
a
workshop,
and
then
it
will
loop
constantly
through
a
sequence
that
will
take
about
15
minutes
to
build,
but
the
video
that
you
actually
use
to
get
that
15
minutes
of
build
time
will
be
about
15
seconds.
So
it's
about
a
second
2
minute
expansion
from
the
video
to
the
actual
build
process.
A
What
we
found
in
the
last
word,
this
is
what
we
found
in
the
last
workshop,
that
a
lot
of
people
would
lag
behind
and
they
would
never
catch
up
and
then
we'd
have
to
go
back
to
them
and
do
like
all
these
different
steps
at
the
same
time,
instead
of
everybody
helping
each
other.
So
we're
learning
that
if
we
can
help
everybody
go
at
the
same
speed,
we
can
do
a
faster
build
in
the
extreme
manufacturing
process.
So
the
point
is
the
last
person
that
is
done.
A
They
should
have
the
entire
team
helping
them
finish,
which
means
that
the
more
the
last
people
that
get
left
behind
they
get
swarmed
on
by
the
rest
of
the
team
and
then
it
gets
finished
really
fast.
So
that's
the
way
we're
designing
this
workshop
to
operate,
so
we
can
have
incredible,
build
fun
and
velocity
at
the
same
time.
So
that's
a
little
bit
about
that,
so
so,
outside
of
that
that's
kind
of
all
I
have
on
what
we
have
to
do.
A
So
what
we
have
to
do
is
pretty
much
spread
the
work
between
different
people
and
then
divide
the
modules
up,
download
the
modules
and
coordinate
that
carefully
after
we
find
out
a
little
bit
of
update
on
what's
what's
happening
from
last
week.
So
from
last
week,
what
we've
been
doing
as
we've
done
pretty
much
the
the
16-inch
version
of
the
3d
printer,
but
CAD
was
complete.
A
Last
week
we
were
working
on
a
12
inch
version
because
we're
using
nested
frames
like
if
you
look
at
our
designs
on
the
d
3d
wiki
page
we've
got
nested
frames
like
the
3d
printer.
You
see
back
here,
there's
cutouts
from
the
insides
of
that
that
makes
smaller
3d
printers.
So
what
we're
doing
right
now
is
16,
12
and
8.
A
In
fact,
I
just
got
just
now:
I
got
new
metal
but
I'm,
exploring
16,
13,
10
and
8,
so
actually
getting
four
sets
out
of
one
set
of
cutting
of
metal,
but
we
were
working
on
a
12
and
8
inch
version.
The
8
inch
version
we're
calling
the
d
3d
mini.
It
would
have
a
5
by
5
inch
print
surface.
So,
let's,
let's
get
a
little
update
on
where
that
stands,
so
so
Jose
I
know,
we've
been
working
on
a
12
inch
version.
Maybe
you
can
fill
us
in
where
we
are.
A
We
don't
have
a
manual
on
a
team
here,
he's
doing
that
the
8
inch
version
and
that
we
got
to
finish
up
because
I'm
gonna
be
prototyping
that,
like
tomorrow
this
week,
so
that
we
can
get
more
videos
showing
how
we
build
these
things.
All
together.
Jose
fill
us
in
on
where
you're
at
just
quickly
can
you
speak.
B
B
B
A
B
A
A
A
B
B
A
Yeah,
that's
no
altogether!
The
idea
is
pretty
good,
so
just
to
check
in
on
us.
So
with
this
like
say,
this
works.
How
much
of
the
frame
do
you
still
need
to
need
to
do,
because
we
pretty
much
want
to
finish
up
the
12-inch
version
and
see
if
we
can
get
you
also
going
on
the
exploded,
part
animation
instructionals?
How
much
do
you
have
to
do
on
the
12
inch
frame
version
for
the
overall
design.
B
A
A
If
you
do
what
you
just
showed
there,
that
means
you
would
need
to
add
another
type
of
screw
to
this
assembly,
a
longer
m3
screw,
which
would
increase
our
part
count
by
one
and
we're
being
very
vigilant
about
how
many
parts
we're
using.
Currently,
we
only
have
three
screws
total
on
the
assembly
to
make
this
whole
thing
work.
So
we
don't
want
to
add
more
because
then
we
go
nuts.
A
B
B
B
B
A
So
we
do
have
a
page
on
the
wiki
called
so
I
I
started
this
recently
and
it's
called
d3d
part
library,
and
we
want
to
put
all
seekers
yeah.
Now
we
get
more
people,
we
want
to
organize
everything
better.
The
best
we
have
so
far
is
that
d3d
integration
page,
but
here's
the
part
library
so
on
this
page
come
it's
not
moving
up
there.
It
is
so
basically
we've
got
this
page
and
you
can
download
and
click
on
all
the
different
parts
that
we're
using.
So
we
want
to
basically
put
up.
A
This
is
basically
a
gallery
of
parts.
I
was
just
putting
up
the
frame
here,
but
what
we
want
to
do
is
have
this
as
the
approved
source
of
all
the
good
files.
So
you
guys
can
post
all
the
ones
like
yeah,
for
example
the
extruder
mount
that
should
be
a
part
here
and
so
forth.
So
we
want
to
put
that
on
here.
All
I
can
tell
you
is
that
where
that
file
is
is
going
to
be,
who
did
it
and
who
did?
It
was
a
manual,
so
you
go
to
a
manual
log.
A
I'll
put
paste
that
link
for
everybody.
There
he's
got
a
lot
of
the
different
files
there.
So
that's
what
we
want
to
do,
but
yet
so
the
the
page
called
d3d
part
library,
that's
in
progress,
but
that's
critical
to
here,
because
the
workflow
is
and
I'm
gonna
go
back
to
the
document
here.
So
so
a
little
bit
more
about
the
steps
so
I'm
gonna
just
talk
talk
about
that.
A
little
more
fine
fine-tuned,
instructionals
here
so
so
put
part
two
so
download
so
for
each
module.
The
ideas
for
the
export
part
animations
for
each
module.
A
You
would
okay,
so
Jose
I
think
we're
we're
done
on
the
12-inch
version
that
you
can
make
those
upgrades
just
to
wrap
that
up.
Okay,
so
so
so
moving
on
for
every
module-
and
this
is
this-
is
talking
about
the
16-inch
d3d
distributive
enterprise
3d
printer-
for
every
module
download,
the
the
correct
part.
A
And
then
so,
you
can
be
working
at
different
levels
like
if
you're,
putting
together
an
assembly
for
just
say
the
carriage
piece
versus
like
the
entire
axis,
there's
different
many
different
parts.
So,
depending
on
what
you're
working
on
you,
you
select,
the
appropriate
file
from
the
library
and
the
the
library
needs
to
get
updated,
because
right
now.
A
A
A
A
So
I
think
what
we
can
do
best
right
now
is:
let's
see,
allocate
the
different
different
activities
to
people.
But
let's
check
in
on
some
kind
of
jumping
around
here
a
little
bit
but
I
guess
Jean
Baptiste.
Do
you
have
any
any
report
from
the
latest?
You
did
on
the
documentation
any
any
more
work
that
you've
done.
Err.
C
A
Yeah
all
right,
yeah,
that's
pretty
good,
so
that's
the
kind
of
stuff
we
want
to
be
doing
now.
So
we
have
exploded.
Part
diagrams
like
this,
but
these
are
not
animated
so
that
the
goal
of
the
animation
is
to
go
a
step
beyond
that
and
make
it
like
a
video
that
we
can
actually
play.
So
so,
whoever
does
these
videos
we're
gonna
play
them
during
the
workshop
as
real
instructional.
So
this
is
serious
work.
This
is
not
anything
trivial.
A
This
is
a
lot
of
people
will
be
looking
at
these
and
if
we
put
them
into
kdenlive,
then
we
can
continuously
actually
edit
those
files
or
update
those
files,
because
we'll
have
all
the
source
code
we'll
have
the
free,
CAD
files
will
have
the
instructionals.
The
text
like
whether
it's
instructionals
like
this
or
whether
it's
the
actual
plain
script,
a
very
tight
set
one
sentence
after
another,
but
yeah
totally
editable
for
future
versions,
and
that's
pretty
good.
A
C
C
A
That's
correct
the
carriage
slider
should
use
should
have
so.
Let
me
let
me
zoom
in
on
that
and
actually
explain
this
to
people,
so
this
is
actually
the
best
working
document
here.
So
if
I
zoom
in
a
little
bit
on
this,
this
is
the
carriage.
This
is
the
place
where
the
motor.
This
is
sorry.
This
is
the
one
where
the
motor
attaches,
and
this
is
where
the
idler
attaches
so
on
the
carriage
one.
A
The
magnets
are
there
like
in
the
corners
1,
2,
3,
4
and
then
in
the
two
middle
ones:
5
6
on
the
end,
once
they're
on
the
edge
ones
and
the
middle
ones,
because
the
the
closest
then
one
won't
actually
be
on
the
middle
and
this
one.
These
four
are
on
because
those
will
be
the
ones
that
over
the
middle,
this
one
is
actually
would
not
be
over
the
current
metal
frame
since
the
metal
frame
ends
at
about
1
&,
a
half
inches
like
about
there.
A
So
that's
the
pattern,
but
the
idea
is
now
to
take
the
axis
and
then
start
working
on
it,
and
so
first
you
want
to
attach
the
mat.
Well,
you
actually
don't
attach
the
magnets
first.
Let
me
go
through
the
general
procedure.
What
you
do
is
you
take
each
of
the
printed
pieces
you
put
in
the
bolts
you
screw
them
in
together.
A
A
It
takes
both
thinking
and
then
just
looking
at
these
diagrams,
so
these
four
linear
bearings
go
inside
the
carriage
slide
after
you
have
the
bearings
in
and
the
bolts
in
then
you
put
in
the
rods
once
you
have
the
rods,
then
you
assemble
the
motor
piece.
You
clamp
that
together
and
put
that
onto
the
rods
and
put
and
then
put
the
idler
piece,
clamp
it
together
and
then
put
it
on
the
rods,
and
that
way
you
have
the
you're.
A
A
A
Okay
yeah,
so
after
you
put
this
sandwich
on
you,
first
put
in
that
the
pulley
onto
the
motor
you
put
the
motor
onto
this
motor
carriage
piece
and
then,
after
you
have
the
motor
on.
You
want
to
make
sure
on
the
other
side,
as
you
assemble
the
idler
piece
you
put
that
idler
inside,
so
that
the
belt
can
get
on
it.
So
after
you've
got
the
the
drive
system
there,
then
you
insert
the
belt
now
the
belt
is
a
linear
belt
and
then
the
belt
is
actually
pinched
inside
the
tooth
groove
on
the
carriage.
A
So
if
you
look
at
the
detail
on
the
carriage,
it
actually
has
teeth
on
this
part,
so
the
belt
goes
in
there,
one
side
through
the
other,
and
then
the
other
belt
goes
in
from
the
other
side
and
so
forth,
and
you
have
these
two
pegs.
So
what's
missing
there.
Also
for
you,
jean-baptiste
is
the
the
pegs
which
are
after
the
belts
go
in
there.
They
punch
in
and
you
can
see
that
on
our
Facebook
page
I
showed
a
detail
of
that,
but
it's
actually
quite
tricky.
A
The
procedure
for
for
putting
in
the
pegs
there's
nothing
hard
about
it.
It's
actually
very
elegant,
but
it
has
to
be
done
in
the
right
order.
I
need
to
ride
that
out
carefully
because
you
can
logic
it
out,
but
it's
a
little
trickery.
So
so
that's
that
so
for
now
what
I
would
suggest
then,
just
so
people
get
started
with
assembly
animations.
So
that's,
basically
how
one
of
these
frames
go
once
you
got
the
frames
and
magnets,
so
the
magnets
go
on
you
goo.
They
actually
go
down
with
Krazy
Glue.
A
They
don't
come
off,
so
he
put
in
two
magnets
and
you
have
to
hold
the
magnets
down
for
like
30
seconds,
because
they're
gonna
jump
out
like,
for
example,
this
magnet
and
that
magnet,
if
you
just
leave
them
alone,
they're
probably
jumped
to
on
each
other
there
they're,
so
strong,
so
you
have
to
hold
them
down.
Is
the
idea.
So,
once
you
put
down
all
the
magnets,
you
have
to
hold
them
and
so
forth.
A
But
then
that's
pretty
much
it
for
one
of
those
frames
and
then
once
you
have
the
frames,
you
have
the
sorry
of
the
frames,
the
axes.
Once
you
have
the
axes,
then
you
put
them
onto
the
frames
by
magnetic
attachment
and
then
you
screw
them
together.
So
what
I
would
suggest
for
now
is
that
each
of
us
get
a
little
piece
of
this
action
here.
So
whoever
is
on
the
on
the
show
here
we
should
say:
okay,
let's
do
a
tiny
piece
for
everybody.
A
A
That
means
you're
attaching
the
motor
motor
to
it.
Second,
one
is
the
carriage
side
to
which
the
to
which
the
extruder
is
attached.
Then
you
have
the
idler
side.
So
each
of
these
could
get
an
exploded,
part
animation,
and
we
should
start
with
that.
We
should
perfect
these
get
people
practicing
and
once
we've
got
those
going,
we
can
import
them.
A
At
the
same
time
like
you
can,
in
other
words,
you
can
build
in
animations
at
the
primitive
level
like
the
axis
motor
side
and
then,
if
you
insert
it
into
the
x-axis
once
you're,
building
the
x-axis
from
individual
parts,
because
the
workflow
is
typically
to
make
an
assembly
you
just
you
just
import
individual
parts,
so
those
parts
should
have
the
animations
imported
along
with
the
part.
That
would
be
great.
So
let's
do
that.
Another
piece
is
the
extruder.
A
Another
piece
is
the
extruder:
is
there
so
it's
already,
but
that's
a
pretty
primitive
piece.
There's
the
end
stops
right
here.
There's
the
frame
cable
chain
wiring
so
now,
cable,
chain
and
wiring
are
kind
of
complicated
because
they
got
so
many
pieces.
That's
maybe
for
advanced
people,
but
for
these
we
can
definitely
divide
and
conquer
on
this.
So,
okay,
who
wants
to
take
these
speak
up
then,
so
we
we
want
to
divide
it
as
finely
as
possible
for
everyone
who's
on
the
team
here,
so
who's
who's
gonna
do.
A
Maybe
you
can
sign
up
for
that,
but
I
sign
up
for
one
of
the
freakout
animations,
because
that
you
want
to
give
that
practice
if
you
haven't
practiced
it,
but
idea
on
the
universal
controller
is
that
we
want
to
make
a
scalable
analog
of
the
ramps
with
the
ramps
board
but
make
it
such
that
can
drive
any
size
of
a
stepper
motor.
So
trance
is
gonna
work
on
that
and
we
can
talk.
We
can
talk
about
that
Chad's
a
little
later.
A
It's
not
so
important
for
now,
because
we
can
take
the
discussion
offline,
just
the
point
being
that
for
the
CNC
torch
table
and
the
larger
speedy
printers
that
we're
going
to
be
building
we're
gonna
need
the
universal
controller
which
can
handle
more
power
and
bigger
size
machines.
So
that's
the
idea
there,
but
outside
of
that
out
to
that
aside,
Chaz
you
want
to
take
on
one
one
of
these
pieces.
So
you
learned
this
part
because
that's
gonna
be
critical
for
access
outside.
Okay
they'll
be
great!
So
try
that
who
wants
to
do
the
idler
side!
A
A
You
guys,
by
the
way,
can
edit,
let's
see
the
sharing
documents
on
this
dock.
Here
you
can
find
and
view
it.
I'm
gonna
make
it
so
you
can
find
an
edit,
so
you
can
actually
put
your
name
on
on
this.
It's
a
freely
open,
editable
dock
and
it's
actually
okay
to
make
these
completely
open.
In
fact,
whenever
you
share
docks,
they
should
be
completely
open,
because
if,
if
someone
say
once
the
only
concern
is
someone
wants
to
trash
it
because
it's
open
anyone
on
the
internet
can
see
it
well,
it
doesn't
matter
because
file.
A
You
have
see
revision
history.
You
can
actually
look
at
the
revision.
History.
I
will
pull
up
all
the
previous
versions
of
someone
hacks
this
you
can
actually
restore
it
to
any
former
version.
So
you
have
to
worry
about
people
hacking,
your
documents,
so
that's
the
idea.
Well,
you
guys
can
now
actually
edit
this
document,
so
you
can
feel
free
to
put
your
names
by
whichever
one
but
I'm,
not
getting
any
volunteers.
Who
wants
to
do
that?
Let's
see
so
Jose
you
want
to
do
anything.
Are
you
gonna
be
busy
on
a
twelve-inch?
You
think
I.
A
That's
the
document
right
there
prioritize
the
twelve-inch
revision,
okay,
okay,
so
prioritize
the
12-inch
version.
Okay,
so
I
think
I'm
gonna
start
allocating
here
so
idlers
side.
How
about
Roberto?
Can
you
take
that
perhaps
extruders?
So
we
know
that
Cedric
is
working
on
that
he
couldn't
make
the
meeting
today,
but
we're
gonna
allocate
the
extruder
to
Cedric.
Now
this
is
just
the
pretty
primitive
parts.
Now
that
the
x-axis
means
the
entire
x-axis,
meaning
the
axis
carriage
idler
in
other
parts.
So
that's
getting
a
little
more
advanced
there.
Who
wants
to
do
that?
A
Let's
see
I'm
gonna
pick
some
names
here,
so
Abe
Abe
are
you
gonna
be
able
to
do
it?
Do
some
some
of
this
I'm
gonna
put
you
down
for
the
x-axis
and
y-axis
and
z-axis.
Those
are
all
slightly
different.
I
mean
the
y
axis.
The
two
y
axes
are
the
same,
but
all
together,
they've
got
a
few
little
details
that
are
different,
so
there's
Abe
and
then
lash
lo,
you
think
you
could
do
that.
A
A
The
manual
do
that
one
heated
bed,
I'm
gonna,
see
if
Brian
I
know
Brian
was
out
for
an
injury
sometime,
let's
see
if
Brian
is
available
and
then
and
stops
and
other
people,
let's
see
so
that's
about
see
actually
Emanuel
like
as
far
as
the
wiring
and
cable
chain.
It
would
be
nice
if
we
can
get
the
cable
chain
constraints
such
that
if
you
move
one
end
of
the
cable
chain,
the
whole
thing
stretches
out
without
having
to
move
the
individual
parts.
A
The
cable
chain
is
a
hole
connected
chain,
so
we
want
to
that's
a
little
more
advanced
in
terms
of
free
can,
but
we
can
design
it
such
that
you
constrain
it
with
the
circular
constraints
that
if
you
pull
on
one
one
link,
it
will
actually
stretch
out
the
whole
chain
so
actually,
next
week,
we'll
continue
on
the
explode
apart.
Animations
and
I'm
gonna
see
if
we
can
add
the
other
workbenches
to
free
CAD,
which
are
things
like
there's
an
animation,
workbench
and
there's
also
fabrication
drawings,
technical
drawings
creations.
A
So
we
probably
what
we
want
to
do
for
next
week
instead
of
getting
into
the
animation
we
might
want
to
get
into
the
technical
drawings
section,
because
it
was
also
be
very
useful
to
produce
part
drawings
with
all
the
dimensions,
labeled
and
everything
else,
and
that's
you
can
do
that
in
a
professional
way
within
free
CAD
and
you
can
import
your
own
title
block.
So
I
think
that's
probably
what
we
want
to
learn
next
week
unless
people
have
other
suggestions
for
the
learning
perm,
because
the
idea
here
is,
we
teach
each
other.
A
We
learn
every
week
something
new
on
this,
but
okay.
As
far
as
the
people
concerned,
we've
got
six
of
these
allocated
and
we're
gonna
try
to
allocate
a
couple
more
of
these
to
the
other
people
on
a
team
if
we
can
but
yeah.
This
is
good.
That's
I
mean
that's
good
for
now
we're
actively
recruiting
so
tell
your
friends
about
this,
and
hopefully
we
get
more
people
joining
the
team,
but
other
than
that.
Let's
see
what
are
the
questions?
Maybe
we
can
open
it
up
to
discussion
and
questions.
B
A
So
we
need
to
work
on
a
part
library
and
making
sure
all
the
primitive
parts
are
available.
So
what
I'd
like
you
to
do
is
if
you
can
just
email
me
a
list,
a
specific
list
of
outstanding
parts
or
set
up
placeholders
within
the
library
you
can
create
one
of
these
placeholders
like
here,
it's
a
placeholder
for
the
frame
the
frame
hasn't
been
uploaded
here.
Sorry,
let
me
share
my
screen
again.
A
A
Okay,
I'm
sharing
my
screen
again
Hosea.
If
you
go
to
the
d3d
part
library,
the
best
thing
to
do
would
be
to
seed
those
placeholders
for
the
specific
missing
parts,
because
here
we
want
to
get
down
to
each
an
individual
part
file.
So,
for
example,
I
want
to
make
one
entry
for
the
metal
like
bolts
rods,
so
have
one
file
that
you
can
pull
down
all
the
bolts
and
rods
and
other
metal
pieces.
So
Hosea.
A
If
you
want
to
seed
that
as
individual
files
and
define
exactly
what's
needed
in
those
files
that
would
help
it
would
help
it'll
be
the
best
if
you
just
went
to
the
d3
deep
art
library
page
on
the
wiki
and
start,
if
you
click
Edit
you'll
see
the
syntax
for
the
gallery.
It's
just
basically
the
syntax.
There
is
you'll
see
if
you
figure
it
out,
it's
a
gallery
Tagg
and
then
you
have
the
different
entries.
The
entries
should
be
separated
like
that.
That's
that's.
A
Like
one
entry,
we've
got
like
one
two,
three,
four
five
entries
so
far.
You
can
see
them
see
that
what
the
syntax
is
like
for
the
wiki
markup.
So
you
can
actually
add
your
own
here.
We've
got
five
things
right
now,
so
yeah.
If
you
could
do
that.
Does
that
address
that
issue,
because
we
got
to
pull
those
parts
up
and
make
sure
everyone's
working
with
the
right
right
right.
B
B
A
We
want
to
establish
a
best
practices
guide
for
how
each
of
these
files
are
structured.
So
we
want
to
start
that
and
do
that.
You
can
start
that
we
haven't
really
published
that
yet,
but
we
want
to
do
that.
Definitely,
standards
and
practices
and
I
want
to
show
you
what
I
mean
by
this.
Just
by
going
into
this
one
sample
file
like,
for
example,
when
we
create
the
library
what
we're
promising
to
the
world
is
a
construction
set.
So
what
that
means?
A
A
So
that's
you
can
get
to
the
underlying
sketches
when
you
change
the
sketch,
like,
for
example,
I
added
another
magnet
hall
to
this,
and
when
I
changed
the
sketch,
the
actual
extruded
part
appeared
properly.
It
showed
the
new
Hall
already
because,
though
the
extrusion
part
was
already
done
on
that
sketch
and
if
the
sketch
is
updated,
whatever
was
operated
upon,
that
sketch
also
got
updated.
So
that's
that's
kind
of
what
we
mean
by
the
Construction
Set,
yes,
but
but
best
practices
and
and
specifics
on
that
are
definitely
valuable.
A
A
Well,
for
example,
like
whoever's
got
the
access
piece
you
can
put
together
that
access
piece
by
making
a
sandwich
out
of
that,
putting
the
bolts
in
there
that
you
can
do
already
and
putting
in
the
nuts
in
there.
So
you
have
to
go
to
the
download
the
available
files.
As
we
said,
we
have
at
the
d30
part
library
and
d3d
integration,
so
between
those
two
you
can
start
getting
oriented
as
far
as
where
all
the
parts
are
and
they
are
going
to
be
put
into
here.
A
A
So
it's
at
this
level
here
for
the
part
library
you
want
to
have
a
file
for
a
separate
file
for
every
component,
and
now
that's
not
too
bad,
because
the
entire
d3d,
as
I
mentioned
it's
only
40
unique
parts
which
is
a
great
low
number.
It's
not
hundreds
of
different
parts.
It's
40
unique
parts
altogether.
So
that's
it
so
I
think
that's
about
it.
For
for
what
I
have
to
say
today,
people
who
are
joining
you'll
get
a
welcome
email.
A
First
of
all,
welcome
to
the
team.
My
new
open
sorcerer's
as
far
as
the
weekly
timesheet
goes
make
sure
you
fill
that
out
every
week,
keep
track
of
your
work,
because
this
is
really
valuable
for
learning
for
the
project.
As
far
as
how
this
open
source
product
development
method
can
be
replicated
by
others,
so
we're
developing
something
novel
here
in
terms
of
the
volunteer
development
efforts.
A
Well,
that's
about
it
for
me,
if
you
guys
got
any
questions.
Otherwise
what
I'll
do
is
I
want
to
follow
up
on
this
meeting
and
once
all
the
different
parts
are
up
here.
I'll
email,
you,
but
what
I'll
be
doing,
is
working
on
that
right
now,
so
that
we
make
sure
we
have
all
the
individual
parts
that
make
up
all
the
exploded
part
animations,
but
in
the
meantime
you
can
start
playing
just
download
explore
part
animations
workbench
start
playing
with
it,
and
you
can
see
the
sample
file
within
a
document.
A
You
can
open
up
my
sample
document
right
here.
Let's
see
where
is
that
sample
document,
here's
the
sample
file
on
page
5
I
actually
uploaded
a
new
version
of
the
axis
with
some
of
the
explosions.
But
it's
it's
relatively
straightforward
to
learn
and
once
you
once,
you
learn
the
basics,
go
right
into
the
work
and
check
off
as
soon
as
you
start,
you
got
to
start
your
work.
Log
I
think
most
of
you
have
done
that
make
sure
whatever
you
do.
A
It's
if
I
can
look
at
your
work.
Log
I
see
nothing
is
happening.
There
then
I'm
gonna
say
hey
what's
happening.
Are
you?
Are
you
getting
started?
Alright?
So
it's
a
good
feedback
to
have
that
transparent
reporting,
as
far
as
where,
where
you're
out
are
in
progress,
but
as
soon
as
you
have
something
publish
it
to
your
log
and
also
one
of
the
things
you
want
to
do
is
sign
up
for
on
the
it's
called
the
Aussie
social
network.
But
it's
a
developer's
network
and
it's
the
we
have
the
3d
printer
group
on
there.
A
You'll
get
a
welcome
email
with
all
these
details,
I'm
just
giving
you
a
preview,
but
the
network,
its
network,
not
open
source,
ecology,
org,
and
if
you
go
to
the
3d
printer
group,
so
please
set
up
an
account
there
and
post
your
comments
or
reports
there.
So
so
in
a
3d
printer
development
group.
As
you
see
here,
we've
got.
You
know,
posting
various
different
things,
various
updates
and
questions
and
comments.
So
that
should
be
our
discussion
thread
for
the
the
working
team
and
also
feel
free
to
use
the
OSC
workshops.
A
Facebook
group,
because
that's
that's,
got
a
huge
audience
as
far
as
the
Aussie
social
network.
There's
hardly
anybody
on
it.
Yet
we're
just
starting
that,
but
you
can
feel
free
to
to
get
an
account
there
and
start
posting
on
the
3d
printer
development
group.
That's
an
open
access
group.
Anyone
can
join
that
so
feel
free
to
join
that,
especially
since
you're
a
developer,
and
you
can
post
your
comments
and
questions
there.
A
So
with
that
said,
I
think
we're
pretty
good
to
go.
It's
exciting
to
learn
the
D
3d
assembly.
Animations,
that's
gonna,
make
things
you
know
just
basically
adding
the
skill
set
upon
our
repository
of
free
CAD
knowledge,
so
that
eventually
we
can
produce
a
very
high
quality,
free,
CAD
education
course
for
people.
So
people
can
just
learn
faster
because
it's
really
painful
right
now
to
learn
from
all
the
freakout
videos
out
there,
because
there's
there's
a
lot
of
confusion
out
there.
A
A
If
that
happens,
then,
like
say
I'm
reviewing
that
I
can't
handle
all
of
it
and
money,
it's
better.
If
you
just
keep
posting
little
bits
up
one
at
a
time,
so
that
the
progress
and
discussion
is
continuous.
It's
not
like
all
of
a
sudden.
You
dump
this
lump
of
work
on
my
lap
or
on
whoever's
reviewing
it
or
whoever
is
the
collaborator.
A
Think
of
it
as
a
constant,
ongoing
discussion
back
and
forth,
where
we're
shooting
comments
and
emails
discussions
back
and
forth,
because
there's
a
lot
of
complexity
to
this
process.
You
can't
just
answer
it
all
at
once.
So
it's
better
as
soon
as
you
have
a
question.
Email
use,
the
the
development
network
use
the
email,
I
mean
email
is
right.
Now,
the
most
most
favorable
I
preferred
I
mean
email
is
very
easy.
A
A
Everyone's
life,
all
the
projects
in
the
world
are
incomplete,
don't
be
afraid
to
publish
so
that
something
that
is
visibly
incomplete.
You
know
that's
the
culture
of
open
source.
You
got
to
publish
early
and
often
so
people
can
build
upon
it.
Don't
be
shy
about
it.
It
kind
of
takes
it
kind
of
takes
a
lot
of
self-esteem
to
do
that,
because
you
can't,
you
really
have
to
be
confident
that
you
know
you're
gonna
get
feedback.
If
you
publish
it,
it
goes
out
and
it's
open
to
feedback
and
and
people
spamming
it
or
whatever.
A
D
C
A
D
A
No,
there
are
separate
files
already,
so
that's
the
whole
point.
So
if
you
look
into
the
chat
box,
those
are
the
relevant
pages.
You
want
to
look
at
it's
the
d
3d
log
yeah.
That
gets
you
all
the
past
meetings
except
last
week's
d3
D
is
the
overall
project
page
d3d
integration
is
that
page,
which
shows
the
actual
breakdown
of
the
machine.
You
can
download
all
the
individual
modules
and
as
far
as
the
parts,
the
individual
parts
that
would
be
d3d,
part
library.
D
A
Yeah
I
see
that
so
I'm
gonna
go
yeah.
What
happened
there
so
I'm
gonna
make
that
public
to
the
web.
Anyone
can
edit
save.
Oh
okay,
good
point.
Thank
you
somehow,
I
locked
it
up,
maybe
Google
hacked
it
hacked
us.
Okay,
it's
all!
It
should
be
open
right
now.
You
can
check
that
so
good
points,
any
other
questions
and
welcome
a
good
to
have
you
on
board
and
we've
been
working
on
a
CB
press
and
we're
gonna
definitely
get
back
to
that.
A
We're
producing
at
least
two
two
CB
presses
in
in
August
of
this
year:
more
power
cubes
and
a
tractor
and
excavator
and
sawmill.
So
we've
got
we're
gonna
be
very
busy
and
in
August.
So
that's
why
we
want
to
master
our
free
CAD
and
get
the
team
growing.
So
we
can
really
crank
out
product
one
after
another.
That.
A
All
right,
well,
everybody!
Thank
you.
So
much
if
there's
no
more
questions
we'll
touch.
The
next
meeting
is
every
Monday
at
11
a.m.
if
you
have
schedule
conflicts.
Please.
Let
me
know
if
another
time
besides
11:00
a.m.
works
now
11:00
a.m.
is
good,
because
the
people
in
Europe
can
actually
join
us
like
Jose
or
Cedric,
so
11:00
a.m.
is
good
for
Europeans
and
eventually,
of
course,
we
have
more
of
these
team
meetings
in
different
time
zones.
But
for
now
this
is
the
11:00
a.m.
Central
standard
time
in
the
united
states.
A
So
tell
your
friends
and
and
we'll
see
you
next
week.
Please
email
me
with
any
updates
or
any
questions.
Don't
be
shy
about
that
and
continue
the
discussion
and
and
start
your
log
if
you
haven't
and
publish
early
and
often
so
with
that
I'll
get
going
thanks.
A
lot
we'll
see
you
again
next
week,
and
this
is
recorded
so
I'll
put
this
up
on
YouTube
as
soon
as
I
get
this
processed.