►
From YouTube: 120 Design Lessons - Day 7 - Foundation Design and Build
Description
Notes at https://wiki.opensourceecology.org/wiki/120_Design_Lessons_-_Day_7
-----------------
What you see here at Open Source Ecology is an ambitious open source project for the common good. Join our development team:
http://opensourceecology.org/wiki/OSE_Developers
We run One Day Extreme Build workshops in many locations. Please put yourself on our map if you'd like us to host a workshop near you:
https://microfactory.opensourceecology.org/request-a-workshop/
Take a minute to subscribe to our email newsletter (updates, workshops, etc): http://bit.ly/1LtcM44
A
A
A
A
A
Don't
do
that
a
lot.
But
what
that
means
is
that
you
have
absolute
complete
detail.
If
you
click
on
that,
lod
500
link
take
a
look
at
that.
It's
an
article
on
a
wiki
stands
for
level
of
development.
Let's
click
on
the
on
the
first
first
one,
so
the
first
one.
It
basically
says
how
much
detail
you
have
from
a
conceptual
to
a
detail
to
more
detail
to
a
fully
technically
correct
kind
of
a
system
and
it
and
it
measures
the
geometry.
The
accuracy
information
so
100,
let's
see
like
100,
is
typically
like
conceptual.
A
A
There's
one
document
is
here
in
the
other
other
window,
there's
from
a
website
called
united
bim,
so
levels
of
development.
That's
effectively
how
much
detail
you
have
put
into
your
your
drawing
or
your
cad,
so
that
five
trees
up
above
there
kind
of
represent
okay
rough
sketch
to
absolutely
fully
detail
to
every
leaf.
But
let's
see
do
they
have
a
quick
yeah
there?
It
is
it's
the
quick,
quick
overview
of
what
the
levels
are.
A
So
concept
is
something
called
level
of
it's
called
level
of
design,
because
I
want
to
make
a
distinction
between
level
of
development
not
not
designed
but
developed
level
of
development
versus
level
of
detail,
because
it
doesn't
necessarily
mean
that
the
highest
level
of
development
has
the
the
highest
level
of
detail
in
terms
of
cons
in
terms
of
actual
geometries.
So
but
let's
go
through
it.
So
so
ld
is
just
concept
approximate
for
200
300,
it's
precise,
350,
precise
geometry,
with
connections.
A
A
400
is
fabrication,
ready,
geometry
and
500
is
operational
as
built
model,
so
that
is
so
after
we
actually
build
it.
We
would
we
would
get
to
500
because
we're
probably
going
to
make
some
changes,
so
the
500
level
is
much
more
about
interfaces,
how
things
work
together
as
built,
but
sometimes
the
like.
I
was
reading
this
other
article
on
the
other
one
lod
500
explained,
and
it
says
that
the
500
level
does
not
necessarily
have
to
have
the
most
complete
geometrical
detail.
A
It
could
be
the
things
that
are
relevant
to
the
client
like
for
us,
it'll,
be
all
the
extra
information
how
you
build
it
and
to
us
500
as
built
models,
we're
really
putting
in
information
on
how
to
run
enterprise
on
it.
We
might
not
even
at
that
level
if
people
know
how
to
if,
if
the
knowledge
of
the
modules
is
elsewhere
like
we
don't
need
like,
for
example,
use
case,
we
all
learned
it.
A
We
learned
learned
well
how
to
build
the
house,
then
the
final
lod
500
document
would
be
that
we're
actually
not
putting
in
the
the
level
of
detail
that
we
have
right
now,
absolutely
everything
but
more
like
here's,
the
workflows,
here's
how
you
organize
the
build
process
that
would
be
important
for
us
in
terms
of
the
execution
of
what
we
actually
do
as
the
clients,
the
people
who
are
using
this
design.
So
as
we're
developing,
we
go
to
the
fab
ready
geometries
like
400.
A
A
A
If
the
person
knows
how
to
build
it,
you
don't
necessarily
have
to
put
in
all
the
all
the
detail,
like
architects,
don't
put
all
that
detail
because
they
assume
that
the
builders
know
how
to
build
it.
So
that's
just
something:
fun:
okay,
let's
move
on
to
foundation
design
so
go
on
to
the
second
page
and
let's
go
through
what
we're
doing
on
a
foundation
which
is
already
in
place,
but
I
want
to
describe
to
you
what
what
has
happened
there
and
visually
too.
A
So
if
you
click
on
this,
this
document
there
let's
go
through
what
has
happened,
because
this
is
what
we
will
build
for
september
and
you
guys
all
will
be
part
of
that.
So,
let's
go
to
to
page
one
for
maybe
here
here,
let's
start
here,
so
this
is
actually
what
we
did.
So
we
had
a
pad
that
was
graded,
bigger
than
the
house.
A
It
was
32
by
64
because
the
house
is
only
32
by
16,
but
what
I
did
there
out
out.
There
was
32
by
64
because
you
got
to
work
around
like
you,
don't
just
drop
the
house
off
at
32
by
16.
You
have
to
have
a
little
bit
of
slope.
Actually
it's
like
10
feet
of
slope
of
drainage
so
that
the
water
goes
away
from
it.
So
I
had
to
do
that.
A
First
thing
is:
get
the
string
out
there
mark
the
corners
put
the
gravel
in
the
middle
of
that
pile,
so
the
choices
here
are
well.
You
do
have
to
do
considerable
earth
moving
if
you're
on
on
uneven
ground
for
the
step,
one
for
the
grading
part.
So
you
get
a
heavy
machine
out
there
like
a
tractor
or
dozer
or
backhoe.
You
have
a
pile
of
gravel.
A
You
lay
out
the
the
form,
the
string
for
the
corners
and
then
put
in
all
the
gravel,
because
the
gravel
is
you
want
to
have
a
few
inches
of
gravel.
So
that's
what
we
did
we
made
forms
so
so
here
we've
got
the
pile
of
gravel
in
the
middle,
the
forms
on
the
outside
and
we
dig
down
just
a
little
bit.
So
the
forms
are
about
eight
inches
tall.
A
So
we
had
to
dig
down
still
like
like
six
or
we
had
to
get
to
18
inches
altogether
for
a
shallow
frost
protected
footer.
So
we
dug
down
that
those
those
ditches
are
and
I'll
show
pictures
of
this.
At
a
certain
point,
when
we
had
the
gravel
in
there,
we
put
in
the
plumbing
I'll
show
you
that
and
then
we
leveled
off
the
basically
leveled
off
with
a
scree
board.
A
We
leveled
the
gravel
so
so
that
the
the
thickness
of
the
concrete
would
actually
be
about
three
and
a
half
or
four
inches,
just
four
inches,
so
basically
a
long
board.
Then
we
put
the
rebar,
that's
this
next
picture
here
and
finally
inserted
the
insulation
and
the
concrete
anchors
in
red.
So
the
insulation
went
actually
inside
on
the
inside
of
the
forms
and
then
well
that's
about
it.
So,
let's,
let's
take
a
look
at.
Let
me
see
what
else
I
want
to
show
here.
Some
of
the
this
is
actually
the
side
cut
detail.
A
If
we
want
to
take
a
look
at
what's
actually
going
on
there,
so
the
the
foundation,
that's
what
is
represented
there
underneath
the
foundation
you
have
polyethylene.
So
that's
a
vapor
barrier,
because
otherwise,
if
you
don't
have
that
polyethylene
underneath
it
your
concrete
will
be
sweating,
it
will
be
transmitting
moisture
like
on
cold
days.
You'll
have
all
this
water
on
your
floor,
so
in
in
your
house
like
you'd
have
water,
because
water
goes
through
concrete,
so
you
have
to
have
that
vapor
barrier!
A
It's
seeing
on
the
gravel
like
four
inches
of
glas
gravel,
the
insulation
is
on
the
outside
and
what
we
framed
in
for
the
foundation
was
level
with
you
see
the
top
of
the
concrete
there.
Well,
there's
still
a
little
chunk
of
insulation
that
sticks
up
on
top
of
there
and
we
actually
add
that,
but
the
bottom
sill
plate
the
one.
This
thing
here
with
my
cursor:
that's
on
the
16
by
32
edge,
the
anchors
which
are
those
metal
pieces
embedded
in
the
concrete
they
kind
of
wrap
around
so
right.
Now
we
have
these
anchors.
A
A
Let's
see
where
these
metal
pieces
that
are
stuck
and
right
now,
they're
they're,
horizontal
they're
going
out
like
this,
and
then
we
wrap
them
around
the
bottom
and
the
bottom
is
gonna,
be
a
two
by
four
and
the
one
above
that
is
going
to
be
a
two
by
six,
so
that
exterior
panel
hangs
over
the
insulation
underneath
the
the
exterior
plywood
is
still
weather
weather
barrier.
That's
your
house
wrap
and
there's
also
this
piece
of
vinyl
flashing.
A
This
thing
this
kind
of
shape
it's
actually
violence,
flexible
vinyl,
so
we
stick
that,
through
on
the
back
side
of
the
wall,
underneath
above
the
top
plate
and
above
the
cement
board.
So
currently
the
status
is
we've
got
the
insulation
on
the
outside.
That's
what's
there
right
now
up
to
this
point
here
next
step
is
we've
got
these
strips
of
the
cement
board
so
that
bugs
or
insects
don't
eat
up
your
insulation,
insulation
is
quite
frail.
Rodents
would
eat
it
and
house
in
there.
A
So
we
stick
the
cement
board,
which
is
a
mixture
of
cement,
and
it's
got
some
fiberglass
threading
through
it.
It's
a
it's
a
cement
material
that
does
not
rot.
So
it
goes
underneath
about
six
inches,
so
you're
protecting
that
from
from
rodents
and
critters,
and
then
the
grade
you
bury
back
so
right
now,
we've
got
maybe
like
eight
eight
or
ten
inches
around
foundation,
so
we'll
dig
down
just
like
a
couple
inches
and
insert
the
cement
board
in
there.
A
So
that's
some
of
our
next
steps,
and
so,
let's
just
get
to
the
pictures
of
how
this
all
looks
in
real
life.
So
it's
a
good
reality
check
to
have
the
reality.
That's
live
track.
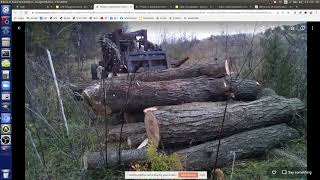
We're
clearing
out
some
trees.
I
actually
saved
a
bunch
of
these
trees
to
cut
with
a
sawmill.
If
we
forget
that
going,
but
here's
the
pile-
that's
that's
actually
behind
there.
That's
that's
actually
at
the
site,
just
a
little
south.
I
put
all
this
lumber
down
there.
A
A
This
was
like
november
december
time
just
trying
to
figure
out
what
to
do
here.
It's
kind
of
you
have
to
there's
a
laser
level
down
there.
I
use
that
to
having
that
just
sit
on
either
on
the
ground
or
on
on
its
box.
The
laser
level
shoots
a
line.
You
have
a
little
detector
and
gets
you
exactly
the
height
of
the
the
string.
That
will
be
the
top
of
the
forms
later
on.
So
here,
just
working
through
that
until
sunset
and
then
at
the
end,
you've
got
your
you
put
in
your
wooden
forms
like
this.
A
Then
you
string
it
across.
So
this
is
forms
are
loose
16
by
32,
screwed,
together
bond
together
with
a
piece
of
wood
right
there
and
then
bond
together
with
a
piece
of
wood
right
there.
Oh
no,
that
should
be
a
single
60.
I
just
had
two
eighths,
but
this
is
a
two
by
eight,
so
it's
about
eight
inches.
It's
actually
seven
a
little
over
seven.
A
So
here
we're
taking
after
the
initial
stakes
were
put
in
measure
across
and
then
make
sure
the
two
corners,
the
measurement
on
those
two
corners
is
identical,
and
if
that
measurement
is
identical,
that
means
you
actually
have
a
perfectly
square
foundation.
You
cannot,
if
you
have
a
rectangular
shape
and
you
make
a
measurement
around
the
corners.
You
cannot
get
the
same,
measuring
measurement
and
not
be
square.
That's
just
basic
geometry
like
if
you're
skewed,
the
two
measurements
will
be
different
and
the
more
skewed.
You
are
the
more
the
difference.
A
B
A
Laser
level
spinning
there
and
I'm
raising
and
lowering
the
edges
so
that
the
laser,
like
I
I
measure
with
the
laser
or
like
I
could
maybe
see
the
laser,
probably
using
the
laser
detector,
but
I
think
I
set
the
strings
to
the
right
place
already
and
I'm
just
bunch
of
messing
around
with
this.
Just
make
sure
it's
all
equal
on
all
sides
and
then
the
cat
runs
by
again,
and
so
so
I'm
basically
getting
it
equal
with
a
string
like,
but
don't
put
the
string
on
it
because
you
don't
know
where.
A
A
So
with
the
life
track
I
took
there
was
a
pile
of
gravel
there
and
I
just
dumped
it
with
a
live
track
before
the
wood
was
there,
because
otherwise
I
could
not.
You
have
to
have
a
particular
procedure.
First
well
this.
So
this
actually
should
have
been
before,
because
I
already
showed
this
step
here,
so
maybe
I
should
actually
dump
gravel
that
was
before
control
x,
so
stake
it
dump
the
gravel
measure
across,
but
I'm
still
showing
how
we're
dumping
the
gravel
and,
what's
what
could
be
interesting
to
note
here?
A
If
you
want
to
drive
over
that
I
mean
I
can't
just
take
the
tractor,
and
the
tractor
is
too
big,
but
maybe
the
micro
track
would
be
a
good
thing,
maybe
put
a
little
ramp
over
this,
so
I
don't
have
to
do
this
all
manually.
That's
this
is
hard
work.
I
mean
just
you
know
a
bunch
of
tons
of
gravel,
a
full
truckload
of
gravel.
So
it's
you
know.
You
could
definitely
appreciate
a
some
mechanical
assist
there
unless
you've
got
a
large
team
that
that
works.
A
A
That's
where
we
grade
it
too,
even
with
the
gravel.
So
this
part
we
still
have
to
go
down
to
make
it
well.
Actually
the
the
rules
are:
there's
12
inches
below
grade
and
six
inches
above
so,
if
we've
got
four
inches
of
gravel
here
and
a
four
inch
of
foundation,
that's
eight
inches,
then
I
still
have
to
dig
ten
inches
down,
but
a
person
with
a
shovel
could
real
could
pretty
much
do
that
at
this
small
scale,
but
that's
very
hard
work.
A
A
So
then
you
build
the
plumbing
and
the
plumbing
is
super
simple
for
the
roughing.
Is
this.
You
know
we
built
it,
we
glued
it
up
inside
we've
got.
This
is
for
the
toilet.
This
is
for
the
shower,
and
this
actually
ex
is
gonna,
extend
for
the
extended
plumbing
to
the
second
floor,
so
we're
the
way
we're
designing
it
right
now,
we're
gonna
actually
add
on
to
this,
so
we're
gonna
break.
This
is
where
the
tub
the
shower
drains
into
here
and
the
sink
is
gonna
drain
into
here.
A
This
is
the
toilet
here,
but
this
pipe
here
is
going
to
extend
up
and
go
to
the
second
floor
floor
because
we're
pre-plumbing
for
an
addition
of
to
a
2,
000
square
foot
house
with
a
bathroom
on
the
upper
floor,
so
we're
making
it
designed
for
expansion,
and
all
you
do
there
is.
I
had
some
acetone
and
glue
pvc
glue.
This
is
pvc,
it's
something
we
can
3d
print.
If
we
forgot
the
large
printers,
we
can
print
this
whole
thing
like
the
print,
this
geometry
in
one
piece.
A
If
you
know
what
you're
doing
it's
like
an
hour
or
two
maybe
took
us
all
like
four
hours
to
put
this
together
the
first
time
so
then
you
insert
the
plumbing
so
plumbing
went
in
like
this,
like
there's
had
to
dig
dig
a
little
bit
here
now
you
see
the
that
shovel
and
yeah
the
trench
was
partially
dug
there.
I
did
what
I
could
and
then
you
just
mark
out
the
location
exactly
and
I'm
going
off
the
cat
right
there.
A
I'm
saying:
okay,
the
plumbing
has
to
be
exactly
there
for
it
to
fit.
This
is
like
digital
design
getting
in
there,
though,
it
looks
pretty
much
like
redneck
territory,
but
I
used
that
auger,
as
you
saw
the
little
auger.
I
took
that
out
and
tried
to
dig
and
get
as
much
assist
because
it's
hard
soil
and
it
was
compacted
with
a
tractor
by
riding
over
it
back
and
forth
a
bunch
of
times.
So
that's
how
that
process.
A
A
So
there
it
is
buried
like
and
the
water
line.
The
blue
water
line
is
also
coming
out
there.
You
see
that
stub
over
there
of
the
water
line
they're
both
coming
out
there
and
put
a
box
around
that,
so
that
once
you
pour
pour
the
concrete
you're
pouring
up
to
it
and
inserting
installation
here
is
that
happening?
Yeah,
oh
yeah,
so
so
here
we
start
there
we
go
so
the
the
trenches
dug
all
around,
and
that
was
the
hard
work
here.
That's
like
you
know.
A
A
A
A
So
that's
kind
of
how
it
went
and
yeah.
This
is
with
one
person
doing
that
it's
a
bit
of
work.
So
at
the
end
you
go
scree.
The
gravel,
like
I
mentioned
before
you
take
a
long
board
and
once
you
kind
of
smooth
out
the
gravel
that
take
this
long
board
and
get
it
because
it's
got
a
two
by
four
like
three
and
a
half
it
pretty
much
gets
you
like
three
and
a
half
or
four
inches.
A
I'm
doing
that
with
one
person
by
putting
a
stake
on
one
end
and
just
moving
in
a
few
inches
shoving
it
over
a
little
bit
and
so
forth
until
and
continuing
continuing
and
we're
pretty
much
ready
to
put
in
the
polyethylene
the
vapor
barrier
above
the
discrete
gravel.
Then
we
weigh
it
down.
We
put
rebar
stakes
on
the
long
sides
and
remesh,
which
is
the
mesh
of
rebar
that
you
start
seeing
coming
in
here
that
mesh
put
on
little
stones.
A
A
So
in
here
the
rebar
is
all
all
around
the
perimeter,
so
you
got
two
strands
of
rebar
one
above
the
other
half
of
three
bar
all
all
around.
Do
you
make
a
chair
for
that
or
we
actually
hung
it?
We
didn't
chair
it.
It
was,
I
think,
hung
how
do
we
do
it?
Oh
yeah
yeah.
We
actually
start
stuck
vertical
rods,
just
little
rebars
along
the
edge
and
tied
it
to
it.
So
we
had
so
you.
C
A
Good
enough,
so
we
start
so
we're
just
finishing
this
up.
This
was
then
a
truck
arrives
right
there
already
and
we're
starting
to
pour
so
we're
like
in
the
nick
of
time
just
had
to
do.
It
was
a
long
long
night
before
that,
just
trying
to
prepare
for
that.
So
now
here
we're
just
smoothing
it
out.
We
pour
it
in
smooth
it
out.
A
That's
easy
first
step
is
the
scree
board
just
to
get
it
roughly
even,
and
I
was
doing
that-
I
used
this
long
piece
of
metal
welded
two
pieces
of
metal
like
that
to
to
use
that
as
a
screw
board
and
that
works
works.
Fine,
but
with
two
you
wanna
probably
have
a
couple
more
people
here.
This
is
know
when
you're
doing
this.
A
A
Fatigued
because
we
had
to
get
this
in
by
the
time,
so
this
is
a
float.
It's
called
a
magnesium
float
and
now
you're
getting
that
second
level.
This
is
after
screening,
it
you're
getting
it
smooth,
it
kind
of
punches
all
the
rocks
down,
because
there's
rocks
in
the
concrete,
there's,
gravel
and
sand
in
the
concrete
it
punches
it
down
and
what's
it
do
it
kind
of?
What's
a
float,
do
it's
kind
of
makes
the
water
it
starts?
A
Making
the
water
come
out
of
the
concrete
stuff,
like
that's
the
first
step
and
then
the
second
step
is
a
trowel.
So
now
we're
starting
to
travel
it
you
see
the
small
hand
trowel
and
this
bigger
one
on
a
handle
that
gets
it
nice
and
smooth,
and
at
this
level,
since
this
takes
a
bit
of
time,
I
would
like
to
have
a
power
travel.
That
would
be
good.
It's
a
thing
that
you
walk
behind
it
and
it
spins
well.
At
this
point
it's
still
too
wet
to
walk
on.
A
But
after
you
do
this
initial
traveling
now
to
get
it
nice
like
really
really
nice
and
smooth,
though
actually
the
shop
floor
is
pretty
nice
and
smooth,
I
think
they
use
the
power
travel
there.
But
here
we
just
had
this
equipment
and
then
I
spent
like
all
night
a
few
hours
like,
so
it
got
dark
by
like
five
and
then
I'm
out
there
till
like
eight
just
doing
it
by
hand.
A
I
wish
I
had
a
power
travel
at
that
point,
because
you
can
just
keep
working
the
concrete
forever
and
getting
it
more
and
more
smooth
a
power
trial,
which
is
a
rotating
blade.
It's
a
it's
an
engine
with
a
rotating
rotating
blade,
yeah
float
and
travel,
so
the
poor
happened
at
the
same
time.
The
flow
the
magnesium
float
happened
and
then,
once
you
can
travel
the
first
like
initially
and
then
you
can
walk
on
it
pretty
much
and
you
can
power
travel
at
some
erase
that
float
part
travel.
A
This
is
what
it
pretty.
Much
looks
like
right
now,
you
gotta
start
by
taking
off
the
forms,
there's
a
lot
of
spill
of
concrete
that
we
kind
of
had
to
ram
out
on
the
other
side,
there's
a
bunch
of
concrete
blocks
there,
because
we
just
had
a
little
bit
too
much
concrete
it
spilled.
You
want
to
like
really
measure
it
nicely.
So
you
don't
have
all
this
cleanup
at
the
end
of
the
day.
Did.
A
If
you
go
to
the
foundation
detail
there,
I
think
that
the
most
important
thing
to
keep
in
mind
like
we're
kind
of
doing
a
complicated
thing
with
the
two
by
four
and
the
two
by
six,
and
that's
because
the
detail
there
is
kind
of
tricky,
because,
let's
let's
talk
about
that
detail,
because
if
we
wanted
to
use,
we
could
have
used
anchors
that
come
up
straight
through
the
concrete.
But
then
you
have
to
bury
them
in
the
concrete
and
work
around
them.
So
the
only
challenge
about
these
anchors
that
you
anchor.
A
This
detail:
how
else
would
you
do
it?
Can
we
just
well,
you
cannot
extend
see
this
block
here,
because
the
anchors
have
to
be
have
to
finish
at
the
foundation
edge.
So
this
is
the
anchor
it's
actually
stuck
into
the
ground
when
we
build
the
foundation,
the
anchor
is
is
laying
flat
across
here,
so
you
can
actually
travel
around
it
without
any
interference.
Otherwise
you
have
bolts
in
here
that
you
just
spent
a
bunch
of
time
going
around
them,
because
the
bolts
would
hold
the
the
sill
plate
holes
through
the
sill
plate.
A
Now
that's
pretty
complicated
we
want
to
in
this
digital
housing
2.0.
We
want
to
take
every
single
detail
and
make
sure
we're
not
adding
work
for
the
the
bolts
through
the
concrete
one,
you're
spending
more
time,
traveling
around
the
bolts
that
are
thinset
into
the
concrete.
You
better
make
sure
you
gotta
measure
it
out
properly
and
stuff
like
that,
so
there's
more
measuring
there
while
you're
pouring.
A
A
A
Now,
if
you
use
that
mud
cell
anchor,
you
notice
that
we
could
not
just
use
a
two
2x6
down
there
all
the
way
out,
because
you
don't
have
enough,
they
don't
make
them
for
like
this
piece
that
bends
up
around
the
wood
is
only
so
long.
So
if
we
had
a
2x6
down
there,
it
would
not.
You
can't
wrap
it
around.
So
we
have
to
do
this
weird
detail
here
where
we
use
a
two
by
four
and
then
a
two
by
six.
A
C
A
C
A
You
got
a
water
problem
there.
If
you
had
this
insulation
up
here,
that's
a
kind
of
ledge
that
you
could
get
water
in
there.
So
that's
just
the
detail,
so
you
want
to
be
around
that.
That's
one
of
the
critical
elements,
just
water
infiltration,
make
sure
you're
tight
over
there
so
below
the
sill.
The
sill
plate
is
going
to
be
a
gasket
for
air
and
moisture
and
above
it
we're
going
to
put
a
silk
gasket
and
yeah
just
one
below
and
one
above
and
that's
treated.
A
The
bottom
is
treated
above
that,
where
we
have
our
panels,
that's
not
treated
we're
building,
regular,
regular
panels.
So
that's
a
basic
explanation
of
the
the
house
foundation.
Does
anyone
have
any
questions
on
it?
The
the
thing
to
figure
out
there
is
like
think
about
it.
This
way,
foundations
are
typically
hard.
I
mean
there,
you
got
earth
moving
in
order
to
minimize
that
we
build
up
the
forms
on
the
ground,
we're
digging
minimally.
A
A
But
I
think
at
first
yeah,
so
this
is
at
the
very
end
I
would
expect
to
have
like
I'm
working
from
the
newest
document
on
top,
but
at
first
we
were
thinking
this,
and
this
is
actually
relevant
because
you'll
think
about
this
when
you're
actually
starting
this.
So
this
is
what
I
thought
at
first.
I
said:
no,
that's
not
worth
it!
Okay!
So
what's
g,
what's
going
on
here,
so
one
we
were
discussing
just
dig
down
for
your
footer,
that's
it
with
a
backhoe!
A
A
A
A
So
it's
just
a
detail
like
when
you,
when
you
look
into
doing
this,
so
what
we
ended
up
doing
is
digging
that
pond
that
you
see
south
wall.
You
didn't
necessarily
see
it.
There's
a
pond,
the
small
pond
south
of
the
house.
We
piled
up
all
the
soil,
so
you
have
proper
drainage
and
then
that's
our
flat
point
and
we
build
the
foundation
up
from
there
here.
A
What
we're
implying
is
that
we're
building
up
the
foundation
around
soil
that
we
built
up
there
already,
but
it's
you
got
to
massage
that
soil
and
and
sculpt
it
it's
much
easier
to
start
flat,
put
some
gravel
on
top
and
then
dig
your
footers
on
the
outside.
So
that
was
the
evolution,
but
we
started
on
thinking.
A
So
if
you
really
think
about
it
like
this
is
actually
the
the
difference
between
what
I'm
showing
here
and
what
we
actually
did
is
night
and
day
in
terms
of
the
amount
of
time
it
takes
because,
for
example,
for
the
plumbing
all
I
had
to
do
was
pretty
much
scratch
four
inches
down
and
I
could
lay
the
plumbing
because
that
was
already
like.
I
was
already
building
up
up
from
that
level,
so
I
was
going
up
not
going
down
like
implied
here
like
here.
A
I
would
go
have
to
dig
that
water
line
and
plumbing
line
down
through
what
I
built
up
so
just
just
details-
I
mean
they
all
add
up
to
time,
and
this
is
kind
of
we'll
get
to
that
later.
That's
the
shot!
How
the
shower
is
gonna.
Look
so
then,
here
we're
still
at
this,
the
it's
the
devil's
in
the
details,
because
after
you
do
this
build
up,
you
have
to
tamp.
You
have
to
get
your
tractor
in
there
and
compact
it
either
with
a
tamper
or
like
a
tamping
machine.
A
So
there's
like
too
much
so
in
what
we
ended
up
doing
the
the
simplification
there
was,
I
think,
we're
here.
The
simplification
was
no
that's
still
still
not.
This
is
the
earliest.
On
top
is
what
what
we
ended
up
doing
so
we're
on
we're
on
on
a
on
a
grade.
We
just
did
the
gravel
to
to
raise
it
up.
It's
not
soil!
A
So
then
we're
like
pretty
much
at
the
surface.
The
surface
is
what
we
built
up
by
putting
a
bunch
of
solder
because
it
wasn't
even
we.
We
did
dig
that
pond
and
put
a
bunch
of
soil
there
to
grade
it.
But
after
this
point,
where
you
got
this
grade,
it's
relatively
easy,
all
you
do
is
put
your
pile
of
gravel
in
the
middle.
A
So
this
is
this:
you
can
do
by
hand
use
the
tractor
to
dump
the
gravel
in
from
the
pile
you
could
do
it
also
by
wheelbarrows,
but
that's
basically
what
happened
so
any
questions
on
this
or
any
questions
from
remote,
and
this
is
something
we'll
actually
do.
This
is
a
simple
way
to
know.
This
is
a
slab.
You
could
also
do
just
a
simple
footer,
which
means
you
put
your
walls
on
it
and
the
inside
is
empty,
but
then
the
next
step
there
would
be
okay.
What
do
you
do
for
your
floor?
A
So
here
we've
got
the
floor
and
the
the
foundation
at
the
same
time,
and
then
we
polished,
we
polished
it
a
little
bit
and
we're
going
to
just
seal
it
with
concrete
sealer
to
get
a
finished
floor.
That's
what
we're
doing
so.
We
actually
did
get
buffing
pads
for
polishing,
concrete
and
polished.
Concrete
can
actually
be
very
attractive.
A
That's
what
we
could
we
don't
have
this
level
of
finish,
but
we're
gonna
get
it
shiny,
just
a
little
bit
we're
just
so
there's
a
difference
like
here.
If
you
use
very
fine
grit,
you
don't
even
have
to
there
is
with
polish
concrete
you
can
get
away
with
at
the
end.
You
don't
even
put
anything
on
it
or
no
there's
still
there's
still
a
hardener
at
the
very
end,
but
there
is
no.
C
C
A
C
They
make
a
machine,
so
I
sold
these
machines
and
worked
on
them.
They
make
a
machine.
That's
got
a
head
about
this
big
propane
powered
and,
and
it
was
super
super
heavy
and
you've
got
all
these
little
pads,
similar
to
the
diamond
pads
that
you'll
see
over
the
shop
but
they're
about
three
or
four
inches
of
diameter,
and
you
stick
them
on
these
plates.
A
A
So
this
is
preferred
like
terms
of
lifetime
design.
That's
actually
that's
one
way
to
get
lead
or
actually
living
building.
Cha
challenge
for
natural
material
concrete
if
it
were
solar,
concrete,
is
completely
regenerative,
but
I
mean
right
now,
it's
associated
with
fossil
fuels.
So
it's
not
that
great,
but
even
leed
and
living
building
challenge
considers
it
as
a
green
material
because
of
its
longevity,
so
it'll
be
there
forever,
like
100
or
more
years.
C
B
C
He
had
his
stem
wall
that
the
walls
were
sitting
on,
but
the
interior.
He
only
had
one
inch
thick
and
he
took
a
hammer
in
a
crowbar
and
rotated
it
around
to
make
a
cone
shaped
hole.
You
know
about
that
deep.
So
then,
whenever
he
filled
it
in,
he
had
all
these
little
piers.
Basically
he
was
just
saving
concrete
by
doing.
B
B
B
B
C
A
A
All
right,
so,
let's
keep
moving
on.
So,
let's,
let's
review
and
practice
what
we
did
yesterday.
So
I
want
to
see
where
the
blocks
are
to
the
process.
We
were
doing
so
we're
working
on
cad
on
the
modules
and
trying
to
put
them
positionally
correct.
So
we
have
a
final
model
that
actually
is
complete
in
the
positional
correct
position.
So
can
somebody
describe
that
process
what
we
did
and
replicate
it?
B
B
A
So
we,
what
we
talked
about
yesterday,
was
here's
a
file.
This
house
location
file
which
we're
just
defining
a
coordinate
system
for
everything,
goes
and
then,
as
a
person
finishes
their
wall
module.
They
can
locate
it
on
that
rectangle,
with
the
xyz
being
at
the
bottom
left
corner
like
in
a
cartesian
system
where
you're
looking
the
the
orientation
is
defined
by
the
front
of
the
house.
A
So
the
idea
there
was,
how
do
you
avoid
conflicts?
Well,
first
of
all
we're
allocating
roles
within
our
spreadsheet.
So,
okay,
no
conflicts
there.
We
got
to
make
sure
we
keep
to
our
spreadsheet.
That
has
the
role
allocation
that
should
be
in
our
let's
see.
Do
we
have
that
readily
available
in
our
document?
A
A
The
spreadsheet
was
the
we
found
that
we
think
that's
probably
the
best
way
to
organize.
Where
is
it
down
there
so
status
build
sheet?
We
added
two
columns
where
we
were
saying
in
order
to
avoid
any
conflict
on
actual
cad,
because
we
started
this
the
spreadsheet
for
the
actual,
build
we
added
column
I
and
j
for
the
cad
and
the
person
doing
it.
So
when
you
do
this,
put
your
name
next
to
whatever
you
are
doing,
so
that
another
person
is
not
working
on
it
at
the
same
time.
A
That's
that's
the
only
rule
here
and
then
then
in
case
somebody
has
uploaded
a
new
file
to
the
final
positionally
correct
file
like
we're
talking
about
the
positionally
correct
assembly.
Is
this
one
here
so
this
this
first
one
which
has
two
modules
in
there?
So
this
is
actually
module
number
one,
and
this
other
one
here
is-
is
actually
18.
That's
the
first
window,
but
that's
all
we
have
in
there
in
order
to
not
conflict
within
that
file.
A
The
concept
there
was
download
before
you
before
you
upload
to
this.
This
is
our
assembly
file
here.
This
is
where
you're
uploading
your
finished
product
right
now.
It's
just
got
this
master
file
here,
there's
only
one
which
actually
makes
me
think
that
I
probably
forgot
to
upload
the
one
after
I
got
the
window
because
there's
only
one
file
here,
but
before
you
upload
to
this
one,
it's
a
good
idea
to
download
it
right
before
you
upload
it,
because
your
chance
of
actually
uploading
at
the
same
time
as
another
person
is
not
too
high.
A
A
If
there's
a
rapid
flurry
of
uploads
to
this,
you
might
get
into
a
little
conflict,
but
but
it's
easy
once
you
have
things
merged
into
this
file
to
re-merge.
If
somebody
had
a
conflict
with
it
because
uploading
on
a
wiki
here,
two
people
can
in
principle
upload.
At
the
same
time,
so
this
is
a
little
awkward,
but
if
we're
working
on
the
modules
and
allocating
roles,
then
we
should
avoid
any
conflicts
here
to
allow
multiple
people
to
work
on
this
like
right
now
I
did
not
have
a
conflict
with
somebody
else
uploading.
A
At
the
same
time
as
I
did,
if
you
have
people
working
at
different
paces,
that's
typically
not
an
issue.
If
you
have
a
like
a
flurry
where
everyone's
ready,
it
might
be
an
issue,
but
just
then
just
try
again
just
re-upload
it
after
the
person
finished
theirs.
So
if
you
fail
just
you
can
just
go
right
again
and
download
the
one
that
was
was
the
conflict,
meaning
somebody
uploaded
right
in
front
of
you
just
download
that
and
add
to
that.
So
it
could
be
tag
team
in
that
manner.
A
B
B
A
A
B
A
A
Eye
appointment
so
at
3
30,
so
I
got
to
cut
out
I'm
going
to
walmart.
Get
me
some
glasses,
because
my
short
short
vision
is
is
bad.
I'm
too
farsighted,
no
pun
intended,
but
I'm
so
visionary,
my
shorts
are.
My
side
went
bad,
but
I
gotta
do
that
because
I
mean
I
yeah
that
just
happened
so
sudden
last
year,
man,
it's
funny,
I'm
saying,
but
so
I'm
49..
I
gotta
do
that
and
then
the
gravels
trucks
coming.
So
they.